

A pastry blender is primarily used for cutting cold fat into flour to create flaky baked goods like pie crusts and biscuits. It’s an essential tool for achieving a tender crumb by evenly distributing butter or shortening without overworking the dough.
Key Takeaways
- Cut cold butter into flour quickly and evenly.
- Create flaky pastries and tender baked goods.
- Prevent dough from becoming tough or overmixed.
- Simplify dough preparation for beginners.
- Achieve professional-looking results at home.
- Versatile for other quick bread recipes.
What Is A Pastry Blender Used For: Your Essential Kitchen Tool Guide
Have you ever wondered how bakers get those incredibly flaky pie crusts or light, tender biscuits? It often comes down to the right tools and techniques. One such unsung hero in the kitchen is the pastry blender. If you’re new to baking or looking to improve your results, understanding what a pastry blender is used for can make a world of difference. It might seem like a simple gadget, but this tool is key to achieving that perfect texture in many delicious recipes. Let’s dive in and discover how this humble kitchen helper can elevate your baking game.
Understanding the Magic of Pastry Blending
At its core, a pastry blender is designed for a very specific, yet crucial, task in baking: incorporating solid fats into dry ingredients. Think of it as a bridge between simply mixing ingredients and achieving a desirable texture in your baked goods. The goal is to cut the fat into the flour, creating small pieces of fat that are coated in flour. When these pieces melt during baking, they release steam, which creates pockets of air. This is what gives pastries their signature flakiness and tender crumb.
Without a pastry blender, many home bakers might resort to using their hands or a fork. While these methods can work, they often lead to the fat melting too quickly from the warmth of your hands, or not being distributed evenly enough, resulting in a tougher, less flaky final product. The design of a pastry blender allows you to achieve this delicate balance with greater ease and efficiency.
What Exactly is a Pastry Blender?
A pastry blender typically consists of a handle and several (usually four or five) thin, curved metal blades or wires attached to a frame. These blades are designed to cut through solid fats like butter, lard, or shortening, breaking them down into smaller pieces while mixing them with flour. The gap between the blades allows the flour to sift through while the fat is caught and chopped.
The handle provides leverage, allowing you to press down and move the blender through the flour and fat mixture. The blades are sturdy enough to cut through cold, firm fat but flexible enough to conform to the shape of your mixing bowl. This combination of sturdy blades and a comfortable handle makes it an efficient tool for its intended purpose.
Different Types of Pastry Blenders
While the basic design remains consistent, you might encounter a few variations:
- Wire Blade Pastry Blenders: This is the most common type. It features multiple thin, curved wires that efficiently cut through fat. They are generally lightweight and easy to clean.
- Solid Blade Pastry Blenders: Less common, these blenders have wider, solid metal blades. They can be very effective but might require a bit more force to use and can sometimes clump the fat more than wire blades.
- Ergonomic Handle Blenders: Many modern pastry blenders come with specially designed handles that offer a more comfortable grip, reducing hand fatigue during longer mixing sessions.
What is a Pastry Blender Used For? The Core Functions
The primary function of a pastry blender is to achieve the perfect fat-to-flour ratio for tender, flaky baked goods. This involves several key actions:
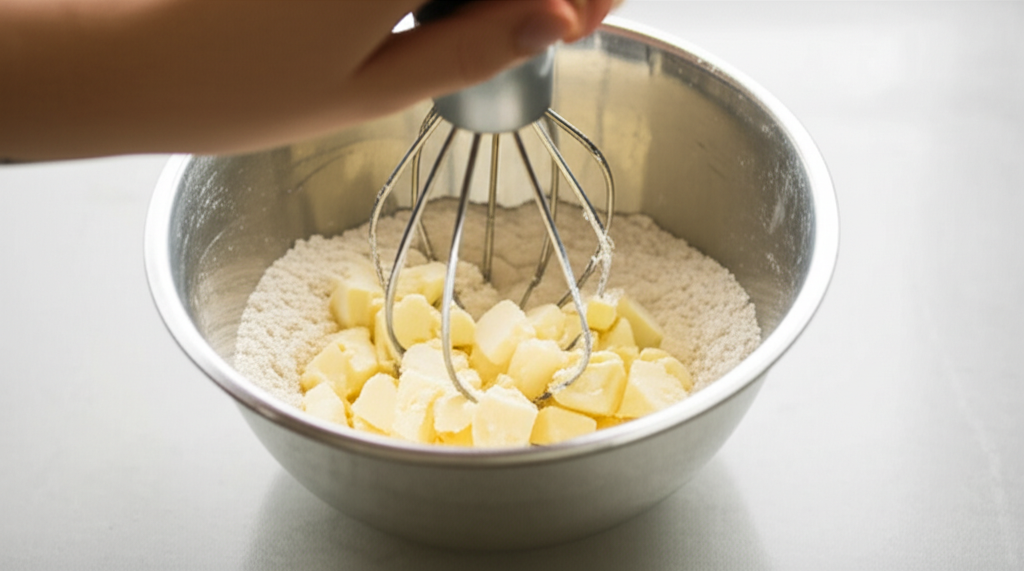
1. Cutting in Fat: This is the most critical use. When recipes call for “cutting in” cold butter or shortening, a pastry blender excels. You add your cold fat (cubed or grated) to your dry ingredients (flour, sugar, salt, leavening). Then, you use the pastry blender to push down and twist through the mixture. The goal is to break the fat into small pieces, roughly the size of peas or small beans, ensuring they are coated in flour.
2. Creating Flakiness: The small, distinct pieces of fat created by the pastry blender are essential for flakiness. As the dough bakes, these fat pockets melt, creating steam. This steam pushes apart layers of dough, resulting in a light, airy, and flaky texture. Think of the layers you see in a croissant or the delicate crumb of a perfect pie crust.
3. Preventing Overmixing: Overworking dough, especially with ingredients like flour, can develop gluten too much. This leads to tough baked goods. A pastry blender allows you to incorporate the fat quickly and efficiently without excessive handling, thus keeping the gluten development to a minimum and ensuring a tender result.
4. Incorporating Dry Ingredients: While its main job is with fat, the pastry blender can also help in initially combining dry ingredients like flour, sugar, salt, and leavening agents. It can distribute them evenly before you add wet ingredients.
Beyond Pie Crusts: Other Applications
While “pastry” is in its name, this tool is versatile. You can use a pastry blender for:
- Biscuits: Essential for achieving that signature flaky, tender biscuit.
- Scones: Similar to biscuits, scones benefit greatly from properly cut-in fat for a tender crumb.
- Muffins and Quick Breads: For recipes where you want a more tender, less cake-like texture, cutting in a small amount of cold butter or shortening can make a difference.
- Crumbles and Streusels: Creating the perfect crumb topping for pies, muffins, or coffee cakes often involves cutting butter into flour and sugar, a task a pastry blender handles beautifully.
- Gnocchi: Some gnocchi recipes call for incorporating butter into the potato and flour mixture, where a pastry blender can be helpful.
Why Use a Pastry Blender Instead of Other Tools?
You might be wondering why you need a specific tool when a fork or your fingers can do the job. Here’s a breakdown of the advantages:
| Method | Pros | Cons | Best For |
|---|---|---|---|
| Pastry Blender | Efficiently cuts cold fat into small, even pieces. Minimizes heat transfer from hands. Faster than a fork. | Requires purchasing a specific tool. | Flaky pie crusts, biscuits, scones, crumb toppings. |
| Fingers | No extra tools needed. Good control for very small batches. | Can easily melt the fat with body heat, leading to tougher dough. Can be slow and uneven. | Very small amounts of fat, or when you need to feel the texture precisely. |
| Fork | Readily available. Can break up larger chunks of fat. | Less efficient than a blender. Can mash fat instead of cutting it. May not distribute evenly. | Breaking up large clumps of fat as a first step. |
| Food Processor | Very fast and efficient for large batches. Creates very fine texture. | Easy to over-process and turn fat into paste. Can incorporate too much air. Requires cleanup of an additional appliance. | Large batches of dough, or when a very fine texture is desired. Requires careful pulsing. |
The pastry blender strikes a perfect balance. It’s more efficient and controlled than a fork or fingers, and less prone to over-processing than a food processor, especially for beginners. The key is its ability to cut the fat into consistent, small pieces without melting it.
How to Use a Pastry Blender: A Step-by-Step Guide
Using a pastry blender is straightforward, but a few tips can ensure you get the best results. Always start with cold ingredients!
-
Chill Your Ingredients: Ensure your butter or shortening is very cold. Cut it into small cubes or grate it if it’s extremely hard. Also, chill your flour and any liquid ingredients if the recipe calls for it.
-
Combine Dry Ingredients: In a large bowl, whisk together your flour, salt, and any leavening agents or sugars as per your recipe. This ensures they are evenly distributed.
-
Add Cold Fat: Add your cold, cubed or grated fat to the bowl with the dry ingredients.
-
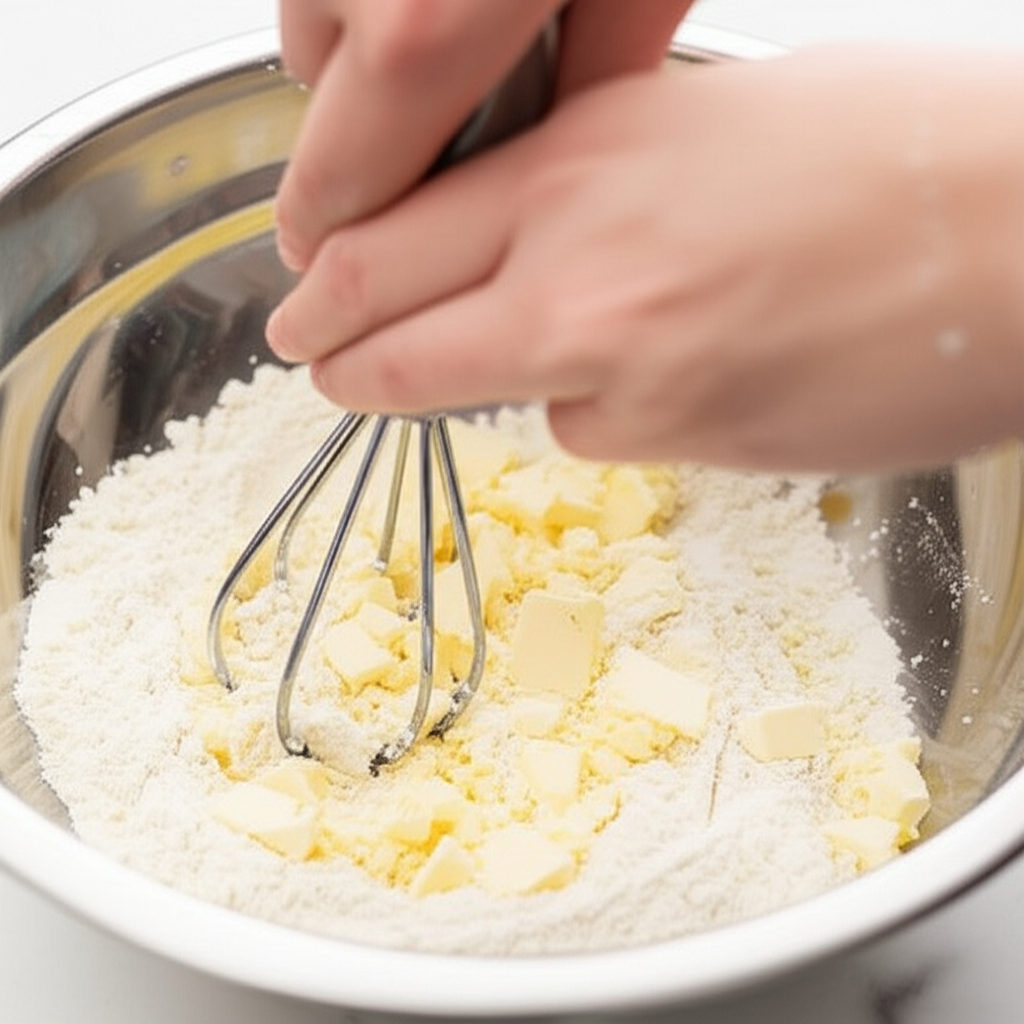
Start Blending: Hold the pastry blender by the handle. Position the blades over the fat and flour mixture. Press down firmly and twist slightly, moving the blender through the mixture. Think of it as a chopping or dicing motion. Continue this process, moving around the bowl, until the fat is broken down into pieces the size of small peas or coarse crumbs. You want to see distinct pieces of fat coated in flour, not a uniform paste.
-
Check for Consistency: The final texture should resemble coarse meal with some larger, pea-sized pieces of fat visible. Don’t overwork it; a few larger pieces are perfectly fine and contribute to flakiness.
-
Add Wet Ingredients: Once the fat is properly cut in, you can add your liquid ingredients (like milk, water, or eggs) and mix until just combined, as the recipe directs.
Pro Tips for Perfect Pastry Blending
Use Cold, Cold, Cold: This is the golden rule. If your butter or shortening starts to feel warm or soft, pop the bowl back into the refrigerator for 10-15 minutes before continuing. Even chilling your flour can help!
Don’t Overwork: Resist the urge to keep blending until it looks perfectly uniform. The presence of small, distinct fat pieces is what creates flakiness. Aim for a crumbly mixture with some larger bits of fat.
Bowl Size Matters: Use a bowl that is large enough to allow you to move the pastry blender freely without spilling the ingredients. This makes the process much easier and more efficient.
Clean Immediately: Pastry blenders can be a bit tricky to clean if dough dries on them. Rinse it thoroughly with warm water immediately after use, and then wash it with soap and a brush to remove any stubborn bits. Many are also dishwasher safe.
Choosing the Right Pastry Blender for You
When selecting a pastry blender, consider these factors:
- Handle Comfort: Since you’ll be using some pressure, a comfortable, non-slip handle is important, especially if you have any hand or wrist issues.
- Blade Material and Durability: Stainless steel is a good choice as it’s rust-resistant and durable. Ensure the blades are securely attached to the frame.
- Number of Blades: Most common blenders have 4-5 blades. More blades can sometimes cut fat more quickly, but the difference is often marginal for home use.
- Ease of Cleaning: Look for designs that are easy to rinse and get into all the nooks and crannies.
Many well-regarded kitchenware brands offer excellent pastry blenders. You can often find them in kitchen supply stores or online retailers. For instance, brands like OXO, Cuisinart, and KitchenAid offer reliable options.
Nutritional Insights: The Role of Fat in Baking
While we often focus on reducing fat for health reasons, in baking, fat plays a crucial role not just in texture but also in flavor. The fat used in pastry—whether it’s butter for its rich flavor or shortening for its neutral taste and pliability—is what creates that desirable tender crumb and flaky layers. When you’re using a pastry blender, you’re essentially controlling how this fat is distributed. Cold fat creates steam pockets during baking, leading to flakiness. Overworking the dough or using fat that’s too warm melts the fat prematurely, and the flour can absorb it, leading to a denser, tougher texture. So, the pastry blender isn’t just about technique; it’s about understanding the science of how ingredients interact to create delicious results.
For those mindful of their fat intake, choosing the type of fat can make a difference. Butter offers flavor and some omega-3 fatty acids, while vegetable shortening is typically trans-fat-free and can produce very tender results. Regardless of the fat choice, the pastry blender is your best friend in incorporating it correctly.
Troubleshooting Common Pastry Blending Issues
Even with the right tool, you might run into problems. Here are some common issues and how to fix them:
- Tough Crust: This is usually due to overmixing the dough or not having enough fat pieces. Ensure you stop blending once the fat is pea-sized and avoid overworking the dough once liquids are added.
- Greasy Texture: This happens when the fat has melted too much before baking. Make sure all your ingredients, especially the fat, are kept very cold.
- Uneven Fat Distribution: If you have large chunks of butter or areas with no fat, it means the blender wasn’t used effectively. Ensure you move the blender around the bowl and through the mixture thoroughly but quickly.
- Dough is Too Dry/Crumbly: This can happen if too much flour was used or if the fat was incorporated too finely, absorbing more liquid. Measure ingredients accurately and stop blending once the fat is pea-sized.
Frequently Asked Questions About Pastry Blenders
Q1: Can I use a food processor instead of a pastry blender?
A1: Yes, you can use a food processor, but you must be very careful. Pulse the dry ingredients and cold fat together in short bursts. It’s very easy to over-process and turn the fat into a paste, which will result in a tough crust. A pastry blender offers more control for beginners.
Q2: What is the difference between a pastry blender and a dough whisk?
A2: A pastry blender has short, sturdy blades designed to cut fat into flour. A dough whisk, often with a larger, looped wire design, is excellent for mixing wet and dry ingredients together more thoroughly, especially in batters and doughs where you want to combine everything quickly without developing gluten. They serve different primary purposes.
Q3: How do I clean my pastry blender?
A3: It’s best to rinse your pastry blender immediately after use with warm water to prevent dough from drying on the blades. Then, wash it with soap and a small brush to get into all the crevices. Most pastry blenders are also dishwasher safe, which can be a convenient option.
Q4: Can I use a pastry blender for cookies?
A4: Yes, if your cookie recipe calls for cutting in butter or shortening to create a tender, crumbly texture, a pastry blender is an excellent tool for the job. It helps achieve that desired texture without melting the fat.
Q5: What size pastry blender should I get?
A5: Most standard pastry blenders are designed to work well in typical mixing bowls. The width of the blades and the length of the handle are generally standardized. Choose one with a comfortable handle that feels good in your hand.
Q6: Are there any alternatives to cutting in fat?
A6: While cutting in fat with a tool like a pastry blender is ideal for flaky pastries, some recipes might use melted butter or creamed butter. Melted butter will result in a denser, cake-like texture, while creamed butter (beaten with sugar until light and fluffy) is common in cookies and cakes for a different kind of tender crumb.
Conclusion
A pastry blender is a simple yet incredibly effective tool for any home baker. Its primary purpose—to cut cold fat into flour—is fundamental to achieving the flaky, tender textures we love in pies, biscuits, scones, and more. By understanding what a pastry blender is used for and how to use it correctly, you can significantly elevate your baking. Remember to keep your ingredients cold, work efficiently, and don’t overmix. With this essential kitchen tool in your arsenal, you’ll be well on your way to creating delicious, bakery-quality treats right in your own kitchen. Happy baking!
smartblander.com is a participant in the Amazon Services LLC Associates Program, an affiliate advertising program. As an Amazon Associate, we earn from qualifying purchases made through our links.