

Mastering your Oster blender is simple with this guide. Learn essential techniques for creating delicious smoothies, sauces, and more, ensuring you get the most out of this versatile kitchen appliance for healthy, citrus-forward recipes.
Key Takeaways
- Assemble your Oster blender correctly for safe operation.
- Understand Oster blender speed settings for various textures.
- Prepare ingredients properly for optimal blending results.
- Clean your Oster blender promptly after each use.
- Explore versatile Oster blender recipes for daily enjoyment.
- Troubleshoot common Oster blender issues with ease.
How to Use Oster Blender: Your Essential Beginner’s Guide
Are you excited to whip up vibrant smoothies, creamy soups, or zesty dressings? Your Oster blender is a fantastic tool to help you achieve just that! Many beginners find blender operation a little confusing at first. Questions about settings, assembly, and cleaning are common. But don’t worry, this guide will walk you through everything you need to know. We’ll cover how to use your Oster blender from start to finish, ensuring you feel confident and inspired to create delicious, healthy recipes. Get ready to unlock the full potential of your kitchen companion!
Understanding Your Oster Blender: Parts and Assembly
Before you start blending, it’s crucial to know the different parts of your Oster blender and how they fit together. This ensures safe and effective operation. Most Oster blender models share common components, though specific designs may vary slightly. Familiarizing yourself with these parts is the first step to mastering your appliance.
The Blender Jar
This is the main container where you’ll place your ingredients. Oster blender jars are typically made of durable glass or BPA-free plastic. They often have measurement markings on the side, making it easy to add liquids and other ingredients accurately. The lid for the jar usually comes with a removable filler cap, which is handy for adding ingredients while the blender is running.
The Blade Assembly
Located at the bottom of the jar, the blade assembly is the workhorse that pulverizes your ingredients. Oster blenders often feature a robust stainless-steel blade system designed for efficient blending. It’s crucial to ensure this is securely attached to the jar before use.
The Motor Base
This is the powerhouse of your Oster blender. It houses the motor that drives the blade assembly. The motor base also typically contains the control panel with speed settings and often a pulse function. Always ensure the motor base is placed on a stable, dry surface before you begin.
The Lid and Filler Cap
The lid seals the jar to prevent spills during blending. The filler cap, usually found in the center of the lid, can be removed to add ingredients like liquids or small fruits while the blender is in operation. This is a very useful feature for adjusting consistency or adding ingredients mid-blend.
Assembling Your Oster Blender: A Step-by-Step Process
Proper assembly is key to safe and effective blending. Follow these simple steps:
- Check for Cleanliness: Ensure all parts—the jar, blade assembly, lid, and filler cap—are clean and dry.
- Attach the Blade Assembly: If your blade assembly is removable, screw it securely onto the bottom of the blender jar. Make sure it’s tight to prevent leaks. Some models have the blade assembly permanently attached.
- Place Jar on Base: Position the blender jar onto the motor base. There’s usually a designated spot, and the jar will often click or lock into place. Ensure it’s seated correctly.
- Add Ingredients: Once assembled and placed on the base, you can add your ingredients. For best results, add liquids first, followed by softer ingredients, and then harder items like ice or frozen fruit.
- Secure the Lid: Place the lid firmly on top of the jar. Insert the filler cap into the lid and twist to lock it, unless you plan to add ingredients while blending.
Mastering Oster Blender Speed Settings
Oster blenders come with various speed settings, each designed for different tasks. Understanding these settings will help you achieve the perfect texture for your recipes, from a super-smooth purée to a chunky salsa. Most Oster models have a dial or buttons to control speed. Here’s a general guide to common settings:
Low Speed
Best for: Gentle mixing, starting thicker blends, or creating coarser textures. Use low speed for things like making a chunky salsa, mixing doughs, or starting to break down larger ingredients before increasing speed. It’s also great for puréeing cooked vegetables for baby food without making them too watery.
Medium Speed
Best for: Smoothies, purées, and sauces. This is your go-to setting for most everyday blending tasks. It effectively breaks down fruits, vegetables, and liquids to create smooth, consistent textures. Think creamy morning smoothies or smooth tomato sauces.
High Speed
Best for: Fine purées, grinding, and creating ultra-smooth textures. Use high speed for tasks like making nut butters, grinding coffee beans or spices, or achieving a silky-smooth consistency for dips and dressings. Be cautious with high speed; it can sometimes aerate liquids more than desired.
Pulse Function
Best for: Short bursts of power, controlled chopping, and breaking up large chunks. The pulse function allows you to control the blending process more precisely. It’s perfect for coarsely chopping vegetables, breaking down ice, or giving your blend a quick, powerful stir without over-processing. You typically press and hold the pulse button for a burst of power, releasing it to stop.
How to Prepare Ingredients for Blending
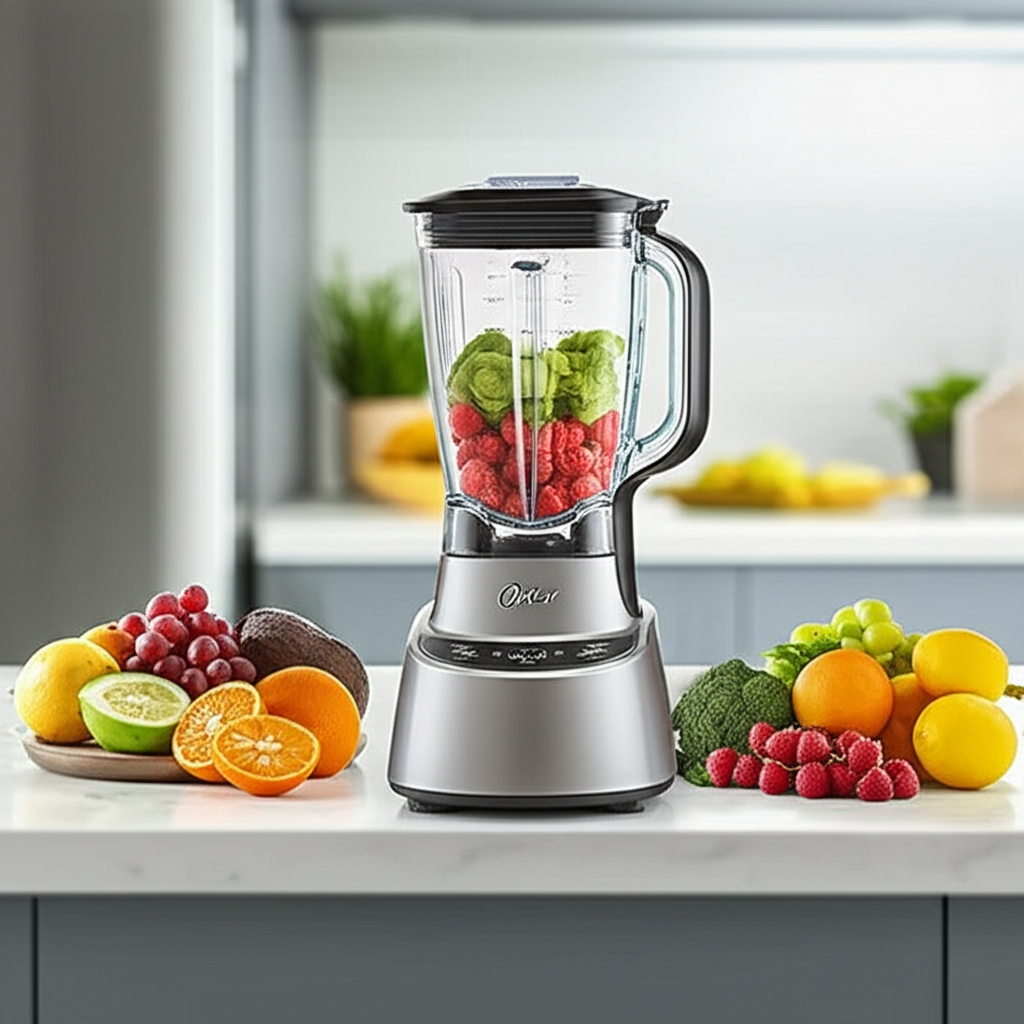
The way you prepare your ingredients can significantly impact the performance of your Oster blender and the final result of your recipe. Proper preparation ensures smooth blending, prevents strain on the motor, and leads to tastier outcomes. Here’s how to get your ingredients ready:
Washing and Chopping
Always wash fresh produce thoroughly to remove dirt and pesticides. For larger or harder ingredients like apples, carrots, or celery, chop them into smaller, uniform pieces (about 1-2 inches). This makes it easier for the blades to process them efficiently and reduces the risk of the motor overheating.
Adding Liquids
It’s generally recommended to add liquids to your Oster blender jar first. This helps the blades move freely and creates a vortex that pulls solid ingredients down into the blades, ensuring everything gets blended smoothly. For citrus-forward recipes, adding orange juice or water first is a great start.
Order of Ingredients
A good rule of thumb for layering ingredients in your Oster blender is:
- Liquids: Orange juice, water, milk, yogurt.
- Soft Ingredients: Spinach, berries, bananas, avocado.
- Harder Ingredients: Apples, carrots, nuts.
- Frozen Ingredients/Ice: Add these last to help weigh down other ingredients and ensure they get pulled into the blade path.
Frozen vs. Fresh Ingredients
If using frozen fruits or vegetables, you might need a bit more liquid to achieve a smooth consistency. For a thicker smoothie, you can often use frozen ingredients without ice. If you’re using fresh ingredients and want a colder, thicker blend, add a few ice cubes. Be mindful that too much ice can dilute the flavor.
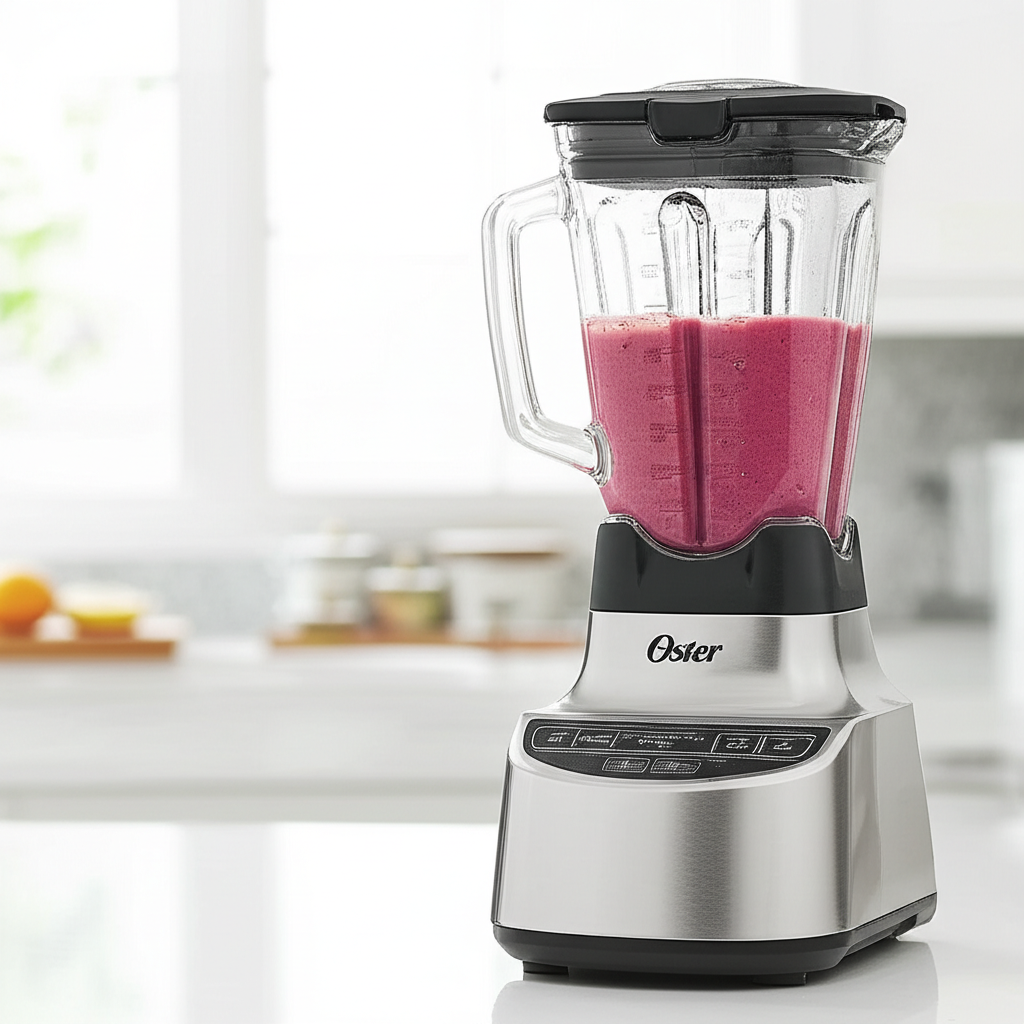
Step-by-Step Guide: Making Your First Oster Blender Smoothie
Let’s put your Oster blender to use with a simple, refreshing orange and berry smoothie. This is a perfect starter recipe that highlights the blender’s capabilities and your own.
Recipe: Sunshine Berry Blast Smoothie
This vibrant smoothie is packed with vitamin C and antioxidants, making it a healthy and delicious choice for breakfast or a snack. The citrusy notes from the orange juice provide a delightful zing.
Ingredients:
- 1 cup orange juice (freshly squeezed is wonderful!)
- 1/2 cup plain yogurt or Greek yogurt
- 1 cup mixed berries (fresh or frozen – strawberries, blueberries, raspberries)
- 1/2 ripe banana (optional, for creaminess)
- 1 tablespoon chia seeds or flax seeds (optional, for added fiber and omega-3s)
- Honey or maple syrup to taste (optional)
Instructions:
- Assemble Blender: Make sure your Oster blender jar is securely attached to the motor base, and the lid is firmly in place.
- Add Liquids: Pour the orange juice and yogurt into the blender jar first.
- Add Soft Ingredients: Add the banana (if using) and chia/flax seeds.
- Add Berries: Add the mixed berries. If using frozen berries, they will help chill the smoothie.
- Secure Lid: Place the lid tightly on the jar and ensure the filler cap is secure.
- Select Speed: Start with a low speed (setting 1 or 2 on most Oster models) to begin breaking down the ingredients.
- Increase Speed: Gradually increase the speed to medium or high (setting 5-7) and blend for 30-60 seconds, or until the smoothie is smooth and creamy. If the mixture is too thick, you can add a little more orange juice or water through the filler cap opening while the blender is running on a low setting.
- Taste and Adjust: Carefully remove the filler cap and taste the smoothie. If you prefer it sweeter, add a little honey or maple syrup and pulse a few times to combine.
- Serve: Pour the smoothie into a glass and enjoy immediately.
Cleaning and Maintaining Your Oster Blender
Proper cleaning and maintenance are essential to keep your Oster blender running smoothly for years to come. A quick clean after each use prevents food particles from drying and becoming difficult to remove, and also helps maintain hygiene.
Quick Rinse Method (Ideal After Most Uses)
This is the easiest way to clean your blender jar after making smoothies or shakes:
- Rinse Immediately: As soon as you’re finished, empty the blender jar.
- Add Warm Water and Soap: Fill the jar about halfway with warm water and add a drop of dish soap.
- Blend Briefly: Secure the lid and run the blender on a low to medium speed for about 30 seconds.
- Rinse Thoroughly: Empty the soapy water and rinse the jar, lid, and filler cap thoroughly with clean water.
- Air Dry: Allow all parts to air dry completely before reassembling or storing.
Deep Cleaning (For Stubborn Residue)
If you encounter dried-on food or residue, a deeper clean is necessary:
- Disassemble (If Possible): For some models, you may be able to unscrew the blade assembly from the bottom of the jar. Check your user manual.
- Hand Wash: Wash the jar, lid, filler cap, and blade assembly (if removed) with warm, soapy water and a soft cloth or sponge. Be very careful when handling the blades.
- Use a Brush: For hard-to-reach areas around the blades or the bottom of the jar, a small brush (like a bottle brush or an old toothbrush) can be very effective.
- Stubborn Stains: For tough stains or odors, you can try a paste of baking soda and water. Apply it to the stained area, let it sit for a few minutes, then scrub gently and rinse.
- Motor Base: Never immerse the motor base in water. Wipe it down with a damp cloth only. Ensure it is completely dry before plugging it in.
Blade Care
The blades are sharp and crucial for performance. Always handle them with care. Avoid using abrasive cleaners or scouring pads on the blades, as this can dull them. Ensure the blade assembly is completely dry before storing to prevent rust.
Storage
Store your Oster blender with the jar placed on the motor base or separately. Ensure all parts are dry to prevent mold or mildew. Keep the power cord neatly wrapped.
Beyond Smoothies: Versatile Oster Blender Uses
Your Oster blender is a powerhouse for more than just smoothies! Its versatility can transform your cooking and meal prep. From appetizers to desserts, here are some exciting ways to use your blender:
Sauces and Dressings
Whip up homemade salad dressings, marinades, or smooth tomato sauces in seconds. A simple vinaigrette with olive oil, vinegar, Dijon mustard, and herbs comes together beautifully. For a creamy citrus dressing, try blending Greek yogurt, lemon juice, olive oil, and a touch of honey.
Soups and Purées
Cooked vegetables can be transformed into velvety smooth soups. Blend roasted red peppers with vegetable broth for a vibrant soup, or purée steamed broccoli with milk for a classic cream of broccoli. This is fantastic for creating baby food too.
Dips and Spreads
Create delicious hummus, pesto, or even nut butters. For a quick hummus, blend chickpeas, tahini, lemon juice, garlic, and olive oil. A classic pesto involves basil, pine nuts, garlic, Parmesan cheese, and olive oil.
Batters
Some Oster blender models are powerful enough to mix pancake or waffle batter. Add your dry ingredients, then your wet ingredients, and blend until just combined. Be careful not to overmix.
Grinding
With the right blade assembly (some Oster models offer specialized ones), you can grind coffee beans, spices, or even nuts. This is a great way to ensure freshness in your cooking and baking.
Troubleshooting Common Oster Blender Issues
Even the best appliances can encounter minor hiccups. Here are some common issues and how to resolve them:
Blender Won’t Turn On
Possible Causes: Not plugged in, jar not seated correctly on base, thermal overload protector tripped.
Solutions:
- Ensure the blender is securely plugged into a working outlet.
- Check that the blender jar is properly locked into the motor base.
- Allow the blender to cool down for 15-30 minutes if the motor base feels hot. The thermal overload protector may have activated.
Ingredients Not Blending Smoothly
Possible Causes: Too many solid ingredients, not enough liquid, blades are dull or damaged, wrong speed setting.
Solutions:
- Reduce the amount of solid ingredients or add more liquid.
- Ensure you’ve followed the correct ingredient layering (liquids first).
- Inspect the blades for damage. If dull or chipped, they may need replacement.
- Experiment with different speed settings and the pulse function.
Leaking from the Jar
Possible Causes: Blade assembly not screwed on tightly, gasket or seal is damaged, jar is cracked.
Solutions:
- Ensure the blade assembly is screwed on very tightly to the bottom of the jar.
- Check the rubber gasket on the blade assembly for wear or damage. Replace if necessary.
- Inspect the blender jar for cracks. If cracked, the jar needs to be replaced.
Blender Smells Hot or Burning
Possible Causes: Motor is overworked, ingredients are too thick, internal motor issue.
Solutions:
- Immediately stop blending and unplug the unit.
- Allow the blender to cool down completely (30+ minutes).
- Try blending smaller batches or adding more liquid.
- If the smell persists after cooling and with normal use, there may be an internal motor problem, and you should contact Oster customer support.
Pro Tips for Oster Blender Mastery
Unlock even more potential from your Oster blender with these expert tips:
- Don’t Overfill: Leave some space at the top of the jar to allow ingredients to move freely and prevent overflow.
- Use the Filler Cap Wisely: Add liquids or small ingredients while the blender is running on low speed for better control and consistency adjustments.
- For Icy Drinks: If making frozen cocktails or slushies, pulse the ice first to break it down before adding other ingredients. This prevents strain on the motor.
- Citrus Zest Power: For an extra burst of flavor in dressings or baked goods, zest your citrus fruits before juicing them. Your Oster blender can even help with this if you have the right blade!
- Experiment with Textures: Don’t be afraid to play with speed settings and blending times to discover your favorite textures for different recipes.
Frequently Asked Questions About Oster Blenders
Q1: Can I put hot liquids in my Oster blender?
A1: Most Oster blender jars (especially glass ones) can handle hot liquids, but it’s crucial to use caution. Never fill the jar more than halfway with hot liquids. Remove the center filler cap from the lid and cover the opening loosely with a folded kitchen towel to allow steam to escape. Start blending on the lowest speed and gradually increase. Rapid temperature changes can crack glass jars, so avoid putting very cold liquids immediately after hot ones.
Q2: How do I clean the blades on my Oster blender?
A2: The safest way to clean the blades is to use a soft brush (like a toothbrush or bottle brush) with warm, soapy water after rinsing the jar. If your blade assembly is removable, be extremely careful when handling it. Never put the blade assembly in the dishwasher unless your manual specifically states it is safe, as high heat can damage the seals.
Q3: My Oster blender is making a loud noise. What should I do?
A3: Loud noises can be caused by several things: ingredients not being cut small enough, too many solid ingredients, or the blade assembly not being properly secured. First, unplug the blender and check if the jar is seated correctly and the blade assembly is tight. If the noise persists after addressing these, and especially if it sounds like grinding or struggling, turn it off immediately to avoid motor damage.
Q4: Can I blend ice in my Oster blender?
A4: Yes, most Oster blenders can blend ice, especially when used with the correct speed settings and sufficient liquid. For best results and to protect your blades, it’s recommended to pulse the ice first to break it into smaller pieces before blending with other ingredients. Avoid overloading the jar with ice.
Q5: How often should I replace the blade assembly on my Oster blender?
A5: The lifespan of a blade assembly depends on usage frequency and care. If you notice that your blender is struggling to blend ingredients that it used to handle easily, or if you see visible wear or dullness on the blades, it’s likely time for a replacement. For regular users, this might be every 2-5 years. You can typically find replacement parts on the Oster website or through authorized retailers.
Q6: My Oster blender has multiple speed settings. Which one should I use for smoothies?
A6: For smoothies, it’s best to start on a lower speed to break down the ingredients initially, then gradually increase to a medium or high speed for about 30-60 seconds until the desired smooth and creamy consistency is achieved. The pulse function can also be useful for breaking up large frozen chunks before continuous blending.
Conclusion
You’ve now got a comprehensive understanding of how to use your Oster blender! From understanding its parts and mastering speed settings to preparing ingredients and cleaning effectively, you’re well-equipped to create a wide array of delicious and healthy recipes. Whether you’re craving a vibrant citrus smoothie, a creamy soup, or a zesty dressing, your Oster blender is ready to be your kitchen partner. Don’t hesitate to experiment, try new recipes, and enjoy the fresh, homemade goodness you can achieve. Happy blending!
smartblander.com is a participant in the Amazon Services LLC Associates Program, an affiliate advertising program. As an Amazon Associate, we earn from qualifying purchases made through our links.