

Mastering your immersion blender is simple! Learn how to use an immersion blender effectively for creamy smoothies, silky soups, and more with these essential tips, making kitchen prep a breeze.
Key Takeaways
- Blend ingredients in a tall, narrow container.
- Submerge the blade fully before turning it on.
- Use a pulsing motion for better control.
- Clean the blender immediately after use.
- Experiment with different smoothie recipes.
- Ensure proper safety when handling the blade.
Welcome to the world of easy kitchen gadgets! If you’ve just unwrapped a shiny new immersion blender, you might be wondering where to start. These handy tools can transform your cooking and smoothie-making. They are perfect for quickly pureeing soups right in the pot or whipping up a single-serving smoothie without dirtying a large blender. Many people find using them a bit intimidating at first. But don’t worry, this guide is here to help. We’ll walk you through everything you need to know about how to use an immersion blender. Get ready to unlock its full potential and make delicious, healthy creations with confidence.
What is an Immersion Blender?
An immersion blender, also known as a stick blender or hand blender, is a kitchen appliance designed for blending ingredients directly in their container. Unlike traditional countertop blenders, it’s a handheld wand with a motor at the top and a blade at the bottom, usually encased in a protective guard. This design allows for incredible versatility, enabling you to blend, whisk, chop, and emulsify directly in pots, bowls, or cups. They are particularly popular for their convenience and ease of cleaning, making them a favorite for busy home cooks and health enthusiasts alike.
Why Choose an Immersion Blender for Your Kitchen?
The appeal of an immersion blender lies in its simplicity and efficiency. Imagine making a creamy tomato soup and wanting to make it smoother without transferring hot liquid to a bulky blender. An immersion blender lets you do just that, directly in the pot. For smoothie lovers, it’s a game-changer for quick, single-serving blends without the hassle of washing a large pitcher. Its compact size also means it takes up minimal storage space. Furthermore, they are generally more energy-efficient for smaller tasks compared to their countertop counterparts. This makes them an eco-friendly and practical choice for everyday use.
Essential Components of an Immersion Blender
Understanding the parts of your immersion blender will help you use it safely and effectively. Most immersion blenders share a common design, though specific features may vary by model.
The Motor Unit
This is the main body of the blender that you hold. It houses the motor and typically features speed control buttons or a variable speed dial. It’s important to keep this part dry, as it contains the electrical components.
The Blending Shaft/Wand
This is the long, slender part that extends from the motor unit. It contains the motor’s drive shaft and connects to the blade assembly. Some models have detachable shafts, which makes cleaning much easier.
The Blade Assembly
Located at the very bottom of the blending shaft, this is where the magic happens. The sharp blades spin at high speeds to chop and liquefy ingredients. Many blades are designed with a protective casing or a bell shape to prevent splashing and to keep ingredients from getting stuck.
Attachments (Optional)
Many immersion blenders come with a variety of attachments to increase their functionality. These can include:
- Whisk Attachment: Perfect for whipping cream, egg whites, or making lighter batters.
- Chopper Attachment: A small container with its own blade, useful for finely chopping nuts, herbs, or small amounts of vegetables.
- Measuring Cup/Beaker: Often included for blending small batches like salad dressings or baby food.
How to Use an Immersion Blender: A Step-by-Step Guide
Using an immersion blender is straightforward once you know the basics. Follow these steps to achieve smooth, consistent results every time.
Step 1: Choose the Right Container
Selecting the right container is crucial for preventing messes and ensuring efficient blending. Tall, narrow containers are ideal. Think measuring cups, sturdy pitchers, or the pot you cooked your soup in. Avoid wide, shallow bowls, as the ingredients will tend to splash out.
Step 2: Add Your Ingredients
Place your ingredients into your chosen container. For smoothies, this might include fruits, vegetables, liquids like almond milk or water, and any boosters like chia seeds or protein powder. For soups, you’ll typically be blending cooked ingredients that have cooled slightly.
Step 3: Submerge the Blade
This is a critical step for safety and effectiveness. Gently lower the immersion blender into the container. Make sure the blade assembly is completely submerged in the liquid or ingredients before you turn the blender on. This prevents the blade from flying out and creating a mess.
Step 4: Start Blending
Once the blade is submerged, press the power button. If your blender has multiple speed settings, start on a lower speed. You can increase the speed as needed. Hold the blender firmly and move it gently up and down and in a circular motion within the container. This helps to ensure all ingredients are incorporated and blended evenly. A pulsing motion can also be very effective for breaking down larger chunks and achieving a smoother consistency.
Step 5: Blend to Your Desired Consistency
Continue blending until you reach your desired texture. For smoothies, this might be perfectly smooth and creamy. For soups, you might want a silky texture or a slightly chunkier consistency, depending on your preference. Be patient; it may take a minute or two to achieve the perfect result.
Step 6: Turn Off and Remove
When you’re finished blending, turn off the immersion blender completely before lifting it out of the container. This prevents any drips or splatters. It’s a good practice to tilt the blender slightly as you remove it to allow any remaining liquid to drain back into the container.
Tips for Perfect Smoothies with Your Immersion Blender
Immersion blenders are fantastic for single-serving smoothies. Here’s how to make yours extra delicious:
- Use a Tall, Narrow Glass or Jar: This is key to avoiding splatters and ensuring all ingredients get blended. A mason jar works perfectly.
- Layer Your Ingredients: Start with liquids (like orange juice or water), then add softer ingredients (like yogurt or spinach), followed by harder items (like frozen fruit or ice). This helps the blender work more efficiently.
- Don’t Overfill: Leave enough space at the top to allow for blending movement.
- Start Slow: Begin on a low speed to break down larger pieces, then increase to high for a smooth finish.
- Move the Blender: Gently move the blender up and down and around the inside of the container to capture all ingredients.
- Add Liquid if Needed: If your smoothie is too thick, add a little more liquid (water, milk, or juice) and blend again.
- Consider Frozen vs. Fresh Fruit: Frozen fruit creates a thicker, colder smoothie. If using fresh, you might want to add a few ice cubes.
For a vibrant and energizing start, try a simple orange and mango smoothie. Combine 1 cup of orange juice, 1/2 cup of Greek yogurt, 1/2 cup of frozen mango chunks, and a splash of lime juice in a tall glass. Blend until smooth and enjoy!
Tips for Silky Soups with Your Immersion Blender
Making smooth, restaurant-quality soups at home is easy with an immersion blender.
- Cook and Cool Slightly: Always allow hot liquids to cool for a few minutes before blending. This prevents dangerous splattering and potential damage to your blender.
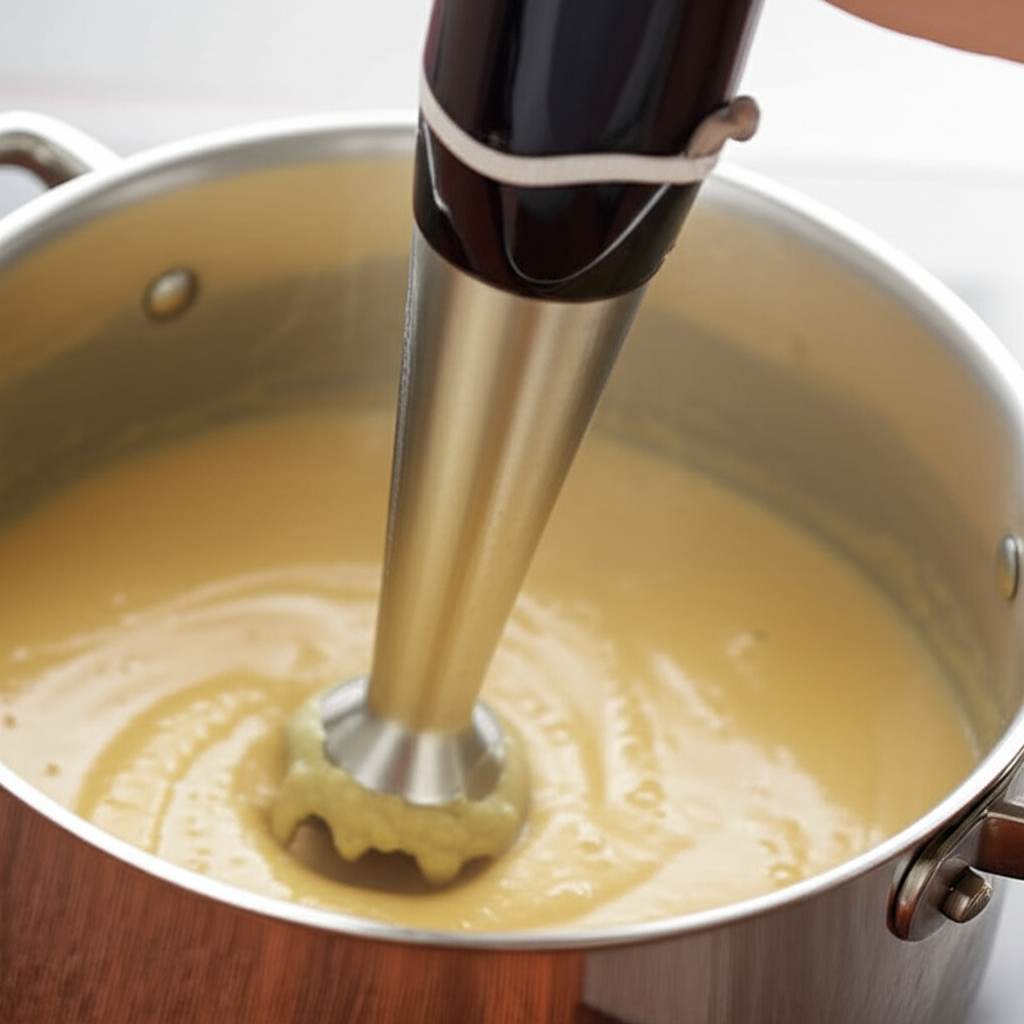
- Blend in the Pot: This is where immersion blenders truly shine. Blend directly in the cooking pot for maximum convenience and minimal cleanup.
- Achieve Smoothness Gradually: Start by blending the larger chunks at the bottom. Then, slowly move the blender up and down, incorporating more liquid and solids until you reach your desired consistency.
- Be Patient: It might take a couple of minutes to get a perfectly smooth soup. Don’t rush the process.
- Add Liquids Carefully: If your soup is too thick, you can add more broth or water while blending.
- Season After Blending: Taste and adjust seasonings after you’ve achieved the desired texture.
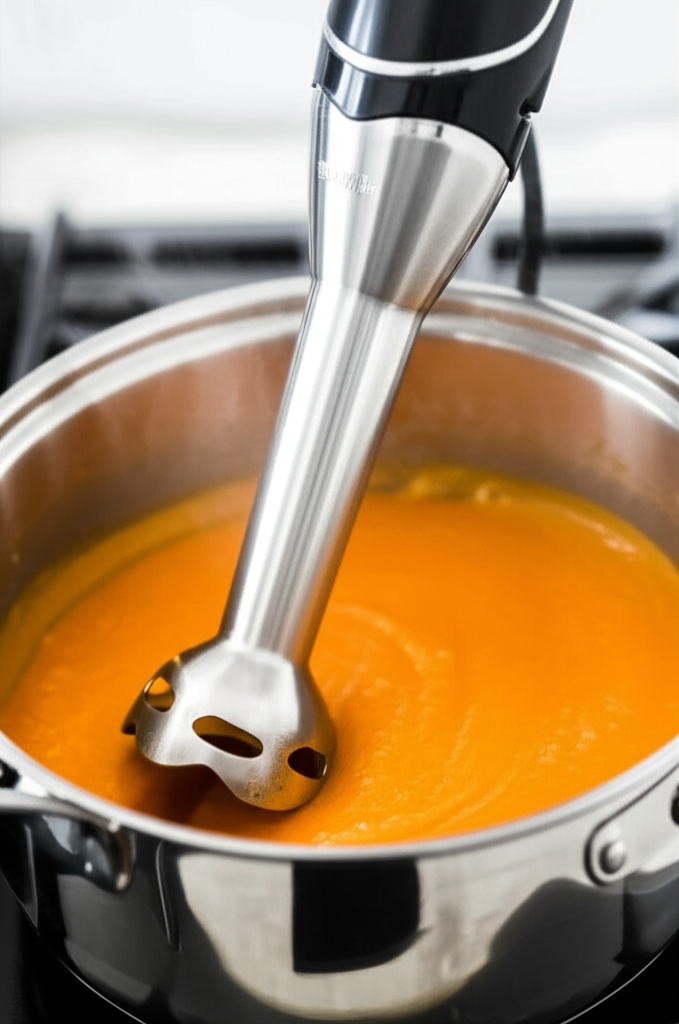
For a classic cream of tomato soup, after pureeing the cooked tomatoes, broth, and cream, blend until perfectly smooth. The result should be velvety and delicious.
Using Immersion Blender Attachments
The versatility of an immersion blender expands significantly with its attachments. Here’s how to make the most of them:
Whisk Attachment
This attachment is designed to incorporate air into mixtures, making them light and fluffy.
- Best for: Whipping cream, beating egg whites for meringues, creating lighter pancake batters, or emulsifying vinaigrettes.
- How to use: Attach the whisk to the motor unit. Submerge the whisk in your mixture. Start on a low speed and gradually increase. Move the whisk around the bowl to ensure even aeration.
Chopper Attachment
This mini food processor is perfect for small-batch chopping tasks.
- Best for: Finely chopping herbs, nuts, garlic, small amounts of onions, or making pestos and dips.
- How to use: Place the ingredients into the chopper bowl. Attach the blade. Secure the motor unit to the lid. Press the power button in short bursts to control the chop size.
Measuring Cup/Beaker
Many immersion blenders come with a dedicated blending cup. This is ideal for making single servings or small batches of dressings, sauces, or smoothies.
- Best for: Single-serving smoothies, salad dressings, small batches of mayonnaise, or pureeing baby food.
- How to use: Add ingredients to the cup. Insert the immersion blender shaft. Blend until smooth. The cup often has measurement markings for convenience.
External Link: For more advanced culinary techniques involving emulsification, you can explore resources from institutions like FoodSafety.gov, which often discusses safe food preparation methods relevant to blending hot liquids.
Safety Precautions for Immersion Blenders
While immersion blenders are generally safe, it’s important to be aware of a few key safety measures to prevent accidents.
- Never Blend Dry Ingredients: Immersion blenders require liquid to operate effectively and safely. Blending without enough liquid can overheat the motor and damage the blades.
- Keep the Motor Unit Dry: The motor unit contains electrical components. Never immerse it in water or any other liquid. Wipe it clean with a damp cloth.
- Unplug Before Cleaning: Always unplug the immersion blender before attempting to clean it, especially the blade assembly.
- Handle Blades with Care: The blades are very sharp. Be cautious when cleaning and storing the blender to avoid cuts.
- Supervise Children: Keep immersion blenders out of reach of children and never let them operate the appliance unsupervised.
- Be Mindful of Hot Liquids: When blending hot soups or sauces, allow them to cool slightly. Hold the blender firmly and tilt it slightly to prevent splashing.
Pro Tip: Always ensure the blade is fully submerged before turning on the blender. This prevents ingredients from being flung out and minimizes the risk of splashing hot liquids.
Cleaning and Maintenance
Proper cleaning and maintenance will ensure your immersion blender lasts for years and performs optimally.
Immediate Cleaning is Best
The easiest time to clean your immersion blender is immediately after use. Food residue is much harder to remove once it has dried and hardened.
Cleaning the Blending Shaft
- Unplug the Blender: Always disconnect the power before cleaning.
- Rinse the Blade: Hold the blending shaft under running warm water.
- Use Soap and Water: For more stubborn residue, you can use a sponge or dishcloth with a drop of dish soap. Carefully wipe around the blades.
- Dishwasher Safe? Check your user manual. Many blending shafts are dishwasher safe (usually on the top rack), but handwashing is often recommended to prolong their life.
Cleaning the Motor Unit and Attachments
- Motor Unit: Wipe the motor unit with a damp cloth. Never submerge it in water.
- Attachments: Whisk attachments and chopper bowls are usually dishwasher safe, but always refer to your manual. Handwashing is also effective.
Storage
Store your immersion blender in a dry place. If it comes with a storage case or wall mount, use it to keep the components organized and protected.
Troubleshooting Common Immersion Blender Issues
Even the best kitchen tools can sometimes act up. Here are some common issues and how to resolve them:
| Problem | Possible Cause | Solution |
|---|---|---|
| Blender not turning on | Not plugged in, power surge protector tripped, faulty outlet. | Ensure it’s plugged in. Check surge protector. Try a different outlet. |
| Ingredients not blending smoothly | Not enough liquid, blade not fully submerged, blender overloaded. | Add more liquid. Ensure blade is fully submerged. Blend in smaller batches. |
| Excessive splashing | Container too wide/shallow, not holding blender firmly, starting on too high speed. | Use a tall, narrow container. Hold blender firmly. Start on low speed and gradually increase. |
| Motor smells like it’s burning | Overheating, blending dry ingredients, or prolonged use without a break. | Stop immediately and let it cool. Ensure enough liquid. Blend in shorter intervals. |
| Blade assembly is difficult to clean | Food residue dried on. | Clean immediately after use. Use a small brush to get into crevices. |
Frequently Asked Questions (FAQ)
Q1: Can I use an immersion blender to make mayonnaise?
A1: Yes! Immersion blenders are excellent for making mayonnaise. The rapid blending action helps to emulsify the oil and egg yolk quickly and efficiently. Use the provided beaker or a tall, narrow jar for best results.
Q2: How much liquid do I need to use with an immersion blender?
A2: You generally need enough liquid to fully submerge the blade assembly. For smoothies, about 1-2 cups is usually sufficient. For soups, ensure the blade is covered by at least an inch or two of liquid.
Q3: Can I use an immersion blender for hot liquids like soup?
A3: Yes, but with caution. Allow hot liquids to cool for at least 5-10 minutes before blending to prevent dangerous splattering and potential damage to the blender. Hold the blender firmly and start on a low speed.
Q4: My immersion blender seems to be struggling. What should I do?
A4: First, ensure you have enough liquid and that the blade is fully submerged. If the problem persists, try blending in smaller batches. If it continues to struggle, the motor might be overheating, so let it cool down. Check your user manual for specific troubleshooting steps.
Q5: Are all immersion blender attachments interchangeable?
A5: No, attachments are typically specific to the brand and sometimes even the model of the immersion blender. Always check compatibility before purchasing or attempting to use attachments.
Q6: How do I prevent my smoothie from being too chunky?
A6: Ensure you’re using a good ratio of liquid to solids. Start by blending softer ingredients first, then add frozen items. Moving the blender up and down and in a circular motion also helps ensure everything is incorporated evenly. If using frozen fruit, letting it thaw for a few minutes can also help.
Q7: What’s the difference between an immersion blender and a regular blender?
A7: A regular (countertop) blender has a fixed container and blades, ideal for larger batches and tougher ingredients. An immersion blender is handheld, allowing you to blend directly in pots, bowls, or cups, making it more versatile for smaller tasks and convenience.
Conclusion
You’ve now got a comprehensive guide to using your immersion blender like a pro! From whipping up vibrant citrus-forward smoothies to creating velvety smooth soups, this versatile tool is set to become a staple in your kitchen. Remember to always choose the right container, submerge the blade fully, and clean your blender promptly. With these essential tips and a little practice, you’ll be blending with confidence and enjoying delicious, healthy meals and drinks in no time. Happy blending!
smartblander.com is a participant in the Amazon Services LLC Associates Program, an affiliate advertising program. As an Amazon Associate, we earn from qualifying purchases made through our links.