

A pastry blender is a simple yet powerful tool that helps you cut butter into flour for flaky pie crusts and tender biscuits. Learning how to use a pastry blender is essential for achieving perfect baked goods, and this guide will make it easy for beginners.
Key Takeaways
- Master pastry blender use for flaky pie crusts.
- Achieve perfectly cut butter into flour quickly.
- Learn the simple rocking and pressing motions.
- Understand when to stop for ideal texture.
- Discover its versatility beyond pastry.
How To Use A Pastry Blender: Your Essential Beginner’s Guide
Have you ever looked at a beautiful, flaky pie crust or perfectly tender scones and wondered about the secret? Often, the magic lies in how the fat, usually butter, is incorporated into the dry ingredients. This is where a pastry blender shines. For beginners, it might seem like just another kitchen gadget, but understanding how to use a pastry blender is a fundamental skill that unlocks a world of delicious possibilities. Don’t worry if you’ve never held one before; we’ll walk you through it step by step, making you feel confident in no time. Get ready to elevate your baking game!
What is a Pastry Blender and Why Use One?
A pastry blender is a handheld kitchen tool designed specifically for cutting solid fats, like butter or shortening, into flour. It typically consists of a handle attached to several thin, curved metal blades or wires that are spread apart. The primary purpose is to break down the solid fat into smaller pieces and distribute them evenly throughout the flour mixture.
You might be wondering why you can’t just use your fingers or a fork. While those methods can work, a pastry blender offers several advantages, especially for beginners:
- Even Distribution: The blades are designed to cut through the fat without overworking it or melting it too much with the heat from your hands. This even distribution is crucial for creating those delightful flaky layers in pastries.
- Speed and Efficiency: It’s significantly faster than using a fork and less messy than using your hands.
- Texture Control: It allows for precise control over the size of the fat pieces. For flaky pastries, you want pea-sized pieces of fat, while for a more tender, cake-like texture, you might aim for even smaller, sand-like crumbs.
- Keeps Fat Cold: The design minimizes contact with your warm hands, which is vital for maintaining the cold temperature of the butter. Cold butter is key to creating steam pockets during baking, resulting in flakiness.
Think of it as the perfect tool for creating that delicate crumb structure that makes baked goods so irresistible. Understanding its function is the first step to mastering it.
Anatomy of a Pastry Blender
Before we dive into how to use it, let’s familiarize ourselves with its parts. Most pastry blenders share a common design:
- Handle: This is what you hold onto. They come in various materials like wood, plastic, or metal, and some are ergonomically designed for a comfortable grip.
- Blades/Wires: These are the workhorses. They are usually made of stainless steel and are curved or angled to effectively cut and mix. Some have fewer, wider blades, while others have more, thinner wires. The number and shape can affect how quickly and finely they cut the fat.
The beauty of a pastry blender lies in its simplicity. There are no complex mechanisms, just a straightforward design built for a specific task.
When to Use Your Pastry Blender
The pastry blender is your go-to tool for recipes that require cutting fat into dry ingredients. This includes:
- Pie Crusts: This is its most famous application. Cold butter cut into flour creates steam in the oven, leading to those coveted flaky layers.
- Biscuits: Similar to pie crusts, biscuits benefit from pockets of butter that melt and create a tender, airy interior.
- Scones: For that characteristic crumbly texture.
- Cobbler Toppings: Many fruit cobbler toppings involve a biscuit-like dough where the fat is cut in.
- Pastry Doughs: Beyond pies, this includes rough puff pastry or other types of enriched doughs where fat is incorporated.
- Crumbles and Streusels: While sometimes made with melted butter, many crumble topping recipes call for cutting in cold butter for a more distinct, crumbly texture.
Essentially, any time a recipe calls for “cutting in” cold butter or shortening until it resembles coarse crumbs or pea-sized pieces, your pastry blender is the ideal tool.
Step-by-Step Guide: How to Use a Pastry Blender
Using a pastry blender is straightforward, but a few techniques make a big difference. Here’s how to do it perfectly every time:
Step 1: Prepare Your Ingredients
Ensure your fat (usually butter) is very cold. It should be firm but not frozen solid. If using butter sticks, cut them into cubes. This helps them incorporate more easily. Have your dry ingredients (flour, salt, sugar if applicable) in a large mixing bowl.
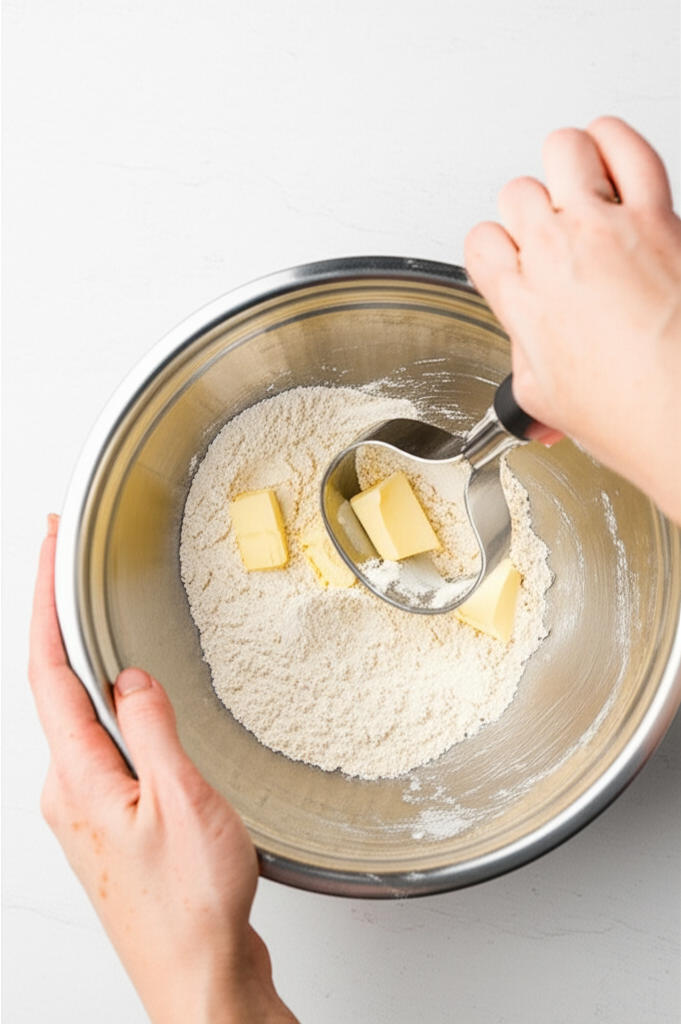
Step 2: Add Fat to Dry Ingredients
Place the cold butter cubes or pieces into the bowl with the dry ingredients. This is where the pastry blender comes in.
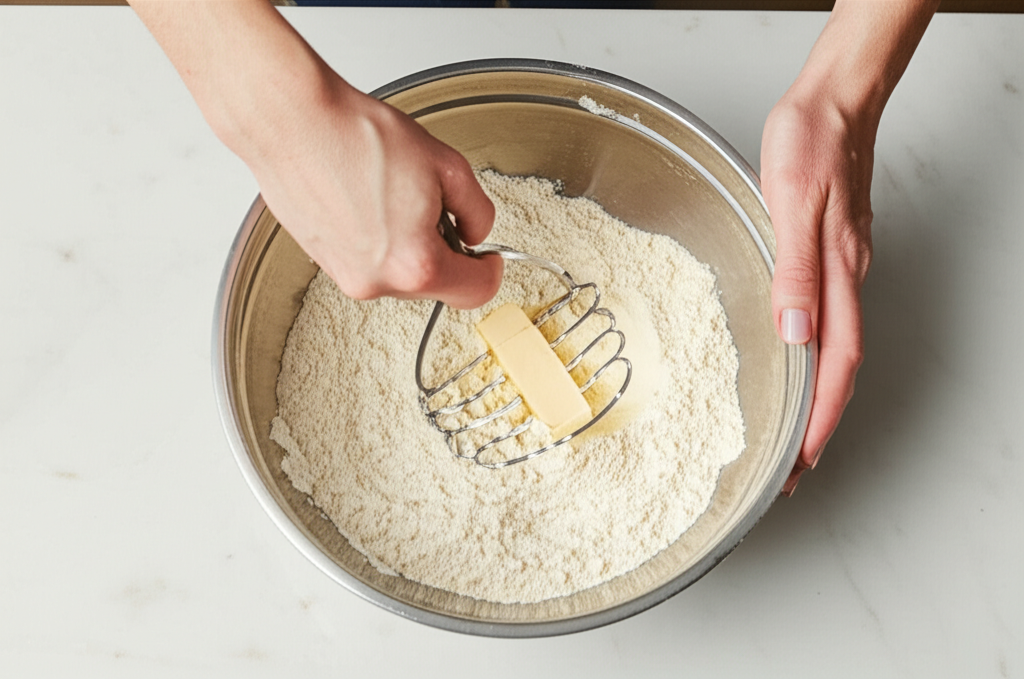
Step 3: The Cutting Motion
Hold the handle of the pastry blender firmly. Place the blades into the flour and fat mixture. Begin to press down, using a slight rocking motion. Imagine you are trying to “cut” the butter into smaller pieces. Move the blender through the mixture, ensuring you reach the bottom of the bowl to incorporate all the flour and fat.
Technique Tip: Don’t just stir or mash. The goal is to cut the fat. Use the blades to slice through the butter, breaking it down. Rotate the bowl as you work to ensure you’re incorporating all ingredients evenly.
Step 4: Continue Until Desired Texture
Keep working the pastry blender through the mixture. The fat will start to break down into smaller and smaller pieces. You’re looking for a consistency where the largest pieces are about the size of peas. Some smaller pieces, the size of coarse meal or breadcrumbs, are also perfectly fine and contribute to flakiness. Avoid overworking the dough, which can make your final product tough.
Visual Guide:
| Desired Texture | Appearance | Best For |
|---|---|---|
| Coarse Meal | Most of the mixture resembles coarse cornmeal, with some larger, pea-sized pieces of fat visible. | Tender biscuits, some pie crusts. |
| Pea-Sized Pieces | A mix of coarse meal and distinct pieces of butter, roughly the size of frozen peas. | Classic flaky pie crusts, scones. |
| Small Cherry-Sized Pieces | Larger chunks of butter, about the size of a small cherry, distributed throughout the flour. | Very flaky, layered pastries. (Use caution not to overwork) |
Step 5: Test for Readiness
Lift a small amount of the mixture between your thumb and forefinger. If you can still easily identify the butter pieces and they are roughly pea-sized, you’re likely done. If the butter has completely disappeared, you may have overmixed. If the pieces are still very large, continue blending.
Step 6: Incorporate Liquid
Once you’ve achieved the desired texture, it’s time to add your liquid ingredients (like ice water for pie crusts or milk for biscuits). Drizzle the liquid over the mixture and gently combine with a fork until just moistened. Again, avoid overmixing.
Pro Tips for Pastry Blender Mastery
Pro Tip: For extra flaky results, chill your pastry blender in the freezer for about 10-15 minutes before you start. This helps keep the butter colder as you work, maximizing the steam pockets that create layers during baking.
Variations and Other Uses for Your Pastry Blender
While its primary job is cutting fat into flour, a pastry blender can be surprisingly versatile. Here are a few other ways you might use it:
- Mashing Soft Ingredients: It can be used to gently mash cooked fruits like berries for jams or compotes, or to break down cooked vegetables for purees.
- Combining Dry Ingredients: While not its main function, it can help distribute spices or cocoa powder evenly into flour before adding wet ingredients.
- Making Quick Breads: For recipes like banana bread or zucchini bread where you might want to slightly break down some of the fruit or vegetable before mixing the batter.
- Creating Crumb Toppings: Perfect for quickly incorporating butter into cookie crumbs or flour and sugar for streusel toppings.
Don’t limit yourself to just pie crusts! Experiment with how this simple tool can assist in various stages of your baking and cooking.
Choosing the Right Pastry Blender
When selecting a pastry blender, consider these factors:
- Handle Comfort: You’ll be using some force, so a comfortable, non-slip handle is important.
- Blade Material and Shape: Stainless steel is durable and easy to clean. The number and curve of the blades can affect efficiency. More, thinner wires might work faster for finer crumbs, while fewer, sturdier blades are great for larger butter pieces.
- Durability: Look for sturdy construction where the blades are securely attached to the handle.
- Ease of Cleaning: Blades can get sticky. Ensure it’s easy to wash by hand or is dishwasher safe.
Many excellent options are available from reputable kitchenware brands. A good pastry blender is an investment that will serve you well for years. For example, OXO Good Grips offers ergonomically designed options, while brands like King Arthur Baking Company often provide classic, reliable designs.
Troubleshooting Common Pastry Blender Issues
Even with a guide, beginners might encounter a few hiccups. Here’s how to solve them:
| Problem | Cause | Solution |
|---|---|---|
| Butter is melting too much. | Warm hands, butter too soft, or overworking. | Use ice-cold butter, work quickly, take breaks to let the bowl cool. Ensure your kitchen isn’t too warm. Try chilling the blender. |
| Fat pieces are too large. | Not blending long enough, or butter is too hard. | Continue the cutting motion until pea-sized. If butter is rock hard, let it sit out for 5 minutes before cutting. |
| Fat pieces are too small (like sand). | Overmixing or using blades that cut too finely for the desired texture. | Stop blending as soon as you reach the desired pea-size or coarse meal texture. For super flaky results, some larger butter pieces are desirable. |
| Uneven incorporation. | Not rotating the bowl or reaching all parts of the mixture. | Consistently rotate the bowl and sweep the blender across the entire surface and down to the bottom. |
Patience and practice are key. Don’t be discouraged if your first few attempts aren’t perfect. Every baker has been there!
Nutritional Benefits of Baking with Whole Grains and Healthy Fats
While we focus on the technique, it’s worth noting the nutritional aspects of baking. When you use your pastry blender with whole wheat flour for a pie crust or biscuit recipe, you’re adding valuable fiber and nutrients. Incorporating healthy fats like butter in moderation, as part of a balanced diet, provides essential fatty acids. For instance, whole grains are a fantastic source of B vitamins and minerals, supporting energy production and overall health, as recommended by the USDA’s MyPlate guidelines. Pairing these with well-prepared pastries can make your treats not only delicious but also a more wholesome part of your diet.
Frequently Asked Questions About Pastry Blenders
What is the best way to clean a pastry blender?
Most pastry blenders are easy to clean. After use, rinse the blades immediately under warm running water to remove excess dough and butter. You can then use a brush (like a vegetable brush or an old toothbrush) to get into the crevices between the blades. Many are also dishwasher safe; check the manufacturer’s instructions. Ensure it’s completely dry before storing to prevent rust.
Can I use a food processor instead of a pastry blender?
Yes, you can use a food processor. Pulse the dry ingredients and cold butter until you reach the desired crumbly texture. However, be very careful not to over-process, as it’s easy to turn the mixture into a paste. Pulse in short bursts and check frequently. For beginners, a pastry blender offers more control.
What if I don’t have a pastry blender?
If you don’t have a pastry blender, two forks can be used to achieve a similar effect by crossing them and “cutting” the butter into the flour. Another option is using your fingertips, but be quick to avoid melting the butter. A bench scraper can also help cut through larger butter pieces.
How cold does the butter need to be?
The butter should be very cold, almost hard. If it’s too soft, it will melt and incorporate too much into the flour, resulting in a tough or greasy texture rather than flaky layers. Straight from the refrigerator is usually ideal.
How do I know when I’ve reached the right texture?
You’re aiming for a mixture that resembles coarse crumbs or small peas. When you pinch a bit between your fingers, you should still see distinct pieces of butter. If it looks like wet sand or paste, you’ve overmixed. If the butter pieces are still quite large, you need to blend a bit more.
Can I use shortening instead of butter with a pastry blender?
Absolutely! Shortening is often easier to work with than butter because it’s typically softer at room temperature. You can use your pastry blender in the same way to cut shortening into flour for flaky results. Some recipes even combine butter and shortening for the best of both worlds.
Conclusion
Mastering the use of a pastry blender is a foundational skill that opens the door to countless delicious baked goods. From the flakiest pie crusts to the most tender biscuits, this simple tool is your ally in the kitchen. By understanding its anatomy, practicing the cutting motion, and paying attention to the texture of your ingredients, you’ll be creating impressive pastries in no time. Don’t be afraid to experiment and enjoy the process. Happy baking!
smartblander.com is a participant in the Amazon Services LLC Associates Program, an affiliate advertising program. As an Amazon Associate, we earn from qualifying purchases made through our links.