

Instantly make delicious, fresh orange juice right in your blender! This simple method skips the juicer and gives you pure, vibrant citrus goodness in minutes. Perfect for beginners, it’s a quick and healthy way to enjoy homemade orange juice anytime.
Key Takeaways
- Blend whole oranges for fiber-rich juice.
- Peel oranges before blending for smoother results.
- Strain for a pulp-free, classic juice experience.
- Add water for a thinner, more refreshing drink.
- Enjoy your fresh blender orange juice immediately.
- Experiment with flavor additions for variety.
How to Make Orange Juice in a Blender: Instantly!
Craving a glass of fresh, cold orange juice but don’t have a juicer? You might be surprised to learn that you can make delicious orange juice using just your blender. It’s a common kitchen appliance, and with a few simple steps, you can transform whole oranges into a healthy, vibrant drink. Many people think juicing requires a special machine, but we’re here to show you how easy it is to make orange juice in a blender. Get ready to enjoy the freshest taste possible, right from your kitchen!
Why Make Orange Juice in a Blender?
Making orange juice in a blender is a fantastic alternative to traditional juicing, especially for those new to homemade beverages. It’s incredibly convenient, requiring no special equipment beyond the blender you likely already own. This method is also more versatile than you might think, allowing for variations in texture and even the inclusion of the orange’s beneficial fiber.
Traditional juicers can be expensive and take up valuable counter space. Plus, cleaning them can sometimes feel like a chore. Blending, on the other hand, is straightforward. You simply add your ingredients, blend, and strain (if desired). This makes it an accessible option for anyone looking to incorporate more fresh fruit into their diet without a significant investment or learning curve.
Beyond convenience, using a blender means you can capture more of the orange’s goodness. While a juicer separates juice from pulp, a blender can process the whole fruit. This means you get the vitamin C, but also some of the dietary fiber, which is great for digestion and can help you feel fuller longer. However, we’ll cover how to achieve that classic, pulp-free juice texture too!
The Benefits of Fresh Orange Juice
Freshly squeezed or blended orange juice is a powerhouse of nutrition. It’s famously rich in Vitamin C, a vital antioxidant that supports your immune system and skin health. According to the National Institutes of Health, Vitamin C is crucial for wound healing and helps your body absorb iron from plant-based foods.
Beyond Vitamin C, oranges provide other beneficial nutrients like potassium, which is important for blood pressure management, and folate, essential for cell growth. When you make your own juice, you also avoid the added sugars and preservatives often found in store-bought varieties, ensuring you’re getting pure, natural goodness.
The act of juicing itself can be a mindful practice. It connects you to your food and the process of creating something healthy. It’s a simple act of self-care that can brighten your morning or provide a refreshing afternoon pick-me-up. Ready to dive into making your own?
Gather Your Ingredients and Tools
Making orange juice in a blender is wonderfully simple. You don’t need much, which is part of its charm. Here’s what you’ll want to have on hand:
Essential Ingredients:
- Fresh Oranges: The star of the show! Choose ripe, juicy oranges. Valencia, navel, or blood oranges all work beautifully. The quantity depends on how much juice you want. A good starting point is 2-3 medium oranges per cup of juice.
- Water (Optional): A little bit of cold water can help the blender process the oranges more smoothly and achieve a thinner juice consistency.
- Ice Cubes (Optional): For an extra cold and refreshing juice.
Necessary Tools:
- Blender: Any standard blender will do. A high-powered blender will create a smoother texture more quickly, but it’s not essential.
- Knife: For cutting the oranges.
- Cutting Board: A stable surface for cutting.
- Strainer or Fine-Mesh Sieve (Optional): If you prefer your orange juice without pulp. A nut milk bag also works well for a super smooth result.
- Bowl or Pitcher: To collect the juice.
Step-by-Step Guide: How to Make Orange Juice in a Blender
Follow these easy steps to create your instant orange juice. It’s a process that’s as straightforward as it is rewarding.
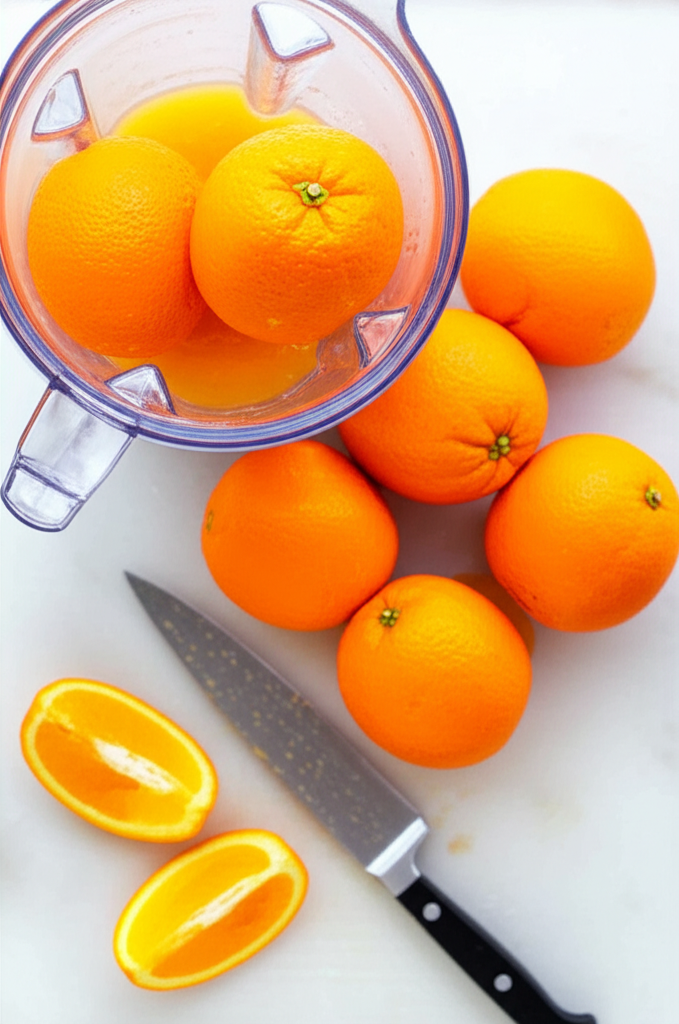
Step 1: Prepare the Oranges
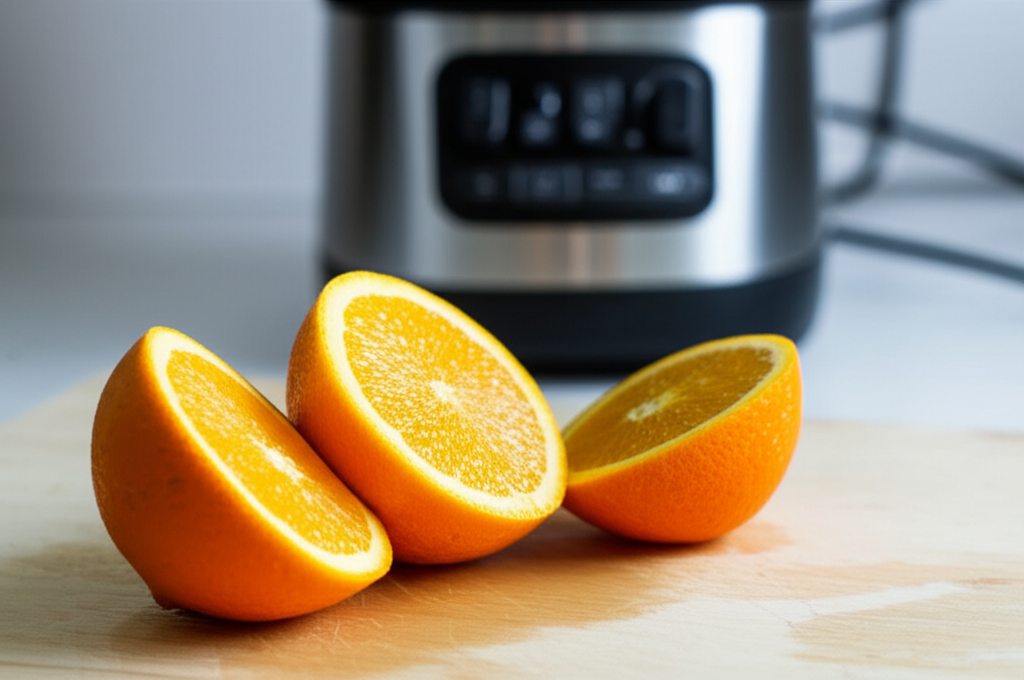
Start by washing your oranges thoroughly under cool running water. This removes any dirt or residue from the peel. Next, you’ll need to peel them. You can do this with your hands or use a knife to carefully remove the peel and the white pith underneath. The pith can sometimes add a bitter taste, so removing as much as possible is a good idea for the best flavor. Once peeled, cut each orange into quarters or smaller chunks. This makes it easier for your blender to process them.
Step 2: Load Your Blender
Place the orange pieces into your blender jar. If you’re adding water, now is the time to pour it in. Start with about 1/4 cup of water for every 2-3 oranges. You can always add more later if needed. If you’re using ice cubes, add them now as well.
Step 3: Blend Until Smooth
Secure the lid on your blender. Start blending on a low speed, then gradually increase to high. Blend for about 30-60 seconds, or until the oranges are completely broken down into a smooth liquid. If your blender is struggling, stop it, give the mixture a stir with a spatula (making sure the blender is off!), and add a tablespoon or two more water if it seems too thick. You’re looking for a consistency that’s smooth and pourable.
Step 4: Strain the Juice (Optional)
This is where you decide your preferred texture. If you like your orange juice with pulp, you can pour it directly from the blender into a glass. For a classic, smooth juice, set a fine-mesh sieve or strainer over a bowl or pitcher. Pour the blended orange mixture through the strainer. Use a spoon or spatula to gently press down on the pulp to extract as much juice as possible. Discard the pulp or save it for other uses, like adding to baked goods or smoothies.
Step 5: Serve and Enjoy!
Pour your freshly made orange juice into glasses. Serve immediately for the best flavor and nutritional benefits. You can add a few ice cubes if you didn’t blend them in, or a sprig of mint for a touch of elegance.
Tips for Perfect Blender Orange Juice
Achieving a delightful glass of orange juice from your blender is simple with a few insider tricks. These tips will help you maximize flavor, texture, and freshness every time you make it.
Pro Tip: For an extra vibrant flavor and nutrient boost, add a small piece of fresh ginger or a squeeze of lime juice to your blender along with the oranges.
Here are some additional tips to elevate your blender orange juice game:
- Chill Your Oranges: Using cold oranges and cold water will result in a colder juice without needing as much ice, which can dilute the flavor.
- Don’t Over-Blend (If Not Straining): If you plan to drink the juice with pulp, a shorter blend time (around 30 seconds) can leave a slightly thicker, more satisfying texture.
- Adjust Consistency: If your juice is too thick, add more cold water, a tablespoon at a time, and blend again briefly. If it’s too thin, you can add more orange segments or a few ice cubes.
- Seedless Oranges are Best: While not essential, using seedless oranges will save you the minor step of picking out any stray seeds before blending.
- Sweetness Check: Taste your juice before serving. If your oranges weren’t as sweet as you’d hoped, a tiny drizzle of honey or maple syrup can be blended in, but it’s usually unnecessary.
Variations and Additions
Once you’ve mastered the basic blender orange juice, don’t be afraid to get creative! Adding other ingredients can introduce new flavors and nutritional benefits. Here are some ideas:
Fruity Blends:
- Orange-Mango Delight: Add half a ripe mango (peeled and pitted) to your oranges.
- Berry Blast: Toss in a handful of fresh or frozen strawberries, raspberries, or blueberries.
- Pineapple Zing: A few chunks of fresh pineapple can add a tropical twist.
Veggie Boosts:
- Orange-Carrot Refresher: Add one peeled and roughly chopped carrot. Carrots add a lovely sweetness and beta-carotene.
- Green Orange Power: A small handful of spinach or kale can be blended in. You won’t taste it much, but you’ll get extra nutrients!
Flavor Enhancers:
- Ginger Kick: A small knob of fresh ginger (about 1/2 inch, peeled) adds a warming spice.
- Minty Fresh: A few fresh mint leaves offer a cooling sensation.
- Citrus Combo: Add a segment of lemon or lime (peeled) for a brighter, tangier flavor.
When adding other ingredients, remember to adjust the amount of water as needed to achieve your desired consistency. Experimentation is key to finding your favorite flavor combinations!
Nutritional Comparison: Blender vs. Store-Bought Orange Juice
Understanding the differences between homemade blender orange juice and its store-bought counterpart highlights why making your own can be a healthier choice. Here’s a look at what you’re typically getting:
| Nutrient | Homemade Blender Orange Juice (Approx. per 8oz) | Store-Bought Orange Juice (Approx. per 8oz) |
|---|---|---|
| Calories | 80-100 | 110-120 |
| Vitamin C | High (Often 100%+ DV) | High (Often 100%+ DV, sometimes fortified) |
| Fiber | Moderate (if not strained) | Low to None |
| Added Sugars | None | Often None, but check label for “from concentrate” variations |
| Preservatives | None | May contain |
| Freshness | Highest | Lower (can be pasteurized) |
As you can see, homemade blender orange juice, especially when not strained, offers a significant advantage in fiber content. Fiber is crucial for digestive health and can help regulate blood sugar levels. Store-bought juices, while often fortified with Vitamin C, can sometimes have higher calorie counts and may lose some nutrients during processing and pasteurization. By making your own, you control exactly what goes into your glass – pure, fresh, and nutritious orange juice.
Troubleshooting Common Issues
Even with a simple process, a few hiccups might occur. Here’s how to address them:
- Juice is too thick: Add more cold water, a tablespoon at a time, and re-blend.
- Juice is too thin: Add more orange segments or a few ice cubes and re-blend.
- Blender is struggling: Ensure you cut oranges into small enough pieces. Stop the blender, stir the contents with a spatula (ensure blender is off!), and add a little more water if needed.
- Bitter taste: You might have left too much of the white pith on the oranges. Next time, be more thorough when peeling.
- Not enough juice: Use riper, juicier oranges. Ensure you’re pressing out all the liquid when straining.
Frequently Asked Questions (FAQ)
Q1: Do I need to peel the oranges completely?
Yes, it’s best to peel the oranges and remove as much of the white pith as possible. The pith can impart a bitter flavor to your juice. The peel itself is also not typically consumed in juice form.
Q2: Can I use frozen oranges?
You can, but it might make your blender work harder. If using frozen oranges, let them thaw slightly for about 15-20 minutes before blending. They will create a thicker, slushier consistency, which can be nice if you don’t plan to strain.
Q3: How long does homemade blender orange juice last?
Freshly made orange juice is best consumed immediately for optimal flavor and nutrient content. If you need to store it, keep it in an airtight container in the refrigerator for no more than 24-48 hours. The flavor and nutrient profile will degrade over time.
Q4: What can I do with the leftover orange pulp?
Don’t throw it away! Orange pulp is rich in fiber and can be added to smoothies, muffin batter, pancake mix, or even used in homemade compost. You can also dry it out to make orange zest powder.
Q5: Do I have to strain the juice?
No, you don’t have to! If you enjoy the texture and added fiber of pulp in your juice, you can skip the straining step. Blending the whole orange (minus peel and seeds) without straining provides a more nutrient-dense beverage.
Q6: Is blender orange juice healthier than store-bought?
Generally, yes. Homemade blender orange juice contains more fiber (if not strained) and has no added sugars or preservatives. You also retain more of the natural enzymes and nutrients that can be diminished during the pasteurization process of store-bought juices.
Conclusion
You’ve now learned how incredibly simple it is to make fresh orange juice using just your blender. This method is a fantastic gateway into the world of homemade juices and healthy drinks. It’s fast, requires minimal equipment, and offers a pure, refreshing taste that’s hard to beat. Whether you enjoy it with pulp for an extra fiber boost or strain it for a classic texture, you’re creating a vibrant, nutritious beverage in minutes. So go ahead, peel those oranges, fire up your blender, and enjoy the instant gratification of your very own homemade orange juice!
smartblander.com is a participant in the Amazon Services LLC Associates Program, an affiliate advertising program. As an Amazon Associate, we earn from qualifying purchases made through our links.