

Yes, you can absolutely make delicious, fresh orange juice in a blender! It’s a simple, fast, and surprisingly effective way to get vibrant, nutrient-rich juice without a special juicer, yielding amazing results.
Key Takeaways
- Peel and segment oranges for easy blending.
- Use a high-powered blender for smoother juice.
- Strain for pulp-free juice or leave for fiber.
- Adjust sweetness with honey or other fruits.
- Enjoy fresh, homemade orange juice in minutes.
Making fresh orange juice at home might seem complicated, especially if you don’t have a juicer. Many people think you need a fancy machine to get that vibrant, refreshing taste. But what if I told you your trusty blender could do the job? It’s true! You can achieve amazing results with just a few simple steps. Get ready to ditch the store-bought cartons and embrace the goodness of freshly blended orange juice. Let’s discover how easy it is to make this sunny beverage right in your kitchen.
Why Blend Your Oranges? The Blender Advantage
Using a blender to make orange juice might sound unconventional, as juicers are often the go-to tool. However, there are several compelling reasons why blending is a fantastic option, especially for beginners. It’s accessible, it’s quick, and it offers a slightly different, yet equally delightful, juice experience. This method is perfect for those who are just starting their journey into fresh juices and want a simple, no-fuss approach.
When you use a blender, you’re not just extracting liquid; you’re essentially creating a pulpy, nutrient-dense beverage. This means you get more of the orange’s goodness, including some of its natural fiber, which is often lost in traditional juicing. Plus, if you don’t own a juicer, your blender is the perfect substitute. It’s a versatile kitchen appliance that many people already have, making fresh juice accessible to more people than ever before.
This method is particularly appealing because it bypasses the need for specialized equipment. You don’t need to invest in an expensive juicer to enjoy the benefits of fresh, homemade orange juice. Your blender, a staple in most kitchens, becomes your juicing hero. It’s a straightforward process that delivers a wonderfully refreshing drink with minimal effort.
Gather Your Simple Supplies: What You’ll Need
To make delicious orange juice in your blender, you don’t need much. The beauty of this method lies in its simplicity. Having the right tools and ingredients on hand ensures a smooth and successful juicing experience. Here’s a quick checklist to get you started:
Essential Ingredients:
- Fresh Oranges: The star of the show! Choose sweet, juicy varieties like Valencia, Navel, or blood oranges for the best flavor. Aim for about 2-4 oranges per serving, depending on their size and juiciness.
- Water (Optional): A small amount of water can help the blender process the oranges more smoothly, especially if your oranges aren’t super juicy. Start with about 1/4 cup.
- Sweetener (Optional): If your oranges aren’t as sweet as you’d like, a touch of honey, maple syrup, or a date can enhance the flavor.
- Ice (Optional): For a chilled juice, you can add a few ice cubes.
Essential Equipment:
- Blender: A high-powered blender will give you the smoothest results, but a standard blender will work too. Make sure it’s clean and ready to go.
- Knife: For peeling and cutting the oranges.
- Cutting Board: A stable surface for preparing your fruit.
- Strainer or Nut Milk Bag (Optional): If you prefer pulp-free juice, you’ll need a fine-mesh sieve or a nut milk bag.
- Bowl or Pitcher: To collect the juice.
Having these items ready will make the process of making orange juice in your blender a breeze. You’re just a few steps away from enjoying a glass of pure, sunshine-in-a-glass goodness!
Step-by-Step: How to Make Orange Juice In A Blender
Ready to transform your oranges into a refreshing drink? Follow these simple steps for amazing results. This method is designed to be easy for anyone to follow, ensuring you get a delicious, healthy juice every time.
Step 1: Prepare Your Oranges
Start by washing your oranges thoroughly under cool running water. This removes any dirt or residues from the peel. Next, you’ll need to peel them. You can do this with a knife or by hand, just like you would before eating them. Once peeled, cut the oranges into quarters or smaller segments. This makes it easier for your blender to break them down. If your oranges have seeds, it’s a good idea to remove them at this stage to avoid a bitter taste in your juice. You can usually spot them and pick them out easily.
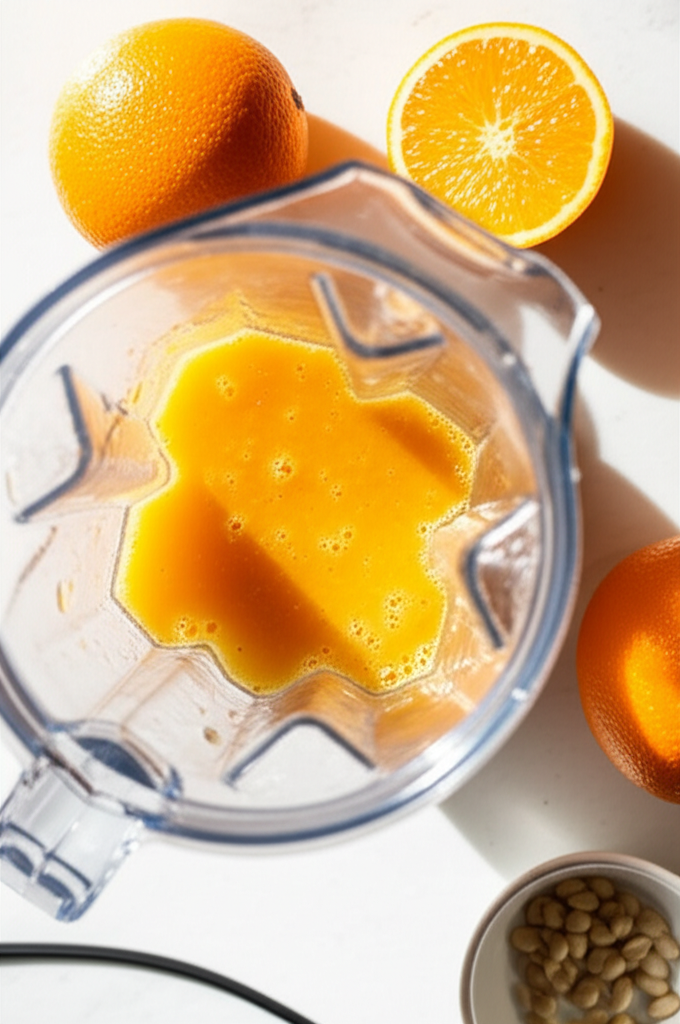
Step 2: Load Your Blender
Place the orange segments into your blender. If you’re using water, add about 1/4 cup now. This helps get the blending process started smoothly, especially if your blender isn’t the most powerful. Don’t overfill the blender; it’s better to blend in batches if you have a lot of oranges. If you plan to add any other fruits or sweeteners at this stage, add them now.
Step 3: Blend Until Smooth
Secure the lid on your blender. Start blending on a low speed, then gradually increase to high. Blend for about 30-60 seconds, or until the oranges are completely pureed and the mixture is smooth. You want to break down the fruit until there are no large chunks remaining. The consistency will be thicker than traditional juice, more like a smoothie or nectar.
Step 4: Strain (Optional) for Pulp-Free Juice
This is where you decide how you like your orange juice. If you enjoy a thicker, more fibrous drink, you can skip this step and pour directly from the blender. If you prefer a smooth, pulp-free juice, you’ll need to strain it. Place a fine-mesh sieve over a bowl or pitcher. Pour the blended orange mixture into the sieve. Use a spoon or spatula to gently press the pulp against the mesh, allowing the juice to flow through. You can also use a nut milk bag for an even smoother result, squeezing out all the liquid.
Step 5: Taste and Adjust
Once strained (or if you skipped straining), taste your fresh orange juice. If it’s not sweet enough for your liking, you can add a touch of honey, maple syrup, or a pitted date and blend again briefly. If it’s too thick, add a little more water and blend again until you reach your desired consistency.
Step 6: Serve and Enjoy!
Pour your freshly made orange juice into glasses. For an extra refreshing treat, add a few ice cubes. Serve immediately to enjoy the freshest flavor and maximum nutritional benefits. Your homemade blender orange juice is ready to be savored!
Nutritional Powerhouse: The Benefits of Fresh Orange Juice
Freshly made orange juice is more than just a delicious beverage; it’s a powerhouse of nutrients that can contribute to your overall well-being. When you make it in a blender, you retain many of the beneficial compounds that might be lost in commercial processing. Understanding these benefits can further inspire you to make this vibrant drink a regular part of your diet.
Oranges are famously rich in Vitamin C, a crucial antioxidant that supports your immune system, promotes healthy skin by aiding collagen production, and helps your body absorb iron. A single serving of fresh orange juice can provide a significant portion of your daily Vitamin C needs. Beyond Vitamin C, oranges also offer other beneficial compounds like flavonoids and potassium. Flavonoids, such as hesperidin, have been studied for their potential anti-inflammatory and heart-health benefits. Potassium is vital for maintaining healthy blood pressure and fluid balance in the body.
The fiber content, especially if you choose to consume some pulp or don’t strain your juice too rigorously, is another significant advantage. Dietary fiber plays a key role in digestive health, helping to regulate bowel movements and promoting a feeling of fullness, which can be beneficial for weight management. It also helps in managing blood sugar levels.
Here’s a look at the general nutritional profile you can expect from a serving of fresh orange juice (approx. 8 oz or 240ml), though values can vary based on the type and size of the oranges used:
| Nutrient | Approximate Amount | Key Benefits |
|---|---|---|
| Calories | 110-120 kcal | Provides energy. |
| Vitamin C | 100-120% DV | Boosts immunity, skin health, antioxidant. |
| Potassium | 400-500 mg | Supports blood pressure, fluid balance. |
| Folate (Vitamin B9) | 10-15% DV | Essential for cell growth and DNA formation. |
| Fiber (if pulp is included) | 1-2 grams | Aids digestion, helps manage blood sugar. |
| Carbohydrates (Sugars) | 25-30 grams | Primary energy source. |
*DV = Daily Value. These are approximate values and can vary.
Making your own orange juice in a blender ensures you’re consuming a pure, natural product without added sugars or preservatives often found in store-bought versions. It’s a simple way to boost your nutrient intake and enjoy a delicious, health-promoting drink.
Tips for Amazing Blender Orange Juice Results
To elevate your blender orange juice from good to amazing, a few insider tips can make all the difference. These pointers focus on maximizing flavor, achieving the best texture, and ensuring you get the most out of your oranges.
Pro Tip: Use Room Temperature Oranges
While cold oranges might seem appealing, using oranges that are at room temperature can actually help your blender work more efficiently. Cold fruits are harder, and their skins can be tougher, making them more difficult for the blades to process. Let your oranges sit out for about 30 minutes before preparing them. This small step can lead to a smoother blend and easier processing, especially for less powerful blenders.
Choose the Right Oranges
The type of orange you use significantly impacts the flavor and juiciness of your final product. Valencia oranges are often considered the best for juicing due to their high juice content and sweet flavor. Navel oranges are also a good choice, though they can sometimes be a bit more watery. Blood oranges offer a beautiful color and a unique, slightly berry-like flavor. Experiment with different varieties to find your favorite!
Don’t Forget the Zest (with caution!)
The zest of the orange contains essential oils that add a wonderful aroma and a subtle, complex flavor. If you like a bit of zestiness, you can add a small strip of peel (about 1-2 inches long) along with the orange segments. However, be mindful of the pith (the white part under the peel), as it can be bitter. If you’re new to this, it’s best to stick to just the flesh of the orange. For those who enjoy a stronger citrus kick, consider zesting a small portion of one orange and adding it to the blender.
Achieving the Perfect Consistency
The amount of water you add is key to controlling the thickness of your juice. Start with less water and add more gradually if needed. If you want a thicker, more nectar-like consistency, use minimal water or skip it altogether. For a thinner juice, add more water until you reach your desired consistency. Remember that straining also affects the final texture.
Sweetness Control
Oranges vary in sweetness. Always taste your juice before adding any sweeteners. If your oranges are perfectly sweet, you won’t need anything else. If they’re a bit tart, natural sweeteners like a pitted Medjool date, a drizzle of honey, or a splash of maple syrup can do the trick. Blend for a few more seconds after adding any sweetener to ensure it’s fully incorporated.
Pulp: Your Choice!
The decision to strain or not to strain is entirely personal. Straining removes the pulp, giving you a clear, smooth juice similar to what you might buy in a store. However, the pulp contains beneficial fiber and nutrients. If you don’t mind a little texture, leaving the pulp in creates a more nutrient-dense beverage that is also more filling. Experiment to see which you prefer!
Blending Power Matters
A high-speed blender will pulverize the oranges more effectively, resulting in a smoother juice with less need for straining. If you have a less powerful blender, you might need to blend for a bit longer or cut the oranges into even smaller pieces. Adding a little water or ice can also help older blenders process the fruit more easily.
By keeping these tips in mind, you can consistently make amazing orange juice in your blender that is both delicious and satisfying.
Creative Twists: Beyond Plain Orange Juice
While plain orange juice made in a blender is fantastic on its own, don’t be afraid to get creative! Adding other ingredients can introduce new flavors, boost the nutritional profile, and create exciting new beverage experiences. Think of your blender as a gateway to a world of fresh juice and smoothie possibilities.
Fruity Combinations
Oranges pair beautifully with a variety of other fruits. Try adding:
- A handful of berries (strawberries, blueberries, raspberries): For added antioxidants and a touch of tartness.
- Half a banana: To create a creamier texture and add natural sweetness.
- Pineapple chunks: For a tropical twist and added sweetness.
- A few slices of mango: For a rich, smooth, and tropical flavor.
- A small piece of ginger: For a zesty, invigorating kick and its anti-inflammatory properties.
When combining fruits, remember that their natural sweetness and acidity will affect the overall taste. You might need to adjust the amount of sweetener or water accordingly.
Veggie Boosters
If you want to sneak in some extra vegetables, oranges are a great base to mask their flavors. Consider adding:
- A small handful of spinach or kale: You’ll get a nutritional boost without significantly altering the taste, especially with the strong flavor of oranges.
- A few slices of carrot: Adds a subtle sweetness and beta-carotene.
- A small piece of cucumber: For added hydration and a refreshing, mild flavor.
Start with small amounts of vegetables to get accustomed to the taste. The sweetness of the orange and any other added fruits will help make the vegetables more palatable.
Flavor Enhancers
Want to add a little something extra? Consider these additions:
- A squeeze of lime or lemon juice: To brighten the flavor and add a touch of tartness.
- A sprig of mint: For a cool, refreshing finish.
- A pinch of cinnamon or turmeric: For added flavor and health benefits.
Texture Adjustments
The beauty of using a blender is controlling the texture. If you want a thinner juice, add more water or coconut water. For a thicker, more milkshake-like consistency, add a frozen banana or a few ice cubes. For a truly smooth drink, ensure you blend for long enough or use a high-powered blender.
Here’s a quick guide to some popular blender juice combinations:
| Combination Name | Ingredients (per serving) | Flavor Profile | Benefits |
|---|---|---|---|
| Orange Berry Blast | 2 Oranges, 1/2 cup Strawberries, 1/4 cup Water | Sweet, slightly tart, fruity | High in Vitamin C and antioxidants |
| Tropical Sunshine | 2 Oranges, 1/2 cup Pineapple, 1/4 cup Mango | Sweet, tropical, vibrant | Rich in vitamins and enzymes |
| Green Citrus Zinger | 2 Oranges, 1 handful Spinach, 1/2 inch Ginger | Sweet, citrusy with a spicy kick | Immune support, anti-inflammatory |
| Creamy Orange Dream | 2 Oranges, 1/2 Banana, 1/4 cup Water | Sweet, creamy, smooth | Good source of potassium and fiber |
Experimenting with these creative twists will help you discover your favorite blender juice recipes. Remember to start with fresh, quality ingredients for the best possible taste and nutritional value.
Frequently Asked Questions About Blender Orange Juice
Here are some common questions beginners might have when making orange juice in a blender:
Q1: Can I use any type of orange to make juice in a blender?
A1: Yes, you can use most types of oranges. Valencia and Navel oranges are excellent choices due to their sweetness and juiciness. Blood oranges offer a unique flavor and color. Even slightly less sweet varieties can work, especially if you plan to add a natural sweetener.
Q2: Do I need to peel the oranges?
A2: Yes, you must peel the oranges before blending. The peel is tough and can impart a bitter flavor and undesirable texture to your juice. You should also remove any seeds.
Q3: How much water should I add?
A3: Start with a small amount, about 1/4 cup of water for every 2-3 oranges. This helps the blender process the fruit. You can add more water gradually if you prefer a thinner consistency or if your blender is struggling. If you want a thicker juice, use less water or none at all.
Q4: Is blender orange juice the same as juiced orange juice?
A4: Not exactly. Blender juice tends to be thicker and contains more pulp and fiber, as the entire fruit (minus the peel and seeds) is processed. Traditional juicers separate the juice from the pulp, resulting in a thinner, clearer liquid. Blender juice is often closer to a smoothie or nectar in consistency.
Q5: How long does it take to make orange juice in a blender?
A5: The process is very quick! Peeling and segmenting the oranges takes about 2-3 minutes. Blending takes about 30-60 seconds. If you strain it, that adds another minute or two. You can have fresh orange juice ready in under 5 minutes.
Q6: Can I make blender orange juice ahead of time?
A6: Freshly made juice is always best. However, you can store it in an airtight container in the refrigerator for up to 24 hours. The flavor and nutrient content may degrade slightly over time, and separation might occur, so give it a good shake or stir before drinking.
Q7: What if my blender isn’t very powerful?
A7: If you have a standard blender, not a high-powered one, you can still make great orange juice. Ensure you cut the orange segments into smaller pieces. Add a bit more water to help with blending. Blend in shorter bursts, stopping to stir if necessary, until the mixture is as smooth as possible. You might find straining becomes more important for a smoother texture.
Conclusion: Your Blender, Your Juice Bar
You’ve seen just how simple and rewarding it is to make fresh orange juice using your blender. It’s a fantastic way to bring the taste of sunshine into your kitchen without needing specialized equipment. From gathering your ingredients to that first refreshing sip, the entire process is quick, easy, and yields amazing results.
Embracing this method means you have direct control over what goes into your glass – no added sugars, no preservatives, just pure, natural goodness. Whether you enjoy it pulp-free or with a bit of fiber, your blender is ready to deliver a vibrant, nutrient-rich beverage that can help boost your day. So go ahead, peel those oranges, fire up your blender, and enjoy the incredible taste of homemade orange juice. Your personal juice bar awaits!
smartblander.com is a participant in the Amazon Services LLC Associates Program, an affiliate advertising program. As an Amazon Associate, we earn from qualifying purchases made through our links.