

You can absolutely make delicious, fresh juice without a blender! Discover simple, effective methods to extract vibrant flavors and nutrients from fruits and vegetables, proving that a juicer isn’t always necessary for homemade goodness.
Key Takeaways
- Extract fresh juice using common kitchen tools.
- Master manual methods like straining and pressing.
- Explore techniques for various fruits and vegetables.
- Achieve nutrient-rich drinks without expensive equipment.
- Enjoy homemade juice with minimal fuss and effort.
How To Make Juice Without A Blender: Astonishing!
Dreaming of fresh, vibrant juice but don’t own a blender or juicer? You’re not alone! Many people think juicing requires specialized gadgets, but that’s simply not true. Making delicious, nutrient-packed juice at home is surprisingly accessible, even with just a few basic kitchen items. Forget expensive machinery; we’re going back to simple, effective methods that have been used for centuries. This guide will show you exactly how to unlock the goodness in your favorite fruits and vegetables, proving that you can indeed make juice without a blender. Get ready to be astonished by how easy and rewarding it can be!
Why Juice Without a Blender?
There are many reasons why you might find yourself wanting to make juice without a blender. Perhaps you’re new to the world of fresh juices and don’t want to invest in costly equipment just yet. Maybe your blender is broken, or you’re traveling and only have access to basic kitchen supplies. Or, you might simply be curious about alternative methods and want to explore a more hands-on approach to extracting liquid gold from your produce.
Whatever your reason, the ability to make juice without a blender opens up a world of healthy possibilities. You can create refreshing drinks, incorporate more fruits and vegetables into your diet, and enjoy the pure, unadulterated taste of fresh ingredients. This approach also often leads to a more rustic, less processed juice, allowing you to truly appreciate the natural flavors and textures. Let’s dive into the methods that will make you a juice-making pro, blender or no blender!
Essential Tools for Blender-Free Juicing
Before we start squeezing, let’s gather our arsenal. You might be surprised by how many of these items you already have in your kitchen! The beauty of these methods is their simplicity and accessibility. You don’t need a dedicated juicing setup to get started.
The Must-Haves:
- Fine-Mesh Sieve or Strainer: This is your primary tool for separating liquid from pulp. A sieve with very small holes is ideal for a smoother juice.
- Cheesecloth or Nut Milk Bag: For an even finer strain, especially with softer fruits or leafy greens, cheesecloth or a dedicated nut milk bag is invaluable. It catches even the smallest particles.
- Bowl or Pitcher: You’ll need a container to catch your freshly squeezed juice. A wide-mouthed bowl works well.
- Spoon or Masher: For pressing and mashing fruits and vegetables to release their juices.
- Knife and Cutting Board: For preparing your produce.
- Gloves (Optional but Recommended): Especially for juicy fruits like berries or beets, gloves will keep your hands from getting stained.
Helpful Additions:
- Citrus Juicer (Manual): If you plan on making a lot of citrus juice, a simple manual citrus juicer can be a great addition.
- Mortar and Pestle: For very small batches or for mashing softer ingredients, this can be useful.
- Clean Towels or Paper Towels: For wiping up spills and keeping your workspace clean.
With these tools, you’re well on your way to crafting delicious juices. Now, let’s get to the exciting part: the methods!
Method 1: The Straining & Pressing Technique (Best for Soft Fruits & Cooked Veggies)
This is perhaps the most straightforward and versatile method for making juice without a blender, especially when dealing with soft fruits or vegetables that benefit from a little pre-softening. Think berries, grapes, cooked apples, or even tomatoes.
Step-by-Step Guide:
- Prepare Your Produce: Wash your fruits and vegetables thoroughly. For larger items like apples, you might want to chop them into smaller pieces. For berries, a gentle rinse is usually sufficient. If using tougher vegetables like carrots or beets, you’ll get better results by steaming or boiling them until slightly tender before proceeding.
- Mash or Muddle: Place your prepared produce into a sturdy bowl. Use a spoon, potato masher, or even your hands (with gloves!) to thoroughly mash the ingredients. The goal is to break them down and release as much juice as possible. For cooked vegetables, this step is much easier.
- The Strain: Place your fine-mesh sieve over another bowl or pitcher. Pour the mashed produce into the sieve.
- Press for Juice: Using the back of your spoon or a spatula, press down firmly on the pulp in the sieve. Work your way around, pushing the juice through the mesh into the bowl below. Be patient; this can take a few minutes.
- Second Strain (Optional): For a clearer, smoother juice, line your sieve with a double layer of cheesecloth or use a nut milk bag. Pour the strained liquid through this finer filter. Gather the edges of the cheesecloth or nut milk bag and gently twist and squeeze to extract the remaining juice.
- Serve and Enjoy: Your fresh juice is ready! Discard the pulp (or save it for baking or compost).
This method is fantastic for capturing the essence of fruits like strawberries, raspberries, and blueberries. It’s also a great way to make a simple apple juice if you first steam or boil the apple chunks until soft. The steaming process breaks down the cell walls, making juice extraction much more efficient.
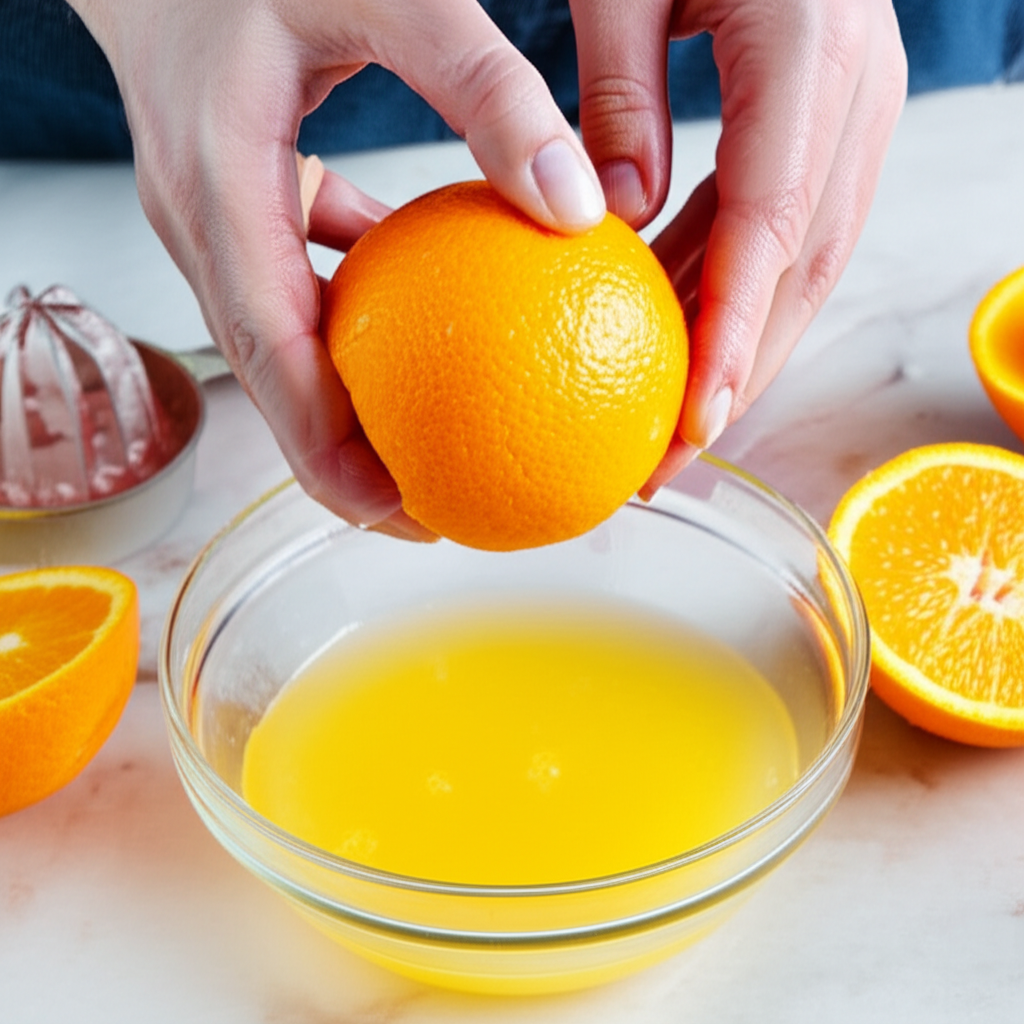
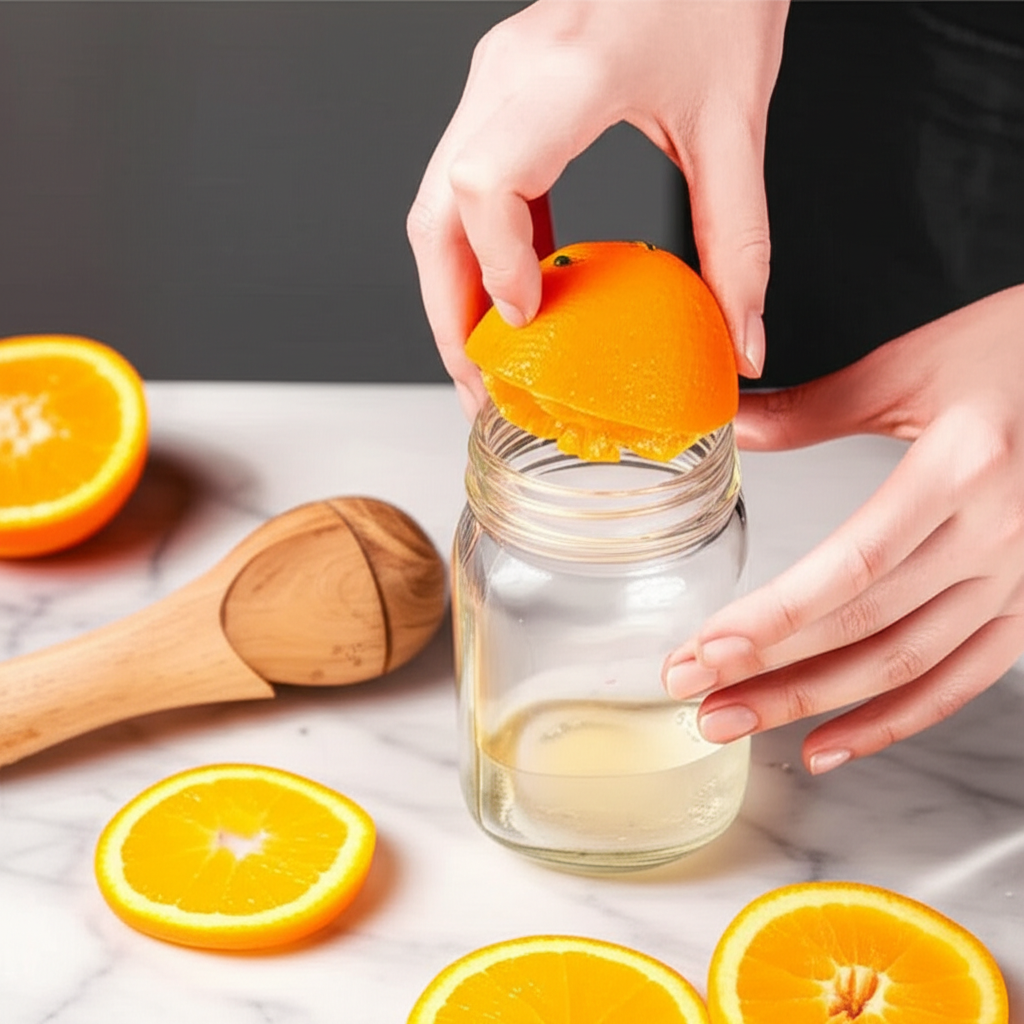
Method 2: The Citrus Squeeze (Perfect for Oranges, Lemons, Limes & Grapefruits)
When it comes to citrus fruits, nature has already provided a built-in juicing mechanism: the fruit itself! You don’t need any fancy equipment to get delicious citrus juice.
Step-by-Step Guide:
- Select and Roll: Choose ripe, juicy citrus fruits. Before cutting, firmly roll each fruit on a countertop with the palm of your hand. This helps to break down the internal membranes, making them easier to juice.
- Cut in Half: Slice the citrus fruits horizontally across their equator.
- Manual Juicing:
- With a Manual Citrus Juicer: Place one half of the fruit, cut-side down, onto the reamer of your manual citrus juicer. Press down and twist firmly to extract all the juice. Repeat for all halves.
- Without a Citrus Juicer: Hold a fruit half firmly over a bowl. Use your fingers to squeeze and twist the fruit, forcing the juice out. This can be a bit messier, but it works! For a slightly cleaner approach, you can place the fruit half cut-side down into the palm of your hand, over a bowl, and squeeze firmly.
- Strain (Optional): If you prefer juice without pulp or seeds, pour the freshly squeezed juice through a fine-mesh sieve into your serving glass or pitcher.
- Serve: Enjoy your pure, refreshing citrus juice immediately!
This is the simplest way to get juice from oranges, lemons, limes, and grapefruits. It’s a quick way to get your daily dose of Vitamin C and a fantastic base for many other drinks.
Method 3: The Bag Squeeze (Ideal for Leafy Greens & Soft Fruits)
This method is a step up from basic straining and is particularly effective for extracting juice from leafy greens and softer fruits that might lose too much pulp through a sieve alone. A nut milk bag or a strong piece of cheesecloth is key here.
Step-by-Step Guide:
- Prepare Produce: Wash all ingredients thoroughly. For leafy greens like spinach, kale, or parsley, you can chop them into smaller pieces. For softer fruits like berries or melon, you can mash them slightly beforehand with a fork or masher to help release juices.
- Fill the Bag: Place your nut milk bag or double-layered cheesecloth into a large bowl. Carefully spoon or pour your prepared fruits and greens into the bag. Don’t overfill it; leave enough room to tie or close the top.
- Tie and Twist: Gather the top of the bag and tie it securely with a string or knot it tightly.
- Squeeze with All Your Might: Hold the tied bag over a clean bowl or pitcher. Begin to squeeze the bag firmly and consistently. You’ll see the juice start to flow out. Keep squeezing until you’ve extracted as much liquid as possible. You might need to knead and twist the bag to get every last drop.
- Repeat if Necessary: For very fibrous greens, you might want to strain a second time through a fresh piece of cheesecloth for an even smoother result.
- Enjoy Your Nutrient-Rich Juice: Discard the pulp left in the bag.
This method is excellent for creating green juices. While it requires a bit more effort than citrus juicing, it’s surprisingly effective for getting the goodness out of ingredients like spinach, cucumber, and even softer vegetables like zucchini. For tougher ingredients like carrots or celery, pre-cooking or finely grating them first can improve juice yield.
Method 4: The Grating & Straining Method (For Harder Vegetables)
When you want to juice harder vegetables like carrots, beets, or ginger without a juicer or blender, grating is your best friend. This breaks down the tough fibers, making the juice more accessible.
Step-by-Step Guide:
- Prepare Vegetables: Wash and peel your vegetables if necessary (e.g., beets, ginger). Grate them using the fine side of a box grater or a dedicated grating tool. Wear gloves for beets and ginger, as they can stain.
- Place in Strainer: Put the grated vegetable pulp into a fine-mesh sieve, ideally one lined with cheesecloth or a nut milk bag for best results.
- Press and Squeeze: Use a spoon to press down on the grated material, forcing the juice through the sieve. If using a cheesecloth or nut milk bag, gather the edges and twist and squeeze firmly to extract the liquid.
- Collect the Juice: Ensure you have a bowl positioned underneath to catch all the extracted juice.
- Repeat if Needed: For tougher vegetables, you might need to grate them in batches and repeat the pressing process to maximize yield.
- Serve: Enjoy your vibrant vegetable juice!
This method works well for ginger, garlic, and other root vegetables. The resulting juice will be potent and packed with flavor. You can even add a little water to the pulp and re-squeeze to dilute and extract a bit more juice if desired.
Juicing Specific Produce Without a Blender
Different fruits and vegetables require slightly different approaches when you’re working without a blender. Here’s a quick guide for some popular choices:
Soft Fruits (Berries, Grapes, Melon)
These are generally the easiest. Mash them well and then strain using a sieve, cheesecloth, or nut milk bag. For grapes, you can crush them and then strain, or even gently boil them first to soften them further before mashing and straining.
Citrus Fruits (Oranges, Lemons, Limes, Grapefruits)
As covered in Method 2, a manual citrus press is ideal, but even just squeezing by hand works effectively. Rolling them first is key!
Hard Vegetables (Carrots, Beets, Celery)
These are trickier. You’ll get the best results by grating them first (Method 4) and then pressing the pulp. Alternatively, you can cook them until tender, mash them, and then strain (Method 1). Juicing raw, hard vegetables without a dedicated juicer is challenging but possible with fine grating and vigorous pressing.
Leafy Greens (Spinach, Kale, Parsley)
The bag squeeze method (Method 3) is your best bet. Chop them finely and squeeze them vigorously in a nut milk bag or cheesecloth. You can also combine them with softer fruits that have already been mashed and strained, adding the greens to the pulp before the final squeeze.
Apples and Pears
These are best when cooked first. Chop them, steam or boil until soft, then mash and strain (Method 1). This breaks down the fibrous structure and releases the juice easily. Trying to juice raw apples without a juicer can be very difficult and yield minimal results.
Tomatoes
For tomato juice, you can simmer whole tomatoes until soft, then press them through a sieve or cheesecloth. Alternatively, for a raw juice, you can mash them very well and strain, but the texture might be more pulpy.
Creating Flavorful Combinations
Once you’ve mastered the basic techniques, you can start experimenting with delicious juice combinations. Remember that the yield will vary based on the juiciness of your ingredients and the method used. It’s often a good idea to combine juicier ingredients with less juicy ones.
Beginner-Friendly Combinations:
- Orange-Apple: Juice oranges (Method 2) and then mash and strain cooked apples (Method 1) and combine.
- Cucumber-Lemon-Mint: Mash cucumber, juice lemon, and finely chop mint. Strain the cucumber and lemon juice together, then stir in the mint.
- Berry Blast: Mash mixed berries and strain through cheesecloth (Method 3).
- Carrot-Ginger: Grate carrots and ginger, then press through cheesecloth (Method 4).
Tips for Flavor:
- Sweetness: Apples, pears, oranges, and berries add natural sweetness.
- Tanginess: Lemons, limes, and tart berries provide a zesty kick.
- Earthy Notes: Beets and carrots add depth.
- Freshness: Mint, parsley, and cucumber bring a refreshing element.
Remember to adjust quantities to your taste. Starting with simpler, single-ingredient juices can also help you appreciate the pure flavor of each fruit or vegetable.
Understanding Juice Yield and Pulp
When juicing without a blender or a dedicated juicer, you’ll notice that the yield of juice might be lower compared to using specialized equipment. This is because these manual methods are less efficient at breaking down plant fibers and extracting every last drop.
Juice Yield: Be prepared for a less concentrated juice. For example, juicing hard vegetables like carrots without a powerful juicer will require significant effort and may result in less juice per pound of vegetable compared to using a centrifugal or masticating juicer. Soft fruits like berries and juicy citrus will yield more readily.
Pulp: You will invariably have more pulp left over. Don’t throw it away! Vegetable and fruit pulp is a valuable resource.
What to Do with Leftover Pulp:
- Baking: Add fruit pulp to muffins, cakes, or breads for added moisture and fiber.
- Smoothies: Toss vegetable pulp into smoothies for an extra nutritional boost (this is where a blender comes in handy again!).
- Composting: If you have a compost bin, pulp is excellent organic matter.
- Veggie Burgers/Patties: Mix vegetable pulp with binders like oats or flour and spices to create homemade veggie patties.
- Soups: Some vegetable pulps can be added to thicken and flavor soups.
Thinking about how to use your pulp can make the juicing process feel more sustainable and less wasteful.
Nutritional Considerations
Freshly made juice, regardless of the method, is a fantastic way to consume vitamins, minerals, and antioxidants. However, it’s important to be aware of a few nutritional aspects:
- Fiber Loss: Most juicing methods, including those without a blender, remove a significant amount of the fruit’s or vegetable’s natural fiber. Fiber is crucial for digestion, blood sugar regulation, and satiety.
- Sugar Content: Fruit juices, in particular, can be high in natural sugars. While these are natural sugars, consuming large quantities can still impact blood sugar levels. It’s often recommended to balance fruit juices with vegetable juices or consume them in moderation.
- Nutrient Density: Juicing concentrates the vitamins and minerals. This can be a great way to get a potent dose of nutrients, but it also means you’re consuming the sugars and calories in a more concentrated form than if you ate the whole fruit or vegetable.
For a more nutritionally complete drink, consider making “smoothies” where you blend the whole fruit/vegetable, retaining the fiber. However, when the goal is specifically clear juice, these methods provide a healthy alternative to store-bought options that might contain added sugars or preservatives. According to the American Heart Association, whole fruits and vegetables are generally preferred over juices due to their fiber content.
Pro Tips for Juicing Without a Blender
Pro Tip: For tougher vegetables like carrots or beets, grating them very finely and then steaming them for just 5 minutes before squeezing can significantly increase your juice yield and make the process easier.
Frequently Asked Questions (FAQ)
Q1: Can I really make good juice without any special equipment?
Absolutely! With basic kitchen tools like a sieve, cheesecloth, or nut milk bag, you can extract delicious and nutritious juice from many fruits and vegetables. The methods involve straining, mashing, and pressing.
Q2: Which fruits and vegetables are easiest to juice without a blender?
Citrus fruits (oranges, lemons, limes) are the easiest, requiring only manual squeezing. Soft fruits like berries and grapes are also quite straightforward. Leafy greens and some softer vegetables can be juiced using a straining bag.
Q3: How do I juice hard vegetables like carrots or beets without a blender or juicer?
The best approach is to grate them very finely first. Then, place the grated pulp into a cheesecloth or nut milk bag and squeeze firmly to extract the juice. Cooking them until tender before mashing and straining is another effective method.
Q4: Will my juice have a lot of pulp?
Yes, juices made without a high-powered blender or juicer will likely contain more pulp. You can strain the juice multiple times through finer materials like cheesecloth or a nut milk bag to reduce pulp, but some will likely remain. You can also choose to embrace a more rustic, pulpy juice!
Q5: How much juice can I expect to get?
The yield will vary greatly depending on the ingredient’s water content and the method used. Juicy fruits like oranges will give you a good amount of juice. Denser vegetables and fruits that aren’t very watery will yield less juice. Be patient and persistent with squeezing to maximize your output.
Q6: Is juice made this way as healthy as store-bought juice?
It can be healthier because you control the ingredients, ensuring no added sugars or preservatives. However, remember that most juicing methods remove fiber. For optimal health, consuming whole fruits and vegetables is often recommended. But for a fresh, pure juice experience at home, these methods are excellent!
Q7: Can I combine fruits and vegetables for my juice?
Definitely! Combining ingredients can create more balanced and complex flavors. For example, sweeten tart fruits with apples or oranges, or balance earthy root vegetables with citrus. Experiment to find your favorite combinations!
Conclusion
Making fresh juice at home without a blender is not only possible but also incredibly rewarding. You’ve learned simple, effective techniques using common kitchen tools to extract vibrant juices from a wide range of fruits and vegetables. Whether you’re squeezing citrus by hand, mashing berries through a sieve, or vigorously pressing greens in a nut milk bag, the power to create healthy, delicious drinks is in your hands. Embrace these methods, experiment with flavors, and enjoy the astonishingly fresh taste of your homemade creations. You don’t need fancy gadgets to live a juicier, healthier life!
smartblander.com is a participant in the Amazon Services LLC Associates Program, an affiliate advertising program. As an Amazon Associate, we earn from qualifying purchases made through our links.