

Making delicious, fresh apple juice at home without a blender is surprisingly simple! You can extract pure, vibrant apple juice using basic kitchen tools and a few easy steps, proving you don’t need fancy equipment for healthy, homemade goodness.
Key Takeaways
- Boil and strain apples for simple juice extraction.
- Use cheesecloth or a fine-mesh sieve for clear juice.
- Sweeten naturally with honey or maple syrup if desired.
- Store homemade apple juice properly to maintain freshness.
- Enjoy vibrant, nutrient-rich apple juice made easily at home.
Have you ever craved a glass of fresh, crisp apple juice, only to realize you don’t have a juicer or even a blender? It’s a common kitchen dilemma. Many people think juicing requires specialized gadgets, but that’s simply not true. You can absolutely make wonderful apple juice with everyday items you likely already have. This guide will show you exactly how to do it, step-by-step. Get ready to enjoy the pure, delicious taste of homemade apple juice without any fuss.
Why Make Apple Juice Without a Blender?
The desire for fresh, homemade apple juice often stems from wanting to control ingredients, avoid added sugars, and enjoy the natural goodness of fruit. When you make your own, you bypass the preservatives and artificial flavors often found in store-bought versions. Plus, it’s incredibly satisfying to create something so wholesome from scratch. Many believe juicing requires an expensive juicer or a powerful blender, leading them to believe fresh juice is out of reach. However, with a few basic kitchen staples, you can achieve fantastic results. This method is perfect for anyone looking to incorporate more natural goodness into their diet without a significant investment in new appliances.
Gathering Your Apple Juice Ingredients and Tools
Before we dive into the “how-to,” let’s make sure you have everything you need. The beauty of this method is its simplicity, relying on common kitchen items rather than specialized juicing equipment. This makes it accessible for everyone, regardless of their kitchen setup.
Essential Ingredients
- Apples: Choose a variety you enjoy. Sweeter apples like Fuji, Gala, or Honeycrisp will yield a sweeter juice. Tart apples like Granny Smith can add a nice zing. A mix is often best for balanced flavor. You’ll need about 4-6 medium apples per cup of juice.
- Water: A small amount, typically 1/4 to 1/2 cup, is needed to help soften the apples and make extraction easier.
- Sweetener (Optional): If your apples aren’t sweet enough for your liking, you can add a touch of honey, maple syrup, or agave nectar after juicing.
- Lemon Juice (Optional): A squeeze of fresh lemon juice can brighten the flavor and help preserve the color, especially if you’re not consuming the juice immediately.
Necessary Tools
You might be surprised by how few tools you actually need. These are all common items found in most kitchens:
- Large Pot with a Lid: For cooking the apples.
- Knife and Cutting Board: For preparing the apples.
- Potato Masher or Wooden Spoon: For mashing the cooked apples.
- Fine-Mesh Sieve or Colander: To strain out the larger solids.
- Cheesecloth or Nut Milk Bag: This is crucial for getting clear, pulp-free juice. If you don’t have cheesecloth, a clean, thin kitchen towel or even a clean pair of pantyhose (yes, really!) can work in a pinch.
- Bowl: To collect the juice.
- Measuring Cups and Spoons.
- Storage Container: A clean glass bottle or jar with a lid for storing your juice.
Step-by-Step Guide: How to Make Apple Juice Without a Blender
Now for the fun part! Follow these simple steps to create your own fresh apple juice. This method involves cooking the apples to soften them, making it easier to extract their juice through straining.
Step 1: Prepare the Apples
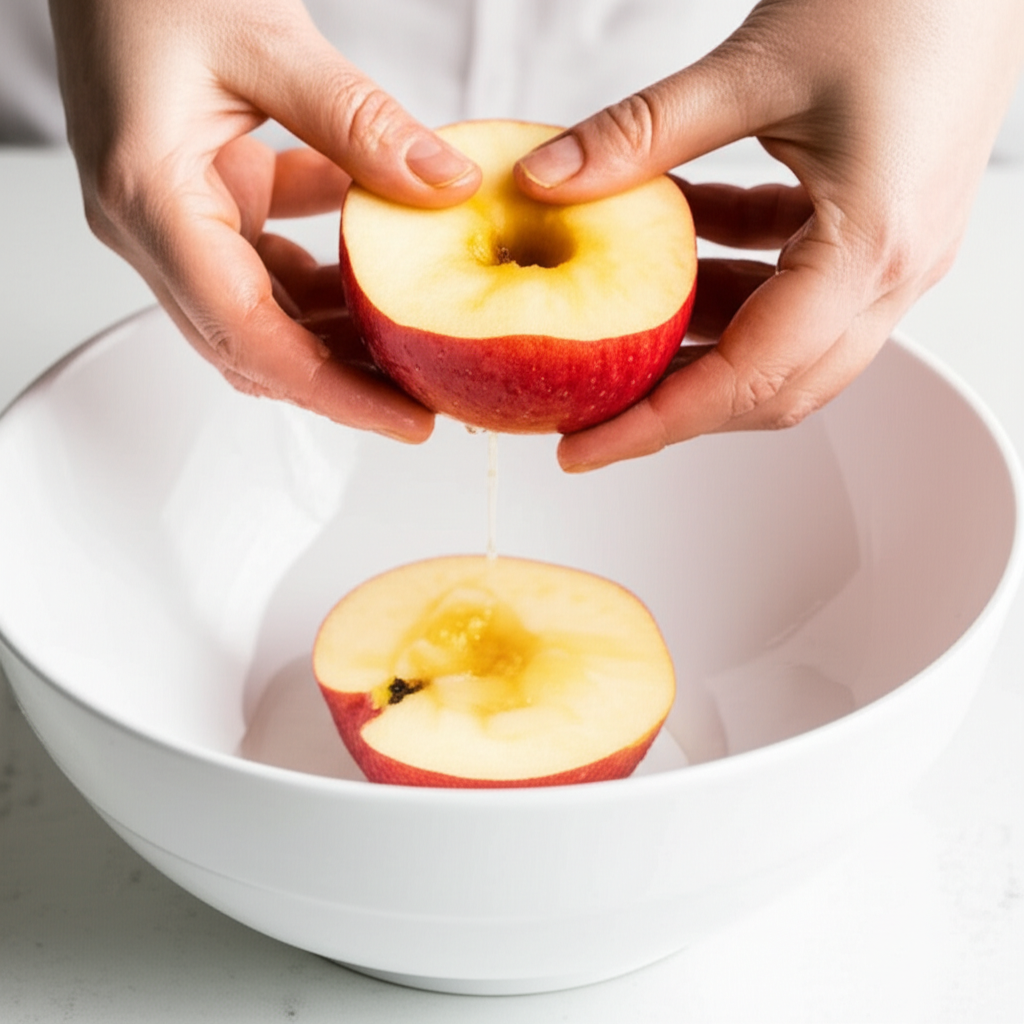
Start by washing your apples thoroughly under cool running water. You can peel them if you prefer a smoother juice, but leaving the peel on adds extra nutrients and fiber. Core the apples and cut them into quarters or smaller chunks. Removing the core and seeds is recommended as they can impart a slightly bitter flavor.
Step 2: Cook the Apples
Place the apple pieces into your large pot. Add about 1/4 to 1/2 cup of water. The water helps prevent scorching and aids in softening the apples. You don’t need much water; the apples will release their own juices as they cook.
Cover the pot and bring the water to a simmer over medium heat. Once simmering, reduce the heat to low and let the apples cook for about 15-20 minutes, or until they are very soft and tender. You should be able to easily pierce them with a fork. Stir occasionally to ensure even cooking.
Step 3: Mash the Cooked Apples
Once the apples are soft, remove the pot from the heat. Use a potato masher or the back of a sturdy wooden spoon to mash the apples. The goal here is to break them down as much as possible, releasing more of their juice. Mash them until they form a soft, pulpy mixture.
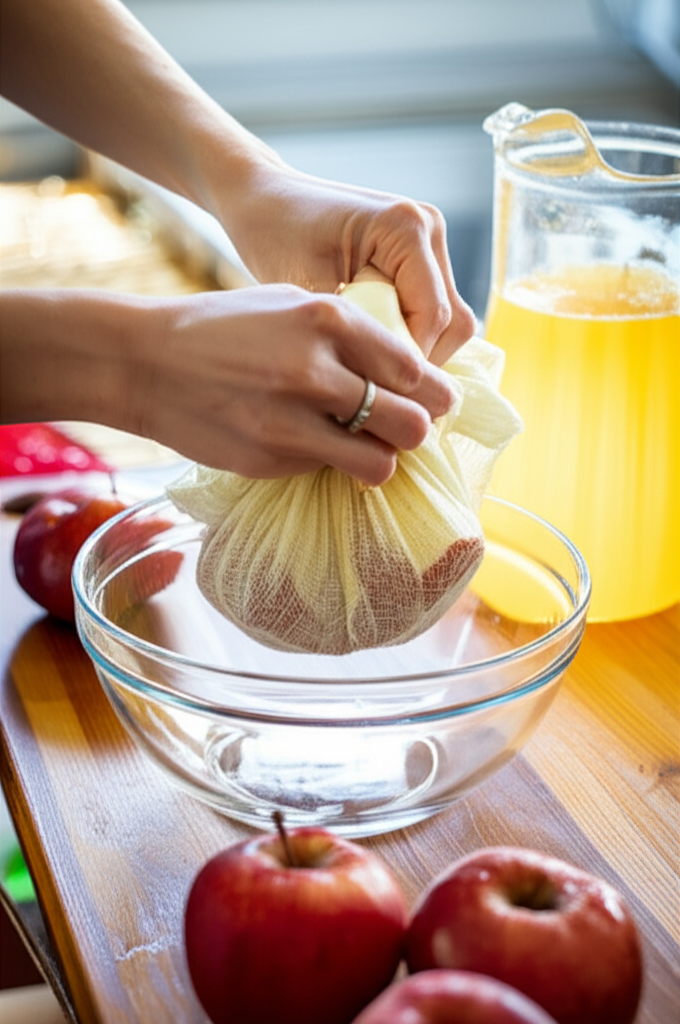
Step 4: Strain the Juice (First Pass)
Place your fine-mesh sieve or colander over a large bowl. Line the sieve with a layer or two of cheesecloth, or use a nut milk bag. Spoon the mashed apple mixture into the cheesecloth-lined sieve. Let it sit for a few minutes to allow the initial juice to drain through. You can gently press down on the pulp with the back of a spoon to encourage more juice to flow, but avoid squeezing too hard at this stage if you want a clearer juice.
Step 5: Strain the Juice (Second Pass for Clarity)
For a clearer, pulp-free juice, you’ll want to strain it a second time. Gather the edges of the cheesecloth (or close the nut milk bag) around the pulp. Carefully lift it and gently squeeze the bag over the bowl to extract the remaining liquid. Be patient; this might take a few minutes. The result should be a good amount of cloudy apple juice.
If you don’t have cheesecloth, you can also use a clean, thin kitchen towel placed inside the sieve for the second straining. Ensure the towel is colorfast and has not been used with strong detergents.
Step 6: Sweeten and Flavor (Optional)
Taste your freshly strained apple juice. If it’s not sweet enough for your preference, now is the time to add your optional sweetener. Start with a teaspoon of honey or maple syrup and stir well. You can add more to taste. A squeeze of fresh lemon juice can also add a lovely brightness. Stir everything together thoroughly.
Step 7: Chill and Serve
Pour your homemade apple juice into a clean glass jar or bottle. Cover it tightly. For the best flavor and to preserve freshness, chill the juice in the refrigerator for at least an hour before serving. This allows the flavors to meld and the juice to become perfectly refreshing.
Variations and Flavor Boosts
Once you’ve mastered the basic apple juice, don’t be afraid to experiment! Adding other fruits or spices can create exciting new flavor profiles. Here are a few ideas to get you started:
Fruity Combinations
- Apple-Pear Juice: Add one ripe pear to the pot along with the apples. Pears add a lovely sweetness and smooth texture.
- Apple-Berry Juice: Add a handful of berries (like raspberries or blueberries) during the last 5 minutes of cooking. Strain as usual. Berries add vibrant color and a tart-sweet flavor.
- Apple-Citrus Splash: Add the juice of half an orange or a few slices of orange (peeled) to the pot while cooking for a bright, zesty kick.
Spiced Apple Nectar
Warm spices pair beautifully with apple juice. You can add these during the cooking process:
- Cinnamon Stick: Add one cinnamon stick to the pot while the apples are cooking. Remove it before mashing.
- Star Anise: A single star anise pod can impart a subtle, licorice-like warmth.
- Ginger: A small piece of fresh ginger, peeled and sliced, can add a lovely spicy note.
Remember that adding extra ingredients might slightly alter the cooking and straining times. Always taste and adjust seasonings as needed.
Nutritional Benefits of Fresh Apple Juice
While juicing does remove some of the fiber found in whole apples, fresh apple juice is still a source of valuable nutrients. It’s packed with vitamins, minerals, and antioxidants that can contribute to overall health. Apples are particularly known for their vitamin C content, which is important for immune function and skin health. They also contain potassium, which plays a role in maintaining healthy blood pressure. The antioxidants found in apples, like flavonoids, can help combat oxidative stress in the body.
It’s important to note that while beneficial, apple juice is also a source of natural sugars. Consuming it in moderation is key, especially for individuals managing blood sugar levels. Pairing your juice with a source of protein or healthy fat, like a handful of nuts, can help slow down sugar absorption.
According to the USDA FoodData Central, a typical 8-ounce serving of 100% apple juice contains approximately 25 grams of carbohydrates, primarily from natural sugars, and about 116 calories. It also provides a good amount of Vitamin C, though the exact amount can vary based on the apple variety and processing.
Storing Your Homemade Apple Juice
Proper storage is crucial for keeping your homemade apple juice fresh and safe to drink. Because it doesn’t contain preservatives, it has a shorter shelf life than store-bought juices.
Refrigeration: Always store your apple juice in an airtight container in the refrigerator. A clean glass jar or bottle with a tight-fitting lid works best. This helps prevent it from absorbing odors from other foods and keeps it fresh.
Shelf Life: Homemade apple juice is best consumed within 3-5 days of making it. After this time, the quality and flavor may start to decline, and there’s an increased risk of spoilage.
Signs of Spoilage: Before drinking, always check your juice for any signs of spoilage. This includes a cloudy or fizzy appearance (beyond what you might expect from natural fermentation), an off-putting smell, or an unusual taste. If you notice any of these, it’s best to discard the juice.
For longer storage, you can freeze apple juice. Pour it into freezer-safe containers, leaving some headspace for expansion, and it can last for several months. Thaw it in the refrigerator overnight before consuming.
Comparing Methods: No Blender vs. Blender vs. Juicer
Each method of making apple juice has its own advantages and disadvantages. Understanding these can help you choose the best approach for your needs.
| Method | Pros | Cons | Yield/Texture |
|---|---|---|---|
| No Blender (Boil & Strain) | Uses basic kitchen tools, no special equipment needed, good for beginners, retains some nutrients from cooking. | Requires cooking time, juice may be less vibrant in color, slightly more labor-intensive than a juicer. | Clear to slightly cloudy juice, moderate yield. |
| Blender | Quick to process apples, can be used for smoothies too, good for small batches. | Requires a powerful blender, results in a thicker, pulpier liquid that needs extensive straining, loses some nutrients in the blending process. | Thick, smoothie-like consistency unless heavily strained; pulp needs to be removed thoroughly. |
| Juicer (Centrifugal/Masticating) | Fastest method, produces the clearest, pulp-free juice, highest nutrient retention for immediate consumption. | Requires specialized, often expensive equipment, cleaning can be time-consuming, yields can vary. | Very clear, smooth juice with minimal pulp; masticating juicers retain more nutrients and yield more juice. |
For those just starting out or without specific equipment, the “boil and strain” method is an excellent entry point. It’s forgiving, educational, and produces a delicious result. If you have a blender, you can adapt it, but be prepared for more straining. A dedicated juicer offers the most efficiency and purity but comes with a higher cost and cleaning commitment.
Pro Tips for Perfect Homemade Apple Juice
Pro Tip: For an extra clear juice, chill your strained juice in the refrigerator for a few hours. Any remaining fine particles will settle to the bottom, allowing you to pour off the clearer liquid from the top, leaving the sediment behind.
Frequently Asked Questions (FAQ)
Q1: Can I use any type of apple for this recipe?
Yes, you can use almost any type of apple. Sweeter varieties like Fuji, Gala, or Honeycrisp will give you a naturally sweeter juice. Tart apples like Granny Smith will result in a tangier juice. A mix of both often provides the best balance of flavor.
Q2: How much juice can I expect from a pound of apples?
Generally, you can expect about 1 to 1.5 cups of juice from one pound (approximately 2-3 medium) of apples. This can vary depending on the apple variety and how much water you add.
Q3: My juice is still cloudy. How can I make it clearer?
To achieve a clearer juice, ensure you are using fine-mesh cheesecloth and straining the mixture at least twice. Gently pressing the pulp is okay, but avoid vigorous squeezing, which can force tiny particles through the cloth. Chilling the juice and then carefully decanting it can also help separate any remaining sediment.
Q4: Can I juice apples without cooking them first?
Without a blender or juicer, it’s very difficult to extract juice from raw apples. The cooking process softens the apples significantly, making it possible to mash and strain them effectively. This method is specifically designed for situations where you don’t have high-powered blending equipment.
Q5: How long does homemade apple juice last?
Homemade apple juice, when stored properly in an airtight container in the refrigerator, typically lasts for 3 to 5 days. Always check for signs of spoilage before consuming.
Q6: Can I add other fruits or vegetables to this method?
Yes! You can add other fruits like pears or berries to the pot during the cooking stage. For vegetables like carrots or celery, it’s often better to use a juicer or blender as they don’t break down as easily with simple boiling and straining. However, you can experiment by finely grating harder vegetables and adding them to the cooking apples, then straining.
Q7: Is homemade apple juice healthier than store-bought?
Homemade apple juice can be healthier because you control the ingredients. You avoid added sugars, preservatives, and artificial flavors often found in commercial juices. While it still contains natural sugars, you can ensure it’s 100% pure fruit juice.
Conclusion
Making delicious, fresh apple juice at home without a blender is not only possible but also incredibly rewarding. By following this simple boiling and straining method, you can enjoy a pure, natural beverage packed with flavor and goodness. It’s a fantastic way to incorporate more fruit into your diet and experience the satisfaction of homemade creations. So, next time you crave a glass of apple juice, remember that you have the power to make it yourself, using just a few basic kitchen tools. Embrace this simple technique, experiment with flavors, and savor the taste of your own healthy, homemade apple juice!
smartblander.com is a participant in the Amazon Services LLC Associates Program, an affiliate advertising program. As an Amazon Associate, we earn from qualifying purchases made through our links.