

Yes, you absolutely can make juice in a blender! While it won’t be the same crystal-clear juice from a traditional juicer, a blender is a fantastic, accessible tool for creating nutrient-rich, pulp-filled beverages that are packed with goodness. You can easily make delicious and healthy drinks at home with just a few simple steps.
Key Takeaways
- Blend fruits and vegetables for vibrant, healthy drinks.
- Strain pulp for a smoother, more juice-like consistency.
- Use your blender for versatile, nutrient-dense beverages.
- Add water or other liquids to achieve desired texture.
- Start with simple recipes to build your confidence.
- Enjoy fresh, homemade goodness without special equipment.
Can You Make Juice In A Blender? The Shocking Truth Revealed!
It’s a question many of us ponder as we stand in the kitchen, fruit in hand, wondering if our trusty blender can do more than just make smoothies. Can you actually make juice in a blender? The answer is a resounding yes! Many people think you need a fancy, expensive juicer to enjoy fresh, homemade juice. But the truth is, your blender is a powerful tool that can help you unlock a world of vibrant, healthy, and delicious beverages. You might be surprised by how simple it is and the incredible health benefits you can achieve right in your own kitchen. Let’s dive into how you can transform your blender into a juice-making powerhouse.
This guide will walk you through everything you need to know, from the basic process to helpful tips and tricks, ensuring you feel confident and inspired to start juicing with your blender today. Get ready to discover a new way to enjoy your favorite fruits and vegetables!
Blender Juice vs. Traditional Juicer Juice: What’s the Difference?
Before we get into the “how,” let’s clarify what “juice” means when made in a blender versus a traditional juicer. This distinction is key to managing expectations and understanding the benefits of each method.
Traditional Juicer Juice
Traditional juicers, whether centrifugal or masticating (slow-speed), are designed to extract liquid from produce while separating out the pulp and fiber. This results in a clear, smooth liquid that’s often referred to as pure juice. The process:
- Centrifugal Juicers: Use a fast-spinning blade to grate produce, then force it through a sieve to separate juice from pulp. They are generally quicker but can generate more heat, potentially degrading some nutrients.
- Masticating Juicers (Slow Juicers): Use a screw-like mechanism to crush and press produce, extracting juice slowly. This method is known for preserving more nutrients and enzymes due to less heat and oxidation.
The primary characteristic of juice made with a traditional juicer is its thin, watery consistency and lack of fiber. It’s essentially the liquid essence of the fruits and vegetables.
Blender Juice (or Smoothie-Style Juice)
When you use a blender to make juice, the process is fundamentally different. Instead of separating the fiber, a blender pulverizes the entire fruit or vegetable, including the skin, seeds (if small and soft), and pulp. This creates a thicker, more viscous beverage that is closer to a smoothie. The process:
- Blending: A high-speed blender will chop, liquefy, and emulsify the ingredients, incorporating all the edible parts into a single drink.
- Consistency: The result is a beverage that contains all the fiber from the produce. This is why it’s often called a “smoothie” or “blended juice.”
The key difference is the presence of fiber. While not technically “juice” in the traditional sense, this fiber-rich drink offers significant nutritional advantages, making it a fantastic choice for health-conscious individuals.
Why You Might Choose Blender Juice (Even Without a Juicer)
So, why would you opt for blender juice? There are several compelling reasons, especially for beginners or those looking for simplicity and versatility.
1. Accessibility and Cost-Effectiveness
Most households already own a blender. Investing in a separate juicer can be a significant expense. Using your existing blender means you can start making fresh, healthy drinks immediately without any additional cost.
2. Nutrient Density
Blender juice retains all the fiber from your fruits and vegetables. Dietary fiber is crucial for digestive health, helps you feel fuller for longer, and can aid in blood sugar regulation. According to the Harvard T.H. Chan School of Public Health, fiber is essential for overall well-being. By blending, you’re consuming the whole package, maximizing the nutritional benefits.
3. Versatility
Blenders are incredibly versatile. You can easily add a wider range of ingredients to your blended juice, such as nuts, seeds, yogurt, protein powder, or even cooked vegetables. This allows for much more creative recipe development compared to a traditional juicer, which is typically limited to fruits and vegetables.
4. Less Waste
With a blender, there’s very little waste. You use the entire edible portion of the produce, meaning less goes into the compost bin. This is both environmentally friendly and economical.
5. Ease of Cleaning (Sometimes!)
While cleaning a blender can sometimes feel like a chore, it’s often simpler than disassembling and scrubbing multiple parts of a juicer, especially for those with complex designs. A quick rinse and blend with soap and water can often do the trick.
The “Shocking Truth”: Making Juice in a Blender is Easier Than You Think!
The real “shocking truth” is that making a delicious, healthy, juice-like beverage in a blender requires minimal effort and can be achieved in just a few steps. It’s not about achieving the perfectly clear juice of a juicer, but about creating a nutrient-packed drink that tastes amazing and is good for you.
How to Make Juice in a Blender: A Step-by-Step Guide
Ready to get started? Here’s your simple guide to making delicious blender juice.
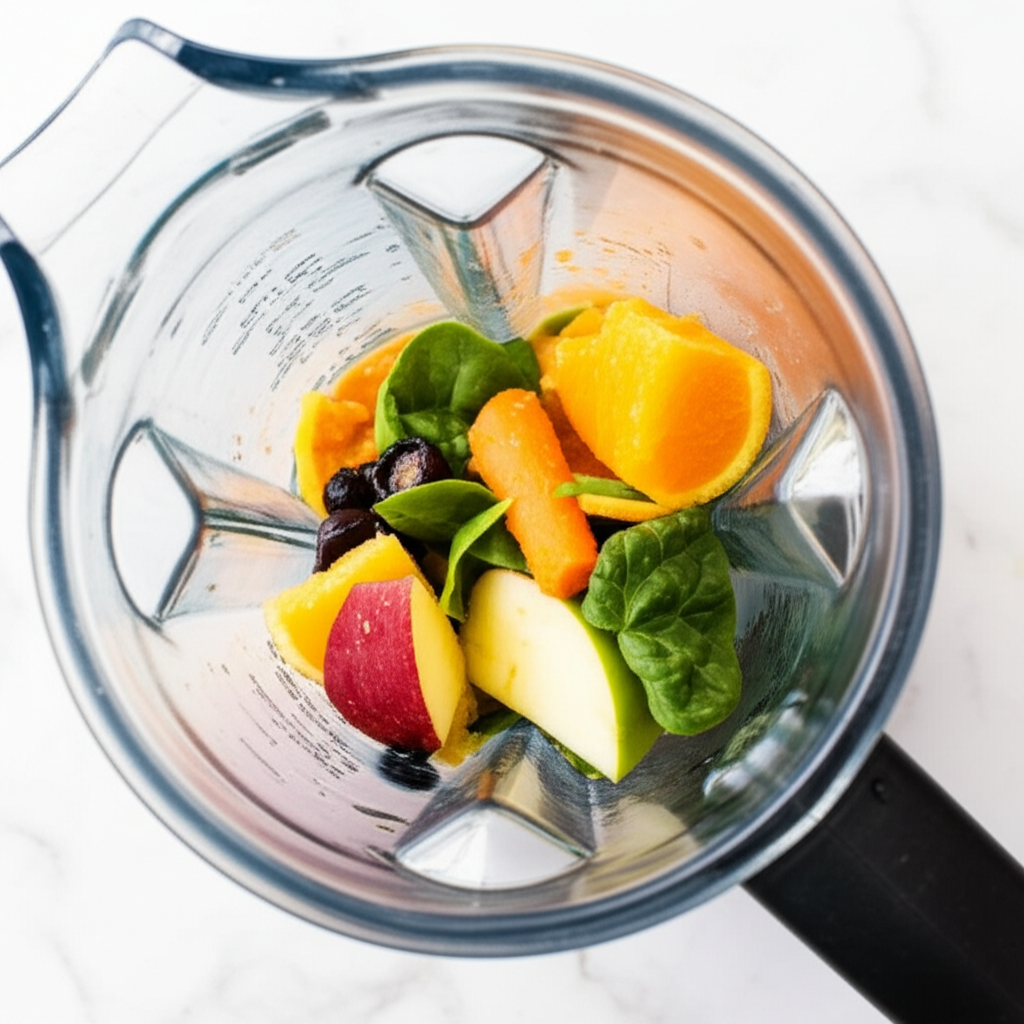
Step 1: Choose Your Produce
Select fresh, ripe fruits and vegetables. For beginners, start with softer fruits and vegetables that blend easily. Good options include:
- Fruits: Berries (strawberries, blueberries, raspberries), bananas, mangoes, peaches, pears, apples (cored), oranges (peeled).
- Vegetables: Spinach, kale (stems removed if tough), cucumber, celery, cooked carrots or sweet potatoes (for added sweetness and nutrients).
Pro Tip: Wash all your produce thoroughly before using it. For fruits with edible skins like apples or pears, you can leave them on for added fiber and nutrients, but be sure to remove any tough cores or seeds.
Step 2: Prepare Your Ingredients
Chop your fruits and vegetables into smaller, manageable pieces. This helps your blender process them more easily, especially if you don’t have a high-powered model. Remove any large seeds, pits, or tough stems.
- Cut apples and pears into quarters.
- Peel citrus fruits like oranges and grapefruits.
- Remove tough kale stems.
- Core apples and pears.
Step 3: Add Liquid
This is a crucial step for successful blending. Without enough liquid, your blender might struggle, and you’ll end up with a thick paste rather than a drinkable beverage. Start with about 1/2 to 1 cup of liquid per serving.
- Water: The simplest and most neutral option.
- Coconut Water: Adds electrolytes and a subtle sweetness.
- Unsweetened Plant-Based Milk: Almond, soy, oat, or cashew milk can add creaminess.
- Dairy Milk: If you consume dairy.
- Juice (from a carton): For extra flavor, but be mindful of added sugars.
The amount of liquid will depend on the juiciness of your produce and your desired consistency. You can always add more if needed.
Step 4: Blend Until Smooth
Place your prepared ingredients and liquid into the blender. Start blending on a low speed and gradually increase to high. Blend for 30 seconds to 1 minute, or until the mixture is completely smooth and there are no large chunks.
If your blender has a smoothie or liquefy setting, use that. For tougher ingredients like kale or carrots, you might need to blend for longer or use a tamper (if your blender has one) to push ingredients towards the blades.
Step 5: Strain (Optional, for a Juicier Texture)
This is where you can get closer to a traditional juice texture. If you prefer a smoother drink with less pulp, you can strain the blended mixture.
- What You’ll Need: A fine-mesh sieve, cheesecloth, or a nut milk bag.
- How to Do It: Place the sieve or cheesecloth over a bowl or pitcher. Pour the blended mixture into the sieve. Use a spoon or spatula to press the liquid through, leaving the pulp behind.
This step will remove most of the fiber, giving you a thinner, more juice-like consistency. The pulp can be discarded or used in other recipes, like muffins or veggie burgers.
Step 6: Taste and Adjust
Before serving, taste your blender juice. Does it need more sweetness? Add a little honey, maple syrup, or a naturally sweet fruit like dates. Is it too thick? Add a splash more liquid. Too thin? Add more fruit or a thickener like chia seeds.
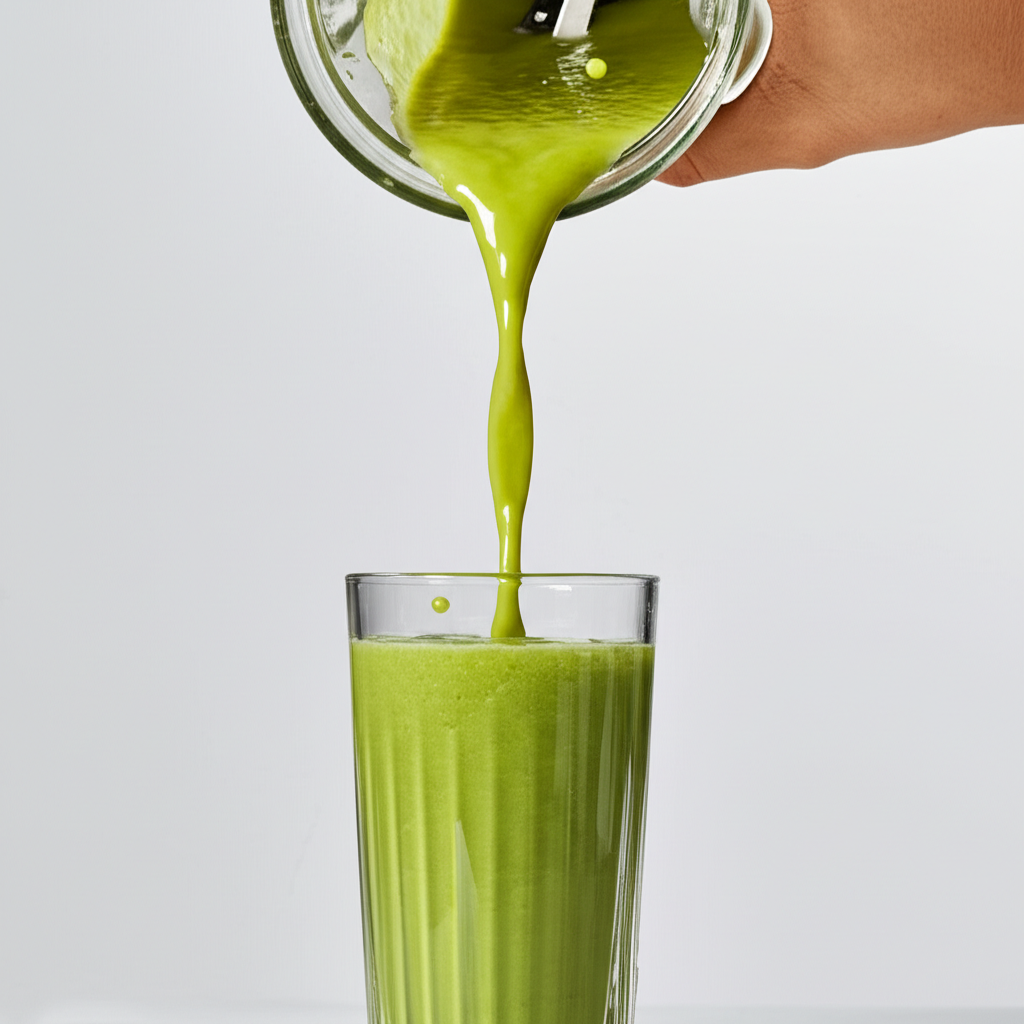
Step 7: Serve Immediately
Freshly blended juice is best enjoyed immediately to maximize its nutrient content and flavor. Pour into a glass and enjoy!
Simple Blender Juice Recipes for Beginners
Ready to try your hand at making some delicious blender juice? Here are a few easy recipes to get you started. Remember, you can adjust the ingredients based on your preferences and what you have on hand.
1. The Green Beginner Boost
This is a great way to sneak in greens without an overpowering taste.
- 1 cup spinach
- 1 apple, cored and chopped
- 1/2 cucumber, chopped
- 1/2 cup water or coconut water
- Juice of 1/2 lemon (optional, for brightness)
Instructions: Combine all ingredients in the blender. Blend until smooth. Strain if desired.
2. Berry Antioxidant Blast
Packed with antioxidants and a vibrant color.
- 1 cup mixed berries (fresh or frozen)
- 1/2 banana (for creaminess and sweetness)
- 1/2 cup water or almond milk
- 1 tablespoon chia seeds (optional, for thickness and omega-3s)
Instructions: Combine all ingredients in the blender. Blend until smooth. Frozen berries will create a thicker, colder consistency. Strain if desired.
3. Citrus Zinger
A refreshing and invigorating blend.
- 1 orange, peeled
- 1/2 grapefruit, peeled
- 1/4 inch ginger, peeled (optional, for a kick)
- 1/2 cup water
Instructions: Combine all ingredients in the blender. Blend until smooth. Strain if desired. Be cautious with ginger; a little goes a long way!
Tools You’ll Need for Blender Juice
While the star of the show is your blender, a few other handy tools can make the process even smoother.
Essential Tools:
- Blender: Any blender will work, but a high-speed blender (like a Vitamix or Blendtec) will yield smoother results, especially with tougher ingredients.
- Measuring Cups and Spoons: For accurate ingredient proportions.
- Sharp Knife and Cutting Board: For preparing your produce.
Optional Tools (for a Juicier Texture):
- Fine-Mesh Sieve: To strain out pulp.
- Cheesecloth: A more traditional straining material, often used in layers.
- Nut Milk Bag: Reusable and excellent for straining.
- Bowl or Pitcher: To strain the juice into.
Nutritional Considerations: Fiber is Your Friend
It’s important to reiterate the nutritional difference. While traditional juice offers concentrated vitamins and minerals, it lacks fiber. This means nutrients are absorbed very quickly, which can lead to a faster spike in blood sugar for some individuals. Blended juice, with its intact fiber, offers a more sustained release of energy and a greater feeling of fullness.
According to the Centers for Disease Control and Prevention (CDC), fruits and vegetables are vital sources of vitamins, minerals, and dietary fiber. By consuming whole fruits and vegetables in a blended format, you’re ensuring you get the full spectrum of their benefits.
Consider this table comparing the general nutritional impact:
| Nutrient/Component | Traditional Juicer Juice | Blender Juice (Smoothie) |
|---|---|---|
| Vitamins & Minerals | High (concentrated) | High |
| Fiber | Very Low / None | High |
| Sugar Absorption | Rapid | Slower (due to fiber) |
| Satiety (Feeling Full) | Low | High |
| Ease of Digestion (for some) | High (easier for those with digestive issues) | Can be challenging for those with severe fiber sensitivities |
Tips for Success with Blender Juicing
Here are some expert tips to help you master the art of blender juicing:
- Use Ripe Produce: Ripe fruits and vegetables are naturally sweeter and easier to blend.
- Balance Flavors: Combine sweet fruits with mild greens or tart citrus.
- Start Small: Begin with simple recipes and gradually experiment with more complex combinations.
- Don’t Overfill: Avoid filling your blender past the maximum fill line, as this can strain the motor.
- Invest in a Good Blender if Possible: While any blender can work, a high-powered one makes a significant difference in texture and efficiency.
- Freeze Some Ingredients: Frozen fruits (like bananas or berries) can make your blender juice cold and thick without needing ice, which can dilute flavor.
- Experiment with Add-ins: Don’t be afraid to add ingredients like ginger, turmeric, cinnamon, protein powder, or healthy fats like avocado.
Troubleshooting Common Blender Juice Issues
Even with the best intentions, you might run into a few snags. Here’s how to fix them:
- Too Thick: Add more liquid (water, coconut water, milk) a little at a time and re-blend.
- Too Thin: Add more fruit (especially banana or mango), a few ice cubes, or a tablespoon of chia seeds and blend again.
- Gritty Texture: This usually means your blender isn’t powerful enough or you haven’t blended long enough. Blend for an extra 30-60 seconds. If using tougher greens like kale, ensure stems are removed and blend longer. Straining is also an option here.
- Bitter Taste: This can happen with certain greens (like kale) or underripe fruit. Balance with a sweeter fruit (like dates or banana) or a touch of natural sweetener. Lemon or lime juice can also cut bitterness.
- Blender Straining/Not Blending: You likely don’t have enough liquid, or the pieces are too large. Stop the blender, add more liquid, cut ingredients smaller, and try again. Ensure you’re not overfilling the blender.
Frequently Asked Questions About Blender Juice
Q1: Can I use frozen fruits and vegetables in my blender juice?
A1: Yes! Frozen fruits and vegetables are excellent for blender juice. They create a thicker, colder consistency without the need for ice, which can dilute the flavor. Just be sure your blender can handle frozen ingredients; you might need to add a bit more liquid.
Q2: What is the best type of blender for making juice?
A2: While any blender can work, high-powered blenders (like Vitamix, Blendtec, or Ninja Professional) are ideal. They have stronger motors and sharper blades that can pulverize tougher ingredients and create a smoother texture more efficiently. They also tend to be better at incorporating fibrous ingredients.
Q3: How long does blender juice last?
A3: Freshly blended juice is best consumed immediately for maximum nutrient retention and flavor. If you need to store it, pour it into an airtight container (preferably glass) and keep it in the refrigerator for up to 24-48 hours. Some nutrient degradation will occur over time, and it may separate.
Q4: Can I add protein powder or other supplements to my blender juice?
A4: Absolutely! This is one of the major advantages of blender juice. You can easily add protein powder, collagen peptides, spirulina, maca powder, or other supplements to boost the nutritional profile of your drink.
Q5: What if I don’t have a fine-mesh sieve for straining?
A5: If you don’t have a sieve, a piece of cheesecloth (folded into a few layers) or a nut milk bag works wonderfully for straining. You can also try using a very fine-mesh colander, though it might not catch as much pulp. Alternatively, embrace the fiber and enjoy it as a thicker smoothie!
Q6: Is blender juice as healthy as eating whole fruits and vegetables?
A6: Blender juice is incredibly healthy, offering many of the same vitamins and minerals as whole produce. It also contains all the fiber, which is beneficial. While it’s not exactly the same as eating whole produce (due to processing), it’s a fantastic way to increase your intake of fruits and vegetables and absorb nutrients efficiently.
Conclusion
So, can you make juice in a blender? The answer is a resounding yes! While it might not produce the crystal-clear liquid of a traditional juicer, your blender is a versatile and accessible tool for creating delicious, nutrient-packed beverages. By embracing the fiber and versatility that blender juice offers, you can easily boost your daily intake of fruits and vegetables, experiment with countless flavor combinations, and enjoy the benefits of homemade, fresh drinks without needing specialized equipment.
Don’t let the lack of a juicer stop you from enjoying the goodness of fresh produce. Your blender is ready for the task. Start with simple recipes, experiment with your favorite ingredients, and discover the vibrant world of blender juicing. Your body will thank you!
smartblander.com is a participant in the Amazon Services LLC Associates Program, an affiliate advertising program. As an Amazon Associate, we earn from qualifying purchases made through our links.