

Absolutely! Making delicious, fresh apple juice at home without a blender is surprisingly easy and requires minimal equipment. You can achieve a pure, vibrant apple juice with simple kitchen tools, proving that a juicer or blender isn’t always necessary for healthy, homemade beverages.
Key Takeaways
- Extract juice using common kitchen tools.
- Achieve pure apple flavor with simple methods.
- Enjoy fresh juice without specialized appliances.
- Learn multiple effortless techniques for juicing apples.
- Boost your daily intake of natural goodness.
- Create healthy, refreshing drinks easily.
How To Make Apple Juice Without A Blender: Effortless!
Making fresh apple juice at home might seem complicated, especially if you don’t have a high-powered blender or a juicer. Many people believe these gadgets are essential for homemade juice. But what if you could create a delightful, pure apple juice using just a few common kitchen items? It’s not only possible but also wonderfully simple. You can transform fresh apples into a refreshing drink without any fancy machinery. This guide will walk you through easy, step-by-step methods. Get ready to enjoy the pure taste of homemade apple juice, made effortlessly!
Why Homemade Apple Juice? The Sweet Benefits
Freshly squeezed apple juice is more than just a tasty drink; it’s a direct connection to the natural goodness of apples. Store-bought juices often contain added sugars, preservatives, and can lose some of their vital nutrients during processing. When you make your own apple juice, you control exactly what goes into it – which is typically just apples! This means you’re getting all the natural vitamins, minerals, and antioxidants that apples offer. For instance, apples are a good source of Vitamin C, which is important for immune function, and they contain beneficial plant compounds like flavonoids and polyphenols. These compounds are known for their antioxidant properties. Making your own juice is a fantastic way to boost your daily intake of these health-promoting elements, all while enjoying a delicious and refreshing beverage. It’s a simple step towards a healthier lifestyle, and the effort involved is minimal when you know the right techniques.
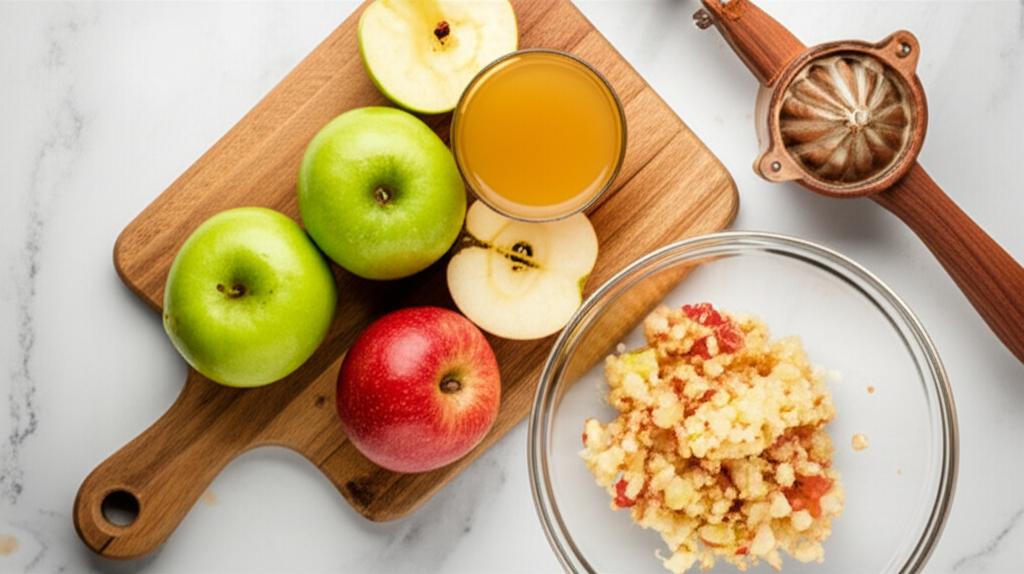
Understanding Your Apples: The Foundation of Great Juice
The type of apple you choose significantly impacts the flavor, sweetness, and juiciness of your final product. Not all apples are created equal when it comes to juicing. Some are bred for eating fresh, offering a crisp texture and tart-sweet balance, while others are specifically cultivated for their high juice content and milder flavor, making them ideal for pressing or extracting. For the best results when making apple juice without a blender, consider these apple characteristics:
- Juiciness: Look for apples that feel heavy for their size. This indicates a high water content, which is crucial for maximizing your juice yield.
- Sweetness vs. Tartness: This is a matter of personal preference. For a sweeter juice, opt for varieties like Fuji, Gala, or Honeycrisp. If you prefer a tangier kick, consider Granny Smith, McIntosh, or Pink Lady. A blend of sweet and tart apples often creates the most complex and balanced flavor profile.
- Texture: Apples with a firmer texture tend to release their juice more readily. Softer apples might become mushy, making extraction a bit more challenging.
- Aroma: A fragrant apple often signals ripeness and a rich flavor.
Some popular apple varieties that work exceptionally well for juicing include:
- Honeycrisp: Known for its explosive crispness and balanced sweet-tart flavor.
- Gala: A very popular, sweet, and mild apple, easy to find and great for a sweeter juice.
- Fuji: Very sweet and firm, offering a good juice yield.
- Granny Smith: Provides a wonderful tartness, excellent for balancing sweeter apples.
- McIntosh: Softer but very flavorful and aromatic, juicing well.
- Golden Delicious: Mildly sweet and fragrant, a good all-purpose apple.
When you’re starting out, don’t be afraid to experiment with different apple combinations. Mixing a sweet apple with a tart one can lead to surprisingly delightful juice flavors. The key is to select fresh, ripe, and firm apples for the best possible yield and taste.
Essential Tools: What You’ll Need
The beauty of making apple juice without a blender lies in its simplicity. You likely already have most, if not all, of these items in your kitchen. These tools are fundamental to extracting the liquid from the apple pulp effectively. Here’s a breakdown of what you’ll need:
The Core Equipment:
- Sharp Knife: For coring and quartering the apples.
- Cutting Board: A stable surface for slicing your apples.
- Colander or Sieve: To strain the juice and separate it from the pulp. A fine-mesh sieve is best for a clearer juice.
- Bowl(s): At least two – one to catch the juice and one for discarded apple cores and peels.
- Fork or Potato Masher: To break down the apple pieces and help release the juice.
- Cheesecloth or Nut Milk Bag (Optional but Recommended): For a smoother, pulp-free juice.
Optional but Helpful Tools:
- Citrus Juicer (Manual or Electric): While designed for citrus, some smaller citrus juicers can be used to press out juice from smaller apple pieces after they’ve been softened.
- A Sturdy Spoon: For mashing and pressing.
- Measuring Cup: To measure your final juice yield.
Having these basic tools ready will make the process of turning whole apples into fresh juice a breeze. You don’t need to invest in expensive appliances to start enjoying homemade apple juice. The focus is on simple, accessible methods.
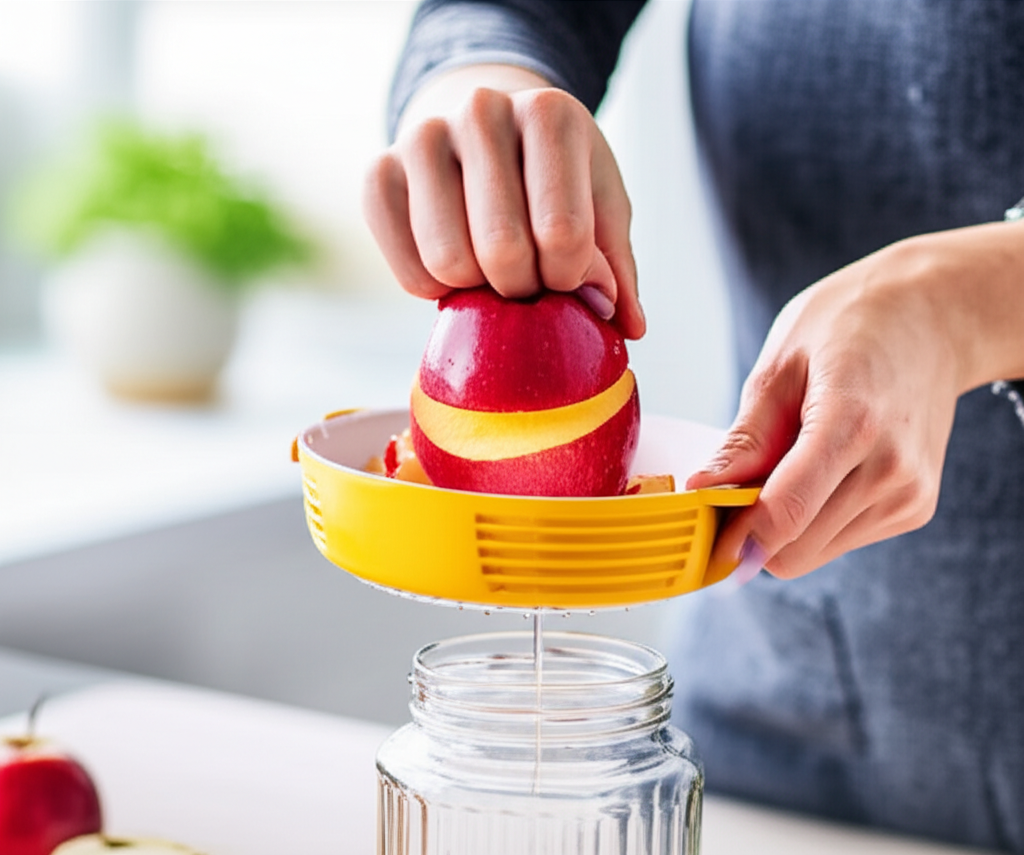
Method 1: The Straining & Mashing Technique (Beginner Friendly!)
This is perhaps the most straightforward method for making apple juice without any special equipment. It relies on breaking down the apples manually and then straining the liquid out. It’s a fantastic starting point for anyone new to homemade juice.
Step-by-Step Guide:
- Prepare Your Apples: Wash your apples thoroughly under cold running water. You can choose to peel them or leave the skins on – apple skins contain valuable nutrients and add color and flavor. Core the apples and then cut them into small, manageable pieces, about 1-inch cubes. The smaller the pieces, the easier it will be to extract the juice.
- Soften the Apple Pieces: Place the apple pieces in a pot and add just enough water to cover the bottom of the pot (about 1/4 to 1/2 inch). Heat on medium-low heat, covered, for about 10-15 minutes. You want the apples to soften but not turn into complete mush. This process helps to break down the cell walls, making juice extraction easier. Alternatively, you can skip the cooking step and proceed directly to mashing if your apples are very ripe and juicy, though cooking often yields more juice.
- Mash the Apples: Once slightly softened (or if using very ripe apples directly), transfer the cooked apple pieces (along with any cooking liquid) to a sturdy bowl. Use a fork, potato masher, or the back of a sturdy spoon to mash the apple pieces thoroughly. The goal is to break them down as much as possible to release their juices.
- Strain the Pulp: Place a colander or fine-mesh sieve over another clean bowl. If you have cheesecloth or a nut milk bag, line the colander with it. Pour the mashed apple mixture into the sieve/cheesecloth.
- Extract the Juice:
- Using a Sieve: Press down on the mashed apples with the back of a spoon to push the juice through the sieve. You may need to do this in batches.
- Using Cheesecloth/Nut Milk Bag: Gather the corners of the cheesecloth or nut milk bag and twist it tightly to squeeze out as much juice as possible. This method is usually more efficient and results in a clearer juice.
- Second Press (Optional): For maximum juice extraction, you can repeat the straining process with the remaining pulp. You might get a bit more liquid, though it might be cloudier.
- Serve or Store: Your fresh apple juice is ready! Taste and adjust if needed (though it’s usually perfect as is). Pour into glasses and enjoy immediately for the best flavor and nutrient content. If you’re not drinking it right away, store it in an airtight container in the refrigerator for up to 2-3 days.
This method is incredibly forgiving and yields a wonderfully fresh-tasting juice. It’s a testament to how simple ingredients and basic kitchen tools can create something truly special.
Method 2: The Hand-Press & Strain Approach
This method is similar to the first but emphasizes manual pressing without initial cooking, relying more on the natural juiciness of the apples and a bit of elbow grease. It’s great for firmer, juicier apples.
Step-by-Step Guide:
- Select and Prepare Apples: Choose crisp, juicy apples. Wash them thoroughly. You can peel if desired, but keeping the skin on adds nutrients and flavor. Core the apples and cut them into very small pieces or thin slices. The smaller the pieces, the easier they are to press.
- Mash Vigorously: Place the apple pieces in a sturdy bowl. Use a potato masher or a heavy fork to mash them as thoroughly as possible. You’re aiming to break down the apple structure to release the juice. This will require more effort than the cooked method, especially with firmer apples.
- First Strain: Set up your colander lined with cheesecloth (highly recommended for this method) over a large bowl. Add the mashed apple pulp to the cheesecloth.
- The Hand Press: This is the key step. Gather the edges of the cheesecloth, twist it tightly, and begin to squeeze. Apply firm, consistent pressure. You’ll feel the juice start to drip into the bowl below. Continue squeezing until you’ve extracted as much liquid as you can.
- Second Strain (Optional): If you want to be absolutely sure there’s no pulp left, you can strain the collected juice through a very fine sieve.
- Enjoy Your Juice: Pour the freshly pressed juice into a glass. It should be vibrant and flavorful. Store any leftovers in an airtight container in the refrigerator for up to 2 days.
This method gives you a great workout and a very pure juice. It’s a rewarding process that connects you directly with the fruit.
Method 3: Using a Citrus Juicer (Manual or Electric)
While designed for citrus, a manual or electric citrus juicer can be surprisingly effective for extracting juice from soft, cooked apple pieces. This method is a good option if you have a citrus juicer but no blender or juicer.
Step-by-Step Guide:
- Cook and Soften Apples: Wash, core, and chop your apples into small pieces. Place them in a pot with a small amount of water (just enough to cover the bottom). Simmer, covered, until the apples are very soft and mushy. This is crucial as raw apple pieces are too firm for a citrus juicer.
- Mash Slightly: Once the apples are cooked and soft, mash them gently with a fork or potato masher to break them down further. You don’t need to go as fine as in the previous methods, as the citrus juicer will do some of the work.
- Juice with Citrus Juicer:
- Manual Citrus Juicer: Scoop a portion of the cooked, mashed apple mixture into the reamer part of the juicer. Press down and twist, similar to how you would with a lemon or orange. You may need to press quite firmly.
- Electric Citrus Juicer: Place the soft apple mixture onto the reamer and let the machine do the work.
You will likely need to work in batches and may need to strain out larger solids that don’t pass through the juicer’s spout.
- Strain for Smoothness: The juice collected from the citrus juicer might still contain some pulp or small solids. Pour it through a fine-mesh sieve or cheesecloth into a clean bowl or pitcher to achieve a smoother consistency.
- Serve and Store: Your apple juice is ready to be enjoyed. Serve chilled, and store any leftovers in an airtight container in the refrigerator for 2-3 days.
This method leverages an existing kitchen tool for a slightly different approach to apple juice making. It’s a good way to repurpose your citrus juicer for a new use!
Nutritional Spotlight: The Power of Fresh Apple Juice
Fresh apple juice, especially when made at home without added sugars, is a concentrated source of beneficial compounds. While the juicing process removes most of the fiber, it retains valuable vitamins, minerals, and antioxidants. A glass of pure apple juice can contribute to your daily intake of:
- Vitamin C: An essential nutrient that supports immune function and acts as an antioxidant.
- Potassium: Important for maintaining fluid balance and blood pressure.
- Phytonutrients: Apples are rich in flavonoids like quercetin and polyphenols, powerful antioxidants that help protect your cells from damage.
It’s important to note that while nutritious, apple juice is also concentrated in natural sugars. Moderation is key, especially for individuals managing their sugar intake. Unlike whole apples, juice lacks fiber, which helps regulate sugar absorption. Therefore, enjoying a glass of fresh apple juice as part of a balanced diet is recommended. For more detailed nutritional information on apples and their benefits, the USDA’s Agricultural Research Service offers extensive data.
Comparing the Methods: Yield and Clarity
Each method for making apple juice without a blender offers a slightly different experience in terms of yield (how much juice you get) and clarity (how free of pulp it is). Here’s a quick comparison to help you choose the best approach for your needs:
| Method | Ease of Preparation | Juice Yield | Clarity of Juice | Best For |
|---|---|---|---|---|
| Straining & Mashing (Cooked) | Very Easy | Good | Moderate (can be clearer with cheesecloth) | Beginners, anyone with basic kitchen tools. |
| Hand-Press & Strain (Raw) | Moderate (requires physical effort) | Good to Very Good | Moderate to Good (best with cheesecloth) | Juicier apples, those who don’t mind a bit of effort. |
| Citrus Juicer (Cooked) | Moderate (requires cooking and straining) | Moderate | Moderate (requires extra straining) | Those who own a citrus juicer. |
As you can see, the cooked and mashed method, especially when using cheesecloth, often strikes a good balance between ease, yield, and clarity for beginners. The hand-press method might yield slightly more juice but requires more physical work.
Pro Tips for Perfect Apple Juice
Pro Tip: For an even more refreshing and complex flavor, consider adding a squeeze of lemon or lime juice to your freshly made apple juice. This brightens the taste and can also help prevent slight browning if you plan to store it for a day or two.
Flavor Variations and Add-ins
While pure apple juice is delicious on its own, don’t hesitate to get creative! You can enhance the flavor and nutritional profile with simple additions. These can be incorporated during the mashing or straining phase, or stirred in after the juice is made.
Seasonal Twists:
- Cinnamon Stick: Add a cinnamon stick to the pot while cooking the apples (Method 1 or 3) for a warm, spiced flavor. Remove before mashing or straining.
- Ginger: A small knob of fresh ginger, peeled and finely grated or minced, can be added to the apples during cooking or mashing for a zesty kick.
- Pear: Substitute some of the apples with ripe pears for a sweeter, more mellow juice.
Nutrient Boosters:
- Lemon/Lime Juice: As mentioned in the Pro Tip, a splash adds brightness and aids preservation.
- Mint Leaves: A few fresh mint leaves can be muddled with the mashed apples or added to the juice for a cooling sensation.
Experimenting with these additions can transform your basic apple juice into a unique and personalized beverage. Remember to use fresh, high-quality ingredients for the best results.
Storage and Best Practices
Freshly made apple juice is best enjoyed immediately after preparation. However, if you make a larger batch, proper storage is key to maintaining its quality and safety. Here’s how to keep your homemade juice tasting great:
- Airtight Containers: Use glass bottles or jars with tight-fitting lids. This prevents oxidation (exposure to air, which can degrade flavor and nutrients) and keeps out other odors from the refrigerator.
- Refrigeration is Crucial: Always store your apple juice in the refrigerator. The cold temperature slows down the growth of bacteria and preserves the juice’s freshness.
- Consume Promptly: Fresh apple juice doesn’t contain preservatives, so it has a shorter shelf life than store-bought versions. Aim to consume it within 2 to 3 days for optimal taste and safety.
- Look for Signs of Spoilage: Before drinking, always check your juice. If it has an off smell, a cloudy or foamy appearance, or a sour taste, discard it immediately.
Making juice in smaller, more frequent batches is often the best strategy to ensure you’re always drinking the freshest possible product. This also allows you to easily experiment with different apple varieties or flavor combinations.
Frequently Asked Questions (FAQ)
Q1: Can I make apple juice without cooking the apples at all?
A1: Yes, you can! Method 2, the Hand-Press & Strain approach, is designed for raw apples. However, it requires very ripe, juicy apples and significant manual mashing and pressing to extract the juice effectively. Cooking softens the apples and makes juice extraction much easier and more efficient, usually yielding more liquid.
Q2: How many apples do I need to make a glass of juice?
A2: This varies greatly depending on the apple variety and the method used. On average, you might need 2-3 medium-sized apples to yield about 4-6 ounces (120-180 ml) of juice. Juicier varieties and more efficient extraction methods will produce more liquid per apple.
Q3: My juice is very cloudy. How can I make it clearer?
A3: Cloudiness is often due to small pulp particles. To achieve clearer juice:
- Use a very fine-mesh sieve.
- Line the sieve with cheesecloth or a nut milk bag.
- Strain the juice a second time.
- For ultimate clarity, you could even let the juice sit in the refrigerator for a few hours and then carefully decant (pour off) the clearer liquid, leaving any settled sediment behind.
Q4: Can I use any type of apple for juicing?
A4: While you can technically juice any apple, some varieties are better suited for it. Apples that are crisp, juicy, and have a good balance of sweetness and tartness (like Honeycrisp, Fuji, Gala, Granny Smith, McIntosh) tend to yield more and taste better. Very mealy or dry apples will be harder to juice and may result in less flavorful juice.
Q5: How long does homemade apple juice last in the refrigerator?
A5: Freshly made apple juice without preservatives typically lasts for 2 to 3 days when stored properly in an airtight container in the refrigerator. It’s best to drink it as soon as possible for the freshest taste and maximum nutrient retention.
Q6: Can I add other fruits or vegetables to my apple juice?
A6: Absolutely! Apple juice is a great base for other flavors. You can add a small piece of fresh ginger, a squeeze of lemon or lime, or even a few mint leaves. For more complex juices, consider blending it with other fruits like pears or berries after you’ve extracted the apple juice.
Q7: What do I do with the leftover apple pulp?
A7: Don’t throw away the apple pulp! It’s still full of fiber and nutrients. You can use it in:
- Baking: Add to muffins, pancakes, or quick breads.
- Composting: A great addition to your compost bin.
- Smoothies: Add a spoonful to your next smoothie for extra fiber.
- Apple Sauce: Cook down the pulp with a little water and sweetener to make a rustic apple sauce.
Conclusion
As you can see, creating delicious, fresh apple juice at home without a blender is entirely achievable. By using simple techniques like mashing and straining, or even repurposing a citrus juicer, you can enjoy the pure, unadulterated taste of homemade apple juice. It’s a rewarding process that connects you directly to the goodness of the fruit, offering a healthier alternative to store-bought options. Don’t let a lack of fancy equipment deter you from experiencing the vibrant flavor and nutritional benefits of fresh juice. Grab some apples, gather your basic kitchen tools, and get ready to pour yourself a glass of pure, effortless refreshment!
smartblander.com is a participant in the Amazon Services LLC Associates Program, an affiliate advertising program. As an Amazon Associate, we earn from qualifying purchases made through our links.