

Making juice with a blender is surprisingly simple and a fantastic way to get more fruits and vegetables into your diet. You don’t need a fancy juicer; just your blender and a few fresh ingredients can create delicious, nutrient-packed drinks in minutes.
Key Takeaways
- Blend fruits and vegetables for fresh juice.
- Use a blender to create quick, healthy drinks.
- Strain for smoother juice, or enjoy as a smoothie.
- Boost your daily nutrition with homemade juice.
- Experiment with endless flavor combinations.
- Clean your blender immediately after use.
Ever looked at a beautiful array of fresh produce and wished you could capture all its vibrant goodness in a glass? Many people think juicing requires a specialized, expensive juicer. That’s a common misconception! The truth is, you can make wonderfully fresh and healthy juice right in your own kitchen using something you likely already own: a blender. It’s a shockingly simple process that unlocks a world of delicious possibilities. Forget complicated steps or pricey equipment; we’re about to show you just how easy it is to transform fruits and veggies into a revitalizing drink. Get ready to feel inspired and empowered to start your homemade juicing journey today!
Why Use a Blender for Juicing?
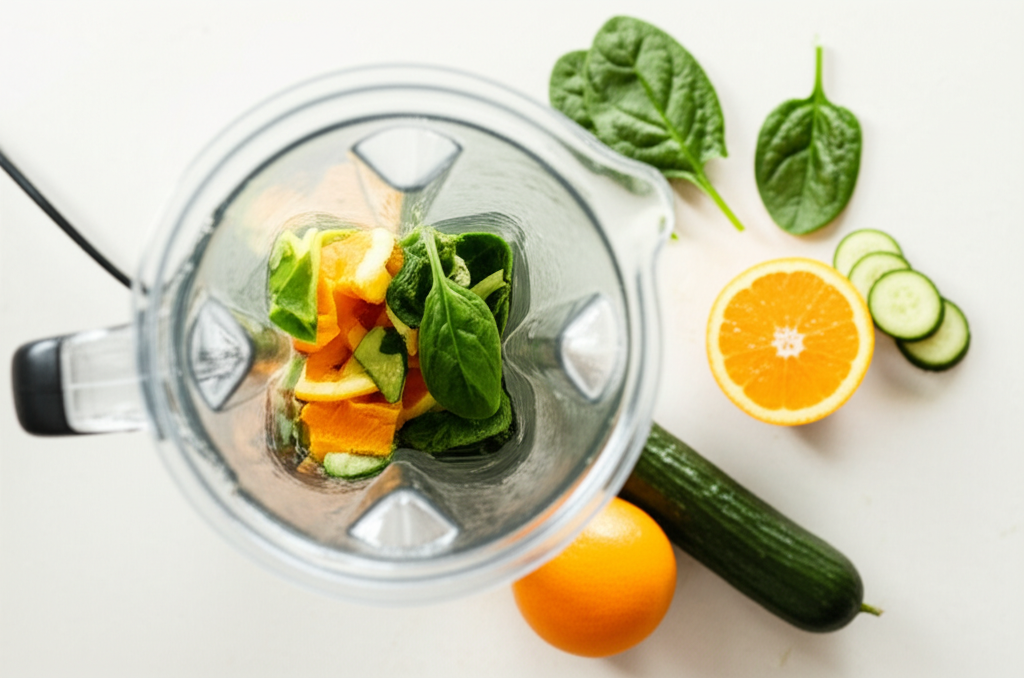
You might be wondering if a blender is truly up to the task of making juice. The answer is a resounding yes! While traditional juicers are designed to extract liquid from produce, a blender liquefies the entire fruit or vegetable, including its fiber. This distinction is important. When you blend, you get more of the whole food’s goodness. Some people prefer this, while others might want a smoother texture. The beauty of using a blender is that it offers flexibility – you can either strain the pulp for a clearer juice or keep it for a thicker, smoothie-like consistency, which is packed with beneficial fiber.
This method is incredibly accessible. Most households have a blender, making it an immediate and cost-effective way to start juicing. You don’t need to invest in a separate appliance, which can be a significant barrier for beginners. Plus, blenders are incredibly versatile. Beyond juicing, you can use them for smoothies, soups, sauces, and more. This versatility makes a blender a true workhorse in the kitchen.
Nutritionally, the benefits of homemade juice are immense. Freshly made juices are packed with vitamins, minerals, and antioxidants that can support your immune system, boost energy levels, and promote overall well-being. By making your own juice, you control exactly what goes in – no added sugars, preservatives, or artificial ingredients often found in store-bought versions. This empowers you to create beverages tailored to your specific health goals and taste preferences.
Essential Tools for Blender Juicing
Gathering your tools is the first step towards juicing success. Thankfully, you won’t need a specialized arsenal. Your trusty blender is the star, but a few other items will make the process smoother and your juice more enjoyable.
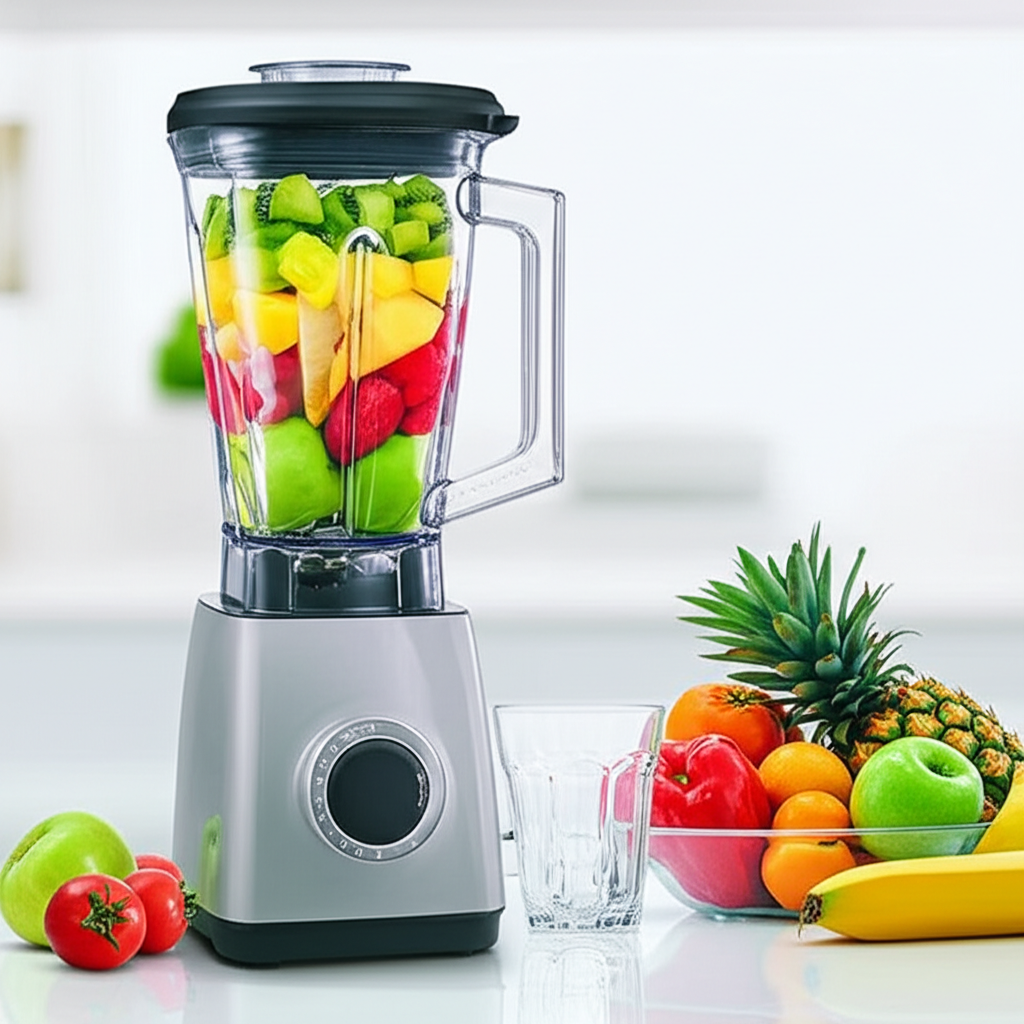
The Blender Itself
Any blender can work, from a personal-sized bullet blender to a high-powered countertop model. More powerful blenders will break down ingredients more effectively, leading to a smoother texture with less effort. If you have a less powerful blender, you might need to add a bit more liquid or blend for longer.
Cutting Board and Knife
Essential for prepping your fruits and vegetables. Ensure they are clean and sharp for safe and efficient chopping.
Measuring Cups and Spoons
Helpful for following recipes and understanding the ratios of ingredients you’re using. This is especially useful when you’re starting out.
Straining Tools (Optional, but Recommended for Smoother Juice)
If you prefer a juice that’s closer to what you’d get from a juicer (less pulp), you’ll need a way to strain it. Here are common options:
- Fine-mesh sieve: A kitchen staple that works well for catching most of the pulp.
- Nut milk bag: These are fantastic for juicing. They are made of a fine mesh that allows liquid to pass through easily while holding back solids. They are also reusable and easy to clean. You can find them online or at kitchen supply stores.
- Cheesecloth: You can layer cheesecloth over a bowl or sieve for an effective straining method.
Bowls and Containers
You’ll need a bowl to catch the strained juice and containers to store it. Make sure your storage containers are airtight.
A Spoon or Spatula
For scraping down the sides of the blender and ensuring all ingredients are incorporated.
Choosing Your Fruits and Vegetables
The beauty of blender juicing lies in its versatility. You can use almost any fruit or vegetable! However, some ingredients work better than others, especially for beginners. It’s best to start with a mix of softer fruits and vegetables that blend easily.
Best Fruits for Blender Juice
- Berries: Strawberries, blueberries, raspberries, and blackberries blend beautifully and add sweetness and antioxidants.
- Citrus: Oranges, lemons, and limes (peeled, of course!) add a bright, zesty flavor.
- Apples: Core them and chop them into manageable pieces. They add natural sweetness and liquid.
- Bananas: Great for adding creaminess and sweetness, though they will make your juice thicker, more like a smoothie.
- Melons: Watermelon, cantaloupe, and honeydew are very watery and blend easily, making them excellent bases for juice.
- Mangoes and Peaches: Offer a tropical sweetness and smooth texture.
Best Vegetables for Blender Juice
- Leafy Greens: Spinach, kale, romaine lettuce, and Swiss chard are nutritional powerhouses. Spinach is milder and a great starting point.
- Cucumbers: High in water content and very refreshing.
- Carrots: Add sweetness and nutrients. Chop them well for easier blending.
- Celery: Provides a fresh, slightly savory flavor.
- Beets: Offer a vibrant color and earthy sweetness, but can be quite potent. Start with small amounts.
- Ginger and Turmeric: Use small pieces for a spicy kick and anti-inflammatory benefits.
What to Be Mindful Of
- Hard Roots: Very hard vegetables like raw sweet potatoes or tough roots might be difficult for some blenders to break down completely. Chop them very finely if you choose to use them.
- Fibrous Stalks: Stalks like lemongrass can be stringy. Remove tough outer layers.
- Seeds and Pits: Always remove large seeds and pits from fruits like avocados, peaches, and cherries to avoid bitterness and potential hazards. Small seeds like those in berries are usually fine.
Step-by-Step: How to Make Juice with a Blender
Ready to dive in? This process is designed to be straightforward. Follow these steps, and you’ll be sipping your homemade juice in no time!
Step 1: Prepare Your Produce
Wash all your fruits and vegetables thoroughly under cool running water. Remove any stickers or waxy coatings. Then, chop them into pieces small enough to fit comfortably into your blender jar. For harder items like apples or carrots, smaller chunks are better. Remove any large seeds, pits, or tough cores. For leafy greens, you can leave them whole or give them a rough chop.
Step 2: Add Ingredients to the Blender
Start by adding your liquid base to the blender. This could be water, coconut water, or even a little bit of juice from a very watery fruit like watermelon. Adding liquid first helps the blades move more freely and prevents ingredients from getting stuck at the bottom. Then, add your fruits and vegetables. It’s often best to add softer items first, followed by harder ones.
Ratio Tip: A good starting point for liquid to produce is about a 1:2 ratio (e.g., 1 cup of liquid for 2 cups of chopped produce). You can adjust this based on your desired consistency and the juiciness of your ingredients.
Step 3: Blend Until Smooth
Secure the lid on your blender. Start blending on a low speed, then gradually increase to a higher speed. Blend for 30 seconds to 2 minutes, or until the mixture is as smooth as you desire. You may need to stop the blender and scrape down the sides with a spatula to ensure everything is well incorporated. If your blender is struggling, add a little more liquid.
Step 4: Strain (Optional, for Smoother Juice)
If you prefer a pulp-free juice, place your fine-mesh sieve, nut milk bag, or cheesecloth-lined bowl over another clean bowl or pitcher. Pour the blended mixture into the strainer. If using a nut milk bag or cheesecloth, gently squeeze the bag to extract as much liquid as possible. If using a sieve, you can use the back of a spoon to press down on the pulp.
What to do with the pulp? Don’t throw it away! Vegetable and fruit pulp is rich in fiber and can be added to baked goods, muffins, veggie burgers, compost, or even used in face masks.
Step 5: Serve and Enjoy!
Pour your fresh juice into a glass. For an extra refreshing treat, add ice cubes. Drink it immediately for the best flavor and maximum nutrient absorption. Fresh juice is best enjoyed right away, as its nutritional value can decrease over time.
Step 6: Clean Up
This is crucial for maintaining your blender and making future juicing sessions easier. Rinse your blender jar, lid, and blades immediately after use. For a quick clean, fill the jar halfway with warm water, add a drop of dish soap, and blend on low for about 30 seconds. Then, rinse thoroughly. Wash any straining tools you used as well.
Simple Blender Juice Recipes for Beginners
Starting with simple recipes is the best way to build confidence. These recipes are delicious, easy to make, and packed with goodness. They focus on ingredients that blend well and offer a balanced flavor profile.
1. The Green Beginner’s Juice
This is a fantastic entry-level green juice. The apple and cucumber provide sweetness and hydration, while the spinach offers a nutritional boost without an overpowering taste.
Ingredients:
- 1 cup chopped cucumber
- 1 cup chopped apple (cored)
- 1 cup fresh spinach
- 1/2 cup water or coconut water
- 1/4 inch piece of fresh ginger (optional)
Instructions:
- Wash and chop all ingredients.
- Add water, spinach, apple, cucumber, and ginger (if using) to the blender.
- Blend until smooth.
- Strain through a nut milk bag or fine-mesh sieve for a smoother juice.
- Serve chilled.
2. The Berry Blast Juice
Sweet, vibrant, and packed with antioxidants. This is more of a smoothie due to the berries, but you can strain it for a thinner juice.
Ingredients:
- 1 cup mixed berries (fresh or frozen)
- 1/2 banana
- 1/2 cup orange (peeled)
- 1/2 cup water or almond milk
Instructions:
- Peel the orange.
- Add all ingredients to the blender.
- Blend until smooth and creamy.
- If you prefer a juice, strain through a fine-mesh sieve.
- Enjoy immediately.
3. The Citrus Zinger Juice
A refreshing and vitamin C-rich juice. The sweetness of the orange and pineapple balances the tartness of the lemon and the warmth of the ginger.
Ingredients:
- 1 orange (peeled)
- 1 cup pineapple chunks
- 1/2 cup chopped celery
- 1/4 inch piece of fresh ginger
- 1/2 cup water
Instructions:
- Peel the orange and chop all ingredients.
- Add water, celery, pineapple, orange, and ginger to the blender.
- Blend until smooth.
- Strain for a clearer juice.
- Serve over ice.
Pro Tip: Balancing Flavors
When creating your own blender juice recipes, aim for a balance of sweet, tart, and refreshing flavors. Use sweet fruits like apples, berries, or pineapple to mask the taste of stronger vegetables like kale or beets. Citrus fruits like lemon or lime can add brightness and cut through richness. A small piece of ginger or mint can add an extra layer of complexity and freshness.
Comparing Blender Juicing to Traditional Juicers
It’s helpful to understand how blender juicing stacks up against dedicated juicing appliances. Each has its advantages and disadvantages.
| Feature | Blender Juicing | Traditional Juicer (Centrifugal/Masticating) |
|---|---|---|
| Equipment Needed | Blender, strainer (optional) | Specialized juicer machine |
| Cost | Low (uses existing appliance) | Moderate to High |
| Fiber Content | High (unless strained), beneficial for digestion | Low (fiber is separated and discarded) |
| Nutrient Retention | Good, especially when consumed immediately. Blending can cause some oxidation. | Excellent, especially with masticating juicers which operate at lower speeds, minimizing heat and oxidation. |
| Texture | Can be thicker/smoother (like a smoothie) or smoother if strained. | Typically smooth, pulp-free liquid. |
| Versatility | High (can make smoothies, soups, sauces) | Limited (primarily for juicing) |
| Cleanup | Easy, especially if rinsed immediately. Straining adds an extra step. | Can be more involved depending on the juicer model. |
| Ease of Use for Beginners | Very easy, minimal learning curve. | Generally easy, but requires understanding machine operation. |
As you can see, blender juicing is a fantastic starting point. It’s budget-friendly, versatile, and still delivers a powerful dose of nutrients. For those seeking the absolute purest juice with maximum nutrient preservation and no fiber, a high-quality masticating juicer might be a worthwhile investment later on. However, for simplicity and accessibility, a blender is hard to beat. For more information on juicer types, you can refer to resources like the USDA National Agricultural Library, which offers insights into various kitchen equipment.
Maximizing Nutrition from Your Blender Juice
Making juice with a blender is a great start, but you can take it a step further to maximize the health benefits. The key is thoughtful ingredient selection and mindful preparation.
Incorporate Nutrient-Dense Greens
Leafy greens like spinach, kale, and romaine lettuce are nutritional powerhouses. They are rich in vitamins A, C, and K, as well as minerals like iron and calcium. Spinach is mild and a great starter green. Kale is more robust; consider removing the tough stems for a smoother blend. According to the National Institutes of Health (NIH) Office of Dietary Supplements, vitamins and minerals play crucial roles in numerous bodily functions, making it vital to consume them daily.
Add Healthy Fats
While not traditional for juice, adding a small amount of healthy fat can help your body absorb fat-soluble vitamins (A, D, E, K) found in your fruits and vegetables. Consider adding a quarter of an avocado or a tablespoon of chia seeds or flaxseeds to your blend. These also add creaminess and satiety.
Boost with Superfoods
Small additions can have a big impact. Consider adding a small piece of fresh turmeric root (for its anti-inflammatory properties), a pinch of cinnamon (for blood sugar balance), or spirulina powder (for protein and iron).
Consume Immediately
The moment produce is cut and blended, it begins to lose some of its nutritional potency due to oxidation. To get the most out of your blender juice, drink it as soon as possible after making it. If you must store it, use an airtight container, fill it to the brim to minimize air exposure, and refrigerate for no more than 24 hours. However, fresh is always best.
Consider the Whole Food
Remember that blender juice retains fiber (unless strained), which is beneficial. Fiber aids digestion, helps regulate blood sugar, and promotes a feeling of fullness. If you’re not straining your juice, you’re getting the full spectrum of benefits from the whole fruit or vegetable.
Frequently Asked Questions About Blender Juicing
Q1: Can I really make juice with any blender?
A: Yes, you can! While more powerful blenders will yield smoother results with less effort, even a basic blender can break down fruits and vegetables. You might need to add a bit more liquid or blend for a longer time with a less powerful machine. For very tough ingredients, you might want to chop them extra small.
Q2: What’s the difference between blender juice and a smoothie?
A: The main difference is often texture and the presence of fiber. Smoothies typically keep all the fiber and are thicker, often including ingredients like yogurt, milk, or ice cream. Blender juice, especially if strained, aims for a thinner, more juice-like consistency, and even unstrained, it’s often lighter than a traditional smoothie. Many people use the terms interchangeably when making juice with a blender.
Q3: Do I have to strain my blender juice?
A: No, you don’t have to! Straining removes the pulp, resulting in a smoother, clearer liquid similar to what you’d get from a juicer. If you don’t strain it, you’ll have a thicker drink that’s rich in fiber. Both are healthy options, it just depends on your preference for texture.
Q4: How long does homemade blender juice last?
A: Freshly made juice is best consumed immediately for maximum nutrient content and flavor. If you need to store it, pour it into an airtight container, fill it to the very top to reduce air exposure, and keep it in the refrigerator. It’s generally recommended to consume it within 24 hours. After that, the nutritional value and taste can degrade significantly.
Q5: What are the best ingredients to start with if I’m new to juicing?
A: For beginners, start with ingredients that are naturally sweet and hydrating. Good choices include apples, cucumbers, watermelon, oranges, and spinach. These are easy to blend, have pleasant flavors, and are less likely to result in a bitter or overpowering taste. Avoid starting with very strong-tasting greens like a lot of kale or bitter vegetables until you get used to the process and flavors.
Q6: Can I juice frozen fruits in my blender?
A: Yes, you can! Frozen fruits can add a wonderful frosty texture, making your juice or smoothie extra refreshing. If using frozen fruits, you might need to add a bit more liquid to help your blender process them smoothly. They can also help chill your drink without needing ice, which can sometimes dilute the flavor.
Conclusion
As you can see, making juice with a blender is a delightfully simple and accessible way to boost your daily intake of fruits and vegetables. You don’t need to be a kitchen whiz or invest in expensive equipment to enjoy fresh, homemade juice. By following these straightforward steps, choosing your favorite ingredients, and perhaps experimenting with a few beginner-friendly recipes, you can easily create delicious and nutritious drinks right in your own home. Whether you strain it for a clearer juice or enjoy it unstrained for the added fiber, blender juicing offers a flexible and rewarding path to better health and vibrant living. So grab your blender, pick out some fresh produce, and start your journey to delicious, homemade wellness today!
smartblander.com is a participant in the Amazon Services LLC Associates Program, an affiliate advertising program. As an Amazon Associate, we earn from qualifying purchases made through our links.